|
RV Electrical Tutorial
Chapter 11 - Solar Power
Solar panels are widely misunderstood. The most common question is "How many solar panels do I
need to run my RV?" But, the fact of the matter is that solar panels don't "run" anything. It's your
batteries that will provide enough amp-hrs to power your electrical devices. Solar panels don't output enough amp-hrs
to run a device but they will continue to provide that output over a fairly long time frame so in effect, solar panels
are strictly battery chargers. Your electrical devices will draw amps from your batteries. What solar panels will do
is put some amps back into those batteries. Unless you have a massive solar panel array or are a real miser with your
power consumption, you'll never be able to keep your batteries from running down. Eventually you will need to run your
generator to recharge those batteries and bring them up to a full charge. However, solar panels can add enough extra
amps to extend the timeframe between generator runs so that it occurs at a time that's more convenient for you.
|
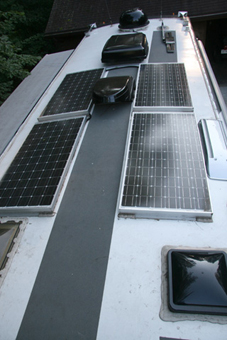
Solar Panels on a 40' Coach
|
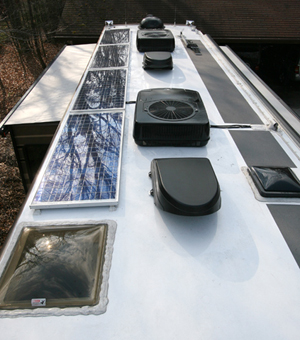
Solar Panels on a 42' Coach
|
One of the biggest limitations of solar panels is that you need enough of them to make a difference. If you
think that slapping a 50 watt panel on the roof is going to do something, then you are wasting your money. Unfortunately,
solar panels take up some room and not every RV roof has an overabundance of that. The image above on the left shows an array
of four 120 watt panels on a 40' coach. It was possible to place two on each side and still be able to walk down the center
of the roof for service access on the gray non-skid surface. The image on the right shows four panels mounted end to end.
Because of the three air conditioners and layout of the roof vent hoods it wasn't possible to place two on each side. Instead
the panels were placed longitudinally on the driver's side while the non-slip access path was placed on the passenger side. In
this particular instance the shorter coach actually had more room due to
its roomier rooftop.
|
|
|
|
|
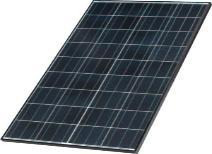
Flat Mounted Solar Panel
|
|
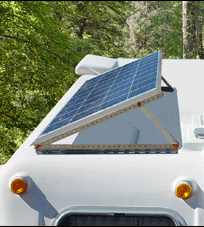
Adjustable Mount Solar Panel
|
Solar panels create the most power when they are getting direct sunlight and lots of it. They can be ordered with
flat mounts or tilt-up mounts. Tilt up mounts have the advantage of being able to be aimed at a southern exposure so that the
solar panel can receive more light throughout the day. You do have to park the RV so that the panels are facing south though and
that's not always an option. Also, if you forget to put them down and lock them before driving away you'll be buying new panels and
patching some holes in the roof where they used to be mounted to. Overall, flat panels are the safe bet for a motorhome. The benefits
of an adjustable mount just aren't that much that it pays to put up with the hassles they bring.
Solar panels vary in output but it's proportional to their size. You won't find a panel that has significantly
higher output than another in the same physical size. The biggest difference in panels is their ability to produce power under
less than optimal conditions. Unfortunately, there is no rating method or specs that will tell you this so you'll have to rely on
information from other owners or a sales rep that you can trust. Some panels will put out their maximum rated output when it's nice
and bright but fall off sharply when the light is dimmer later in the day, early in the morning, or when it's overcast. Some panels
continue to produce respectable light output under less than optimal conditions. Those are the ones you want to have because it's
all about the total amp-hrs output during the day, not just what's happening at high noon.
Sizing a Solar Panel Array:
You'll need to determine just how many amp-hrs you'll be using during a 24 hour period. Take the wattage of any 12 volt items, such as
lights, fans and blower motors, and divide by 12 to find the amps. Then multiply that number times the numbers or hours (or portion of an hour)
that each item will be run during that day. Make a note of that number. Then do the same for all of your 120 volt loads except divide those wattage
amounts by 10 instead of 12 to find out how many 12 volt amps will be needed to fed the inverter. This will allow for a 20% inverter efficiency
loss, which is more than adequate for planning purposes. Add everything up and that'll tell you how many amp-hrs you'll need to run everything
during a 24 hour period. Go look at your battery bank size. A typical four battery bank of 6 volt golf cart style batteries should
be around 440 amp-hrs in size at 12 volts. You don't want to run these batteries below approximately 50% charge level so you should limit
their use to 220 amp-hrs before recharging them. If your above calculations show that you are consuming more than that, you won't make it
through the day. Calculate the difference between what you need and what you have and that's your shortage. If you can install solar
panels to exactly supplement that amount you'll be able to make it 24 hours before recharging via the generator.
If you are an avid boondocker chances are you've figured out ways to minimize your power consumption. By doing the above
math you may find that it's possible to camp for a number of days before needing to run the generator. Solar panels can help extend that
as well. Remember that we said earlier that solar panels don't run anything. What they do is provide "free" amp-hrs of battery charging
power that can help extend your recharge times to where it is more convenient for you. One other option is to just add more batteries.
If the battery bank is large you'll be able to run it longer before it needs recharging. Extra batteries will cost you far less than solar
panels so if all you are looking for is a few extra hours between charge cycles I'd look at adding batteries. If you do decide that solar
panels are a good fit for your RV style then you still may want to add additional batteries. If you use AGM batteries rather than
flooded batteries you'll also get more runtime. This was discussed earlier in the Batteries chapter. Another way to maximize your solar
panel output is with a good charge controller.
|
|
|
|
|
|
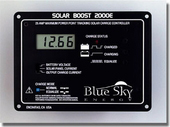
20 amp Charge Controller
|
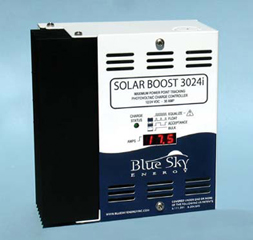
30 amp Charge Controller
|
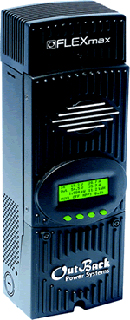
60 amp Charge Controller
|
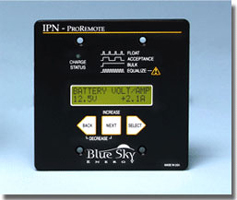
Remote Control Panel
|
Charge Controllers:
Charge controllers connect in between your solar panels and your batteries. They vary greatly in price as to what
they can all do. The simplest charge controller acts as a diode, or check valve, to prevent dark current. Without this check
valve your battery current would drain into the solar panel at night. The charge controller is a one way valve that prevents dark
current from happening so that your batteries can retain their charge. Whenever the solar panel output voltage falls below the
battery voltage the charge controller opens the circuit between the two. The second function that charge controllers do is to provide
voltage regulation. In bright sunlight a solar panel may produce 18 volts or more. The battery doesn't need or want that kind of voltage
so the charge controller regulates it to a safe level. Simple charge controllers generally have a low wattage rating, usually 15 to 20 amps,
and are mounted into a hole cut into the wall. There's nothing very fancy about them and they are inexpensive. The next step up is a charge
controller that features 3 stage charging. Just like our inverter/chargers and converters there will be a bulk charge, absorption charge, and
a float charge. These can be wall mounted or larger units located in a basement compartment. They could be as low as 20 amp or much higher.
The larger sizes, such as 30 and 50 amp usually offer an optional remote control panel that can be mounted inside the RV to monitor operation.
The real benefit is in getting a charge controller with MPPT (Maximum Power Point Tracking) technology.
MPPT technology makes a huge difference in solar panel output and it really doesn't pay to go with solar without an MPPT
controller. Remember our earlier chapter about amps, volts, and watts? Wattage is true power. Amps times volts equals watts. Solar panels
have a fairly high maximum output voltage, which drops as the light intensity fades. A 120 watt panel that's outputting 16 volts will give
you 7.5 amps of current. Your battery doesn't really care what voltage is coming in. As long as the incoming voltage is higher than the
battery voltage it'll take a charge. All it really wants is to see some amps. If we were to modify that 120 watts of power and drop the
voltage down to 12 volts we would have 10 amps of battery charging current. A simple non-MPPT controller merely clips off the excessive
voltage, wasting valuable amps in the process. But, an MPPT Controller will trade volts for amps and you'll get some free current that
you wouldn't otherwise have gotten. On the average an MPPT controller will give you 30% more charging power over a non-MPPT controller.
That's like getting a free extra solar panel in the bargain.
One other feature is voltage transformation. solar panels can be connected in series or parallel. If they are in arranged
in parallel the voltage remains the same but the amperage is multiplied by the number of panels. For instance, a 120 watt panel should
theoretically put out 10 amps each at 12 volts. A bank of four of the connected in parallel would yield 40 amps at 12 volts, which is
equivalent to 480 watts. If these panels were connected in series they would produce 10 amps at 48 volts, which is also 480 watts. The
problem is that our batteries are 12 volts, not 48 volts. But if we had a charge controller that was capable of taking a higher voltage
input and transforming it to a lower voltage output it would work. As of this date the only charge controller that I know of that will
do that is the Outback FLEXmax MPPT Charge Controller. It's available in 60 amp or 80 amp versions and can take an input level as high
as 60 volts and output it as 12 volts. The benefits to this are several.
First of all, wire gauge is relative to how many amps it will carry. As we saw earlier in our wire gauge charts, 40 amps
requires a larger #8 wire while 10 amps can get by with a much smaller #16 wire. This can make it much easier, and less expensive, to
install. Secondly, when the sun begins to set low on the horizon the lighting level is diminished. A 12 volt array may only be capable
of 10 volts at that time so you won't be getting any more power from those solar panels. But, if it was a 48 volt array you would
still have 40 volts left over for the charge controller to convert to 12 volts and feed the battery bank. This will give you even
more amp-hrs per day. The Outback isn't the cheapest controller available but it appears to be the best at maximizing your solar panel
array's output.
In the next chapter we'll talk about energy management with limited power supplies.
Index
|
