|
RV Electrical Tutorial

Chapter 4 - Transfer Switches
Sometimes the 120 volt devices in your motorhome need to be powered when you are not plugged into a campground
pedestal, which is frequently referred to as shore power. When shore power is not available the on-board generator set can be used to
power these devices. Generators can be used in a number of situations. When camping in remote areas where access to power is not
available the generator can be used to provide AC power. A number of systems, such as lighting, water pump, etc are powered by your 12 volt
battery power so the generator is not needed to power them. However, there will come a time when these batteries need to be recharged.
The on-board generator can be used to power the coach's battery charging system whenever shore power is not available. A third
use for generators is to power the rooftop air conditioners to make for a more comfortable environment when driving in hot
weather.
Your RV's 120 volt electrical system is fed through a central distribution panel where all of the circuit breakers
are located. In order to power this panel from two different power sources we can chose one of two methods. The first is the
simplest and least costly and was commonly used in lower cost travel trailers. That method entails hard wiring a power cord to the
breaker panel's inputs. When not plugged into shore power this cord can be plugged into a generator set outlet to provide power to
the RV's electrical systems. While this method is inexpensive, it's not very handy. The second method is to install an automatic
transfer switch.

Automatic Transfer Switch
An automatic transfer switch is basically a three way switch that switches between two inputs and connects them to
a single common output. A transfer switch is located prior to the breaker panel. It intercepts the shore power cord feed to the
breaker panel. The output of the transfer switch goes to the breaker panel's inputs. The shore power cord is connected to one of
the inputs while the generator is hard wired to the transfer switch's second input. Transfer switches will connect one input to the
switch's output. Whenever the transfer switch is told to switch, it will drop that input and connect to the second input. Manual
transfer switches need to be manually switched by moving the switch lever on the box. Automatic transfer switches do this automatically
and are logic controlled to switch under a given set of conditions.
The transfer switches used in RVs are generator priority switches. This means that the switch will connect to
shore power when under normal use or even when there is no power present. As soon as the transfer switch detects the presence of 120
volt power on the generator input lines it will switch over to the generator's inputs and drop the connection to shore power. Transfer
switches are designed so that only one input can be connected at a time in order to prevent any backfeeding of electrical power back
down the other input line, which would be a hazardous condition. In addition, RV transfer switches generally have a built-in delay so
that the generator can come up to speed and warm up a bit for actually switching the load. This prevents stalling or stumbling that
could cause the generator to die if the air conditioners or other heavy loads while the engine was still cold and not producing full
power.
Transfer switches aren't very high maintenance items but there are still a few tips to remember to help keep them
performing well and living long. Firstly, the transfer switch consists of a pair of relays or solenoids that make pass the power
through a set of contacts. When these contacts open or close there can be a brief arc while the circuit is broken, especially if the
current load is high such as when running multiple air conditioners. Sometimes this can't be helped but other times it can. Ideally,
you would switch off your thermostat when starting or stopping your generator in order to minimize the current load which will reduce
arc when the contacts make or break the circuit. Sometimes this can't be helped though and eventually your contacts will get pitted and
do one of two things. Either they'll fail to conduct electricity or they'll weld themselves tight and won't open. When you find that
your electrical devices work on one input, but not the other, it's time to look at the transfer switch. Dirty contacts can usually be
cleaned up with some fine 400 grit sandpaper. Many times that will restore them to a functional state. If they are welded tight you
may have to pop them apart with a screwdriver before sanding them. If they are badly pitted you may have to replace the transfer
switch. Sometimes transfer switches can stick and a quick whack with your hand may just unstick it. That's probably the first
thing to do to get you going temporarily. But, that is an indication that you have a problem so don't ignore it or the next time
a good whack might not get you going again.
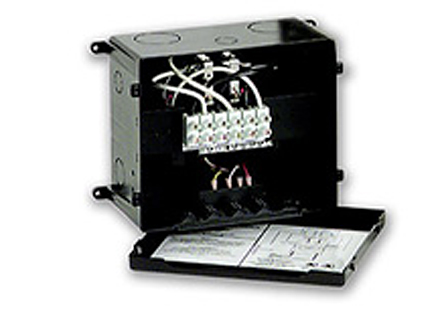
The wires that connect to the transfer switch are held in place by screws on a buss bar. These lugs can loosen up
over time so it's a good idea to check these screws to make sure they haven't worked loose. A good time to do this is during an
annual service and inspection so I'd recommend you add this to your service schedule. Always be sure to disconnect the shore power
cord and make sure that the generator cannot start before performing any work on the transfer switch. The presence of 120 volt
current can be fatal if you accidentally touch the wrong parts. There are three poles on most transfer switches. You'll find the
white neutral wire as well as a blasck L1 wire and red L2 wire. The ground wire will be green or bare copper. Both the ground and
neutral wires are connected to the buss bar lugs but are not switched via the contactors but both the L1 and L2 will be.
In the next section we'll talk about generators and how they interact with your RV.
Index
|


