2020 Jeep Gladiator Rubicon Review
Reviewing the Gladiator and Flat Towing Mods
Article Date: November, 2019
Article and Photography by Mark Quasius
I've always loved Jeeps. I mean, what's not to love. It's a well balanced vehicle that works great as a daily
driver, handles off-road travel like no other and is easy to tow behind a motorhome. The latest Jeep Wranglers are massively different than
the Jeeps that my dad drove during World War II and continual improvement has made them much more civilized and comfortable for the typical
owner, which is evident by the popularity surge in recent years. If you go to any campground you'll see a number of four door Wranglers
parked behind motorhomes. They are so easy to tow and can take their occupants anywhere when touring. While the vast majority of Wranglers
are mall cruisers, and never get off-road, Jeep's ability to get traction down to the ground is legendary and without peer. We've owned Jeeps
of various flavors over the years and our garage recently housed a pair of four door Wrangler Rubicons, which we towed behind our motorhome
and used to travel to mountain tops and ghost towns via old mining trails out west. However, it now came a time in out life where I needed a
truck for some hauling duties. As much as I enjoy our Chevy trucks at work, I really didn't want to give up my Jeep capability nor did I want
to add a third vehicle to our stable.
And then Jeep announced the Gladiator (pause here for large fanfare and fireworks).
At first look the Gladiator looked to be the best of both worlds, combining the lineage of a Wrangler with the capabilities
of a truck. The 5' bed would handle the majority of my needs, expect for maybe a 4x8 sheet of plywood, and would have adequate towing capacity as
well. It wasn't that much longer than a four door Wrangler so maneuverability wouldn't suffer, it had the latest creature comforts and off course
it had the legs of a Wrangler so off-road use wouldn't be a concern. Naturally, when the press releases the first photos and initial specs it takes
a while before they actually show up at dealerships so the general public can see them. I talked to my local dealership and had my salesman call me
as soon they got some in. That took a few months and as it happened, we were gone traveling in Texas when I got the call so I told him that I would
stop in as soon as we got back to Wisconsin in a few weeks.
The Test Drive
The dealership received two Gladiators as their initial allotment, a Rubicon and Sport. As an off-roader I wanted the
Rubicon but they sold it the first week to an employee at the Chevrolet dealership next door. I guess Chevy guys see a good thing when they see it.
So all they had available for a demo was the Sport. Leann and I took it for a test drive and thoroughly looked the vehicle over from top to bottom.
We were impressed. It was a bit lighter in the back end when empty compared to the Wrangler so the rear tires would slip a bit when on wet pavement if
you stomped on the throttle hard or pulled a few extra G's on a tight curve (naturally I had to test that) but it gave us a great ride and handled
well. The 3.6 liter DOHC V6 was the same as in our 2012 Wrangler JK's and we were happy with that engine but the new 8 speed automatic transmission
made a world of difference and made it feel like we had more horsepower. We knew the engines were the same power-wise but the zero to 60 times were
shorter in the Gladiator, even though it was heavier than the Wrangler and it was all due to the 8 speed transmission that put the engine at the best
RPM for power.
After the test drive we sat down with our salesman and went through all of the options. I'm a detail oriented guy and can be a bit
picky so we spent some time determining just what I wanted and didn't want. I plan on taking the Gladiator off-road and towing behind the motorhome so
that was kept in mind when spec'ing out the vehicle. I wanted a Rubicon for its off-road upgrades over the Sport. I've always leaned towards black
vehicles in the past and the red accents on the Rubicon went well with black so we ordered it in black. The cloth seats in our test drive Sport were
comfortable and I had leather seats in our Grand Cherokee in the past and found they got hot in summer and cold in winter so we went with cloth seats. I
also ordered the forward looking trail cam, the cold weather package (obviously) and the factory bed liner, trail rack cargo tie-down system and tonneau
cover. I went with painted fender flares this time to prevent the milky fade number that the sun did on our Wrangler flares. I got the hardtop, knowing
that I'll add Bestop's partial Sunrider later on, and the hardtop insulation package. Lastly I went with the official Jeep slush mats because for once
the factory mats were really good. We then placed the order and began the long wait until delivery. Once it arrived we completed the paperwork, wrote a
large check and drove away with a big smile.
|
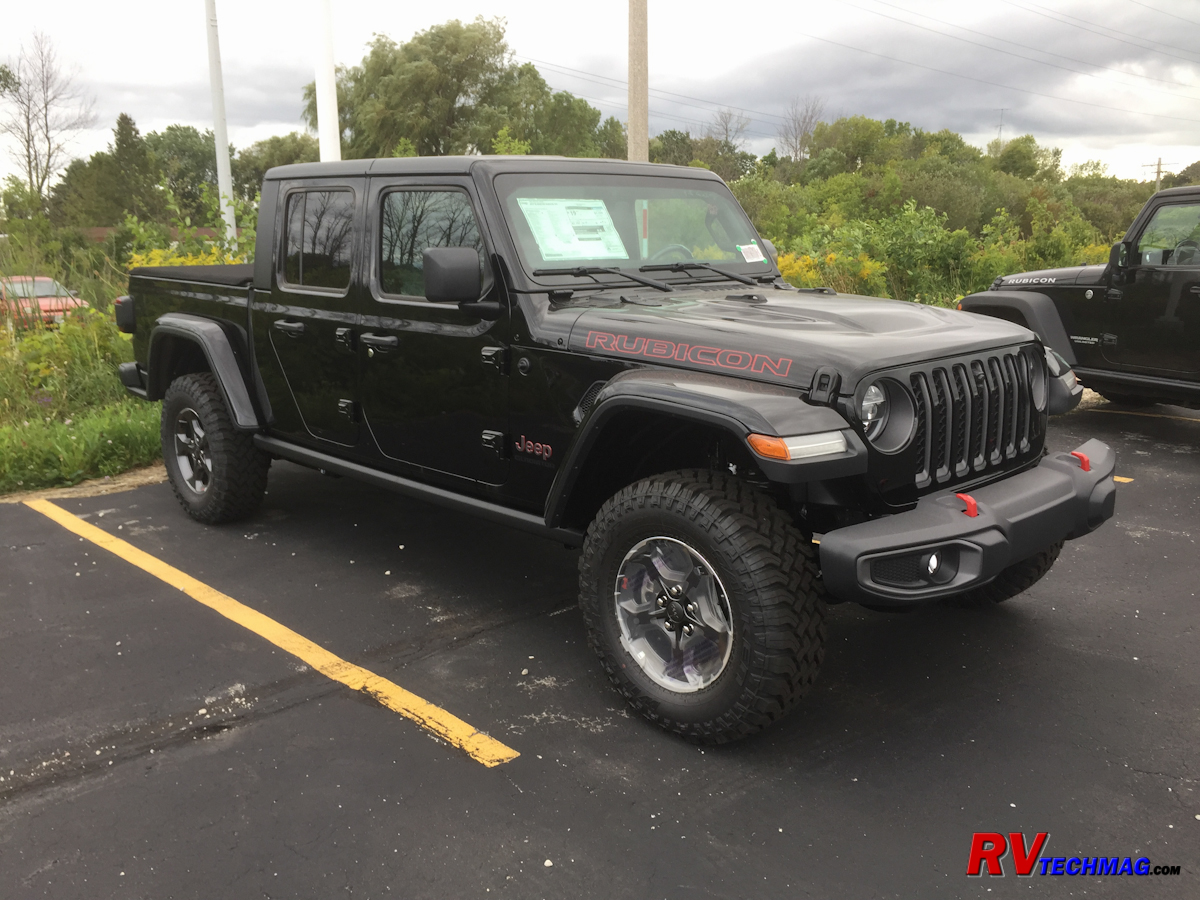
The Gladiator at the dealership right after it was unloaded.
|
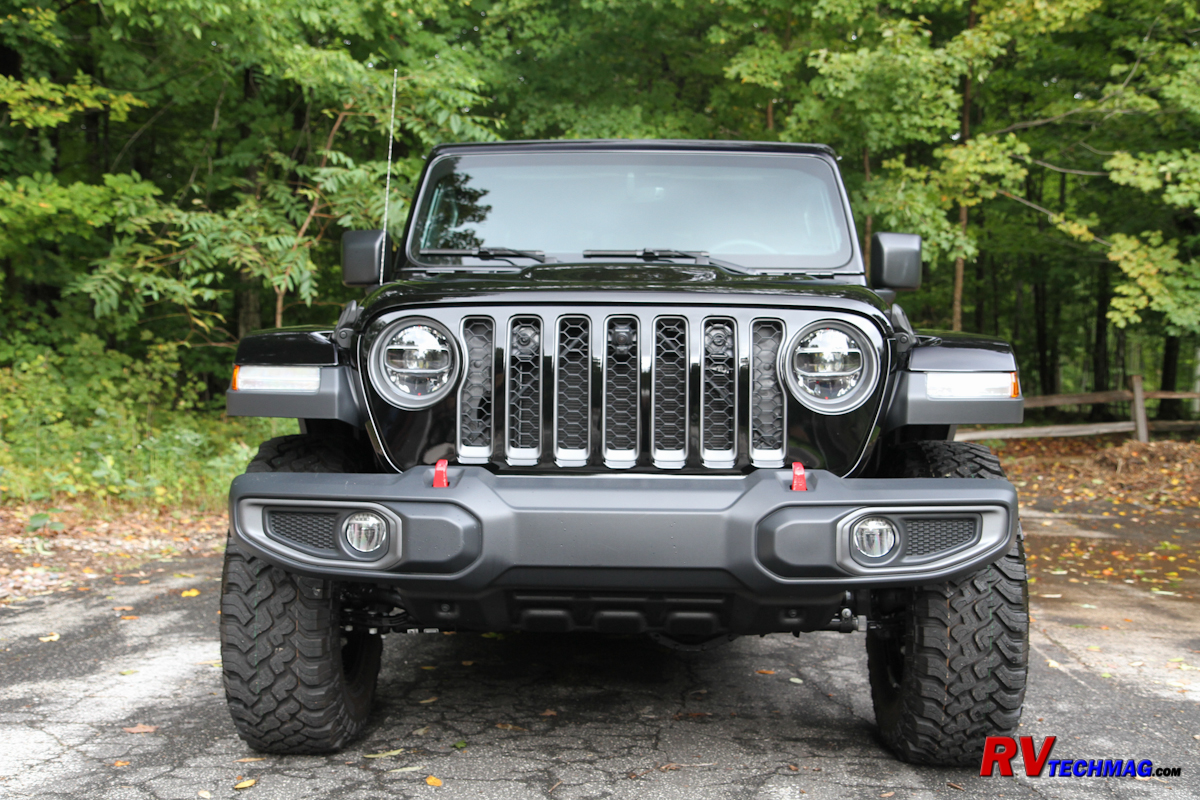
Parked out front as soon as I got it home.
|
Once I started to drive my new Rubicon I quickly realized it was not what I was expecting. It was Better! I knew that the Rubicon
was a step up (actually a couple of steps) from the Sport but I figured that it was going to be better off-road but the same during daily driving. Boy,
was I pleasantly surprised. The Rubicon was a bit heavier than the Sport, although not drastically, and it had knobbier off-road tires but it drove to
whole new level. Gone was the wheel spin I experienced in the Sport. Part of that was the tires, which was a big question mark in my mind prior to taking
delivery. I was a big fan of Goodyear Duratracs and had 33" Duratracs on my Wranglers and considered them to be the best all-around tire. They performed better
on wet or icy roads than my BF Goodrich OEM or the Goodyear Kevlar MTR tires yet still gave a good ride, weren't excessively noisy and delivered reasonable
longevity. The only downside was that they were on the pricey side. The Gladiator Rubicon came with Falken Wildpeak tires. I had never heard of them before
so I wasn't sure how good or bad they would be. I kept in the back of my mind that I may want to swap them out for Duratrac's once I get the vehicle if they
weren't that great. Fortunately, that wasn't necessary. The Falken tires were very similar to the Duratracs. From what I gather the Duratracs are a bit
softer and may perform better on ice but it appears that difference is going to be minimal at best. Plus the harder compound might mean the Falken's last
longer. Maybe, maybe not, but either way they are a good tire, close substitute for my Duratracs and wont' cost as much to replace.
|
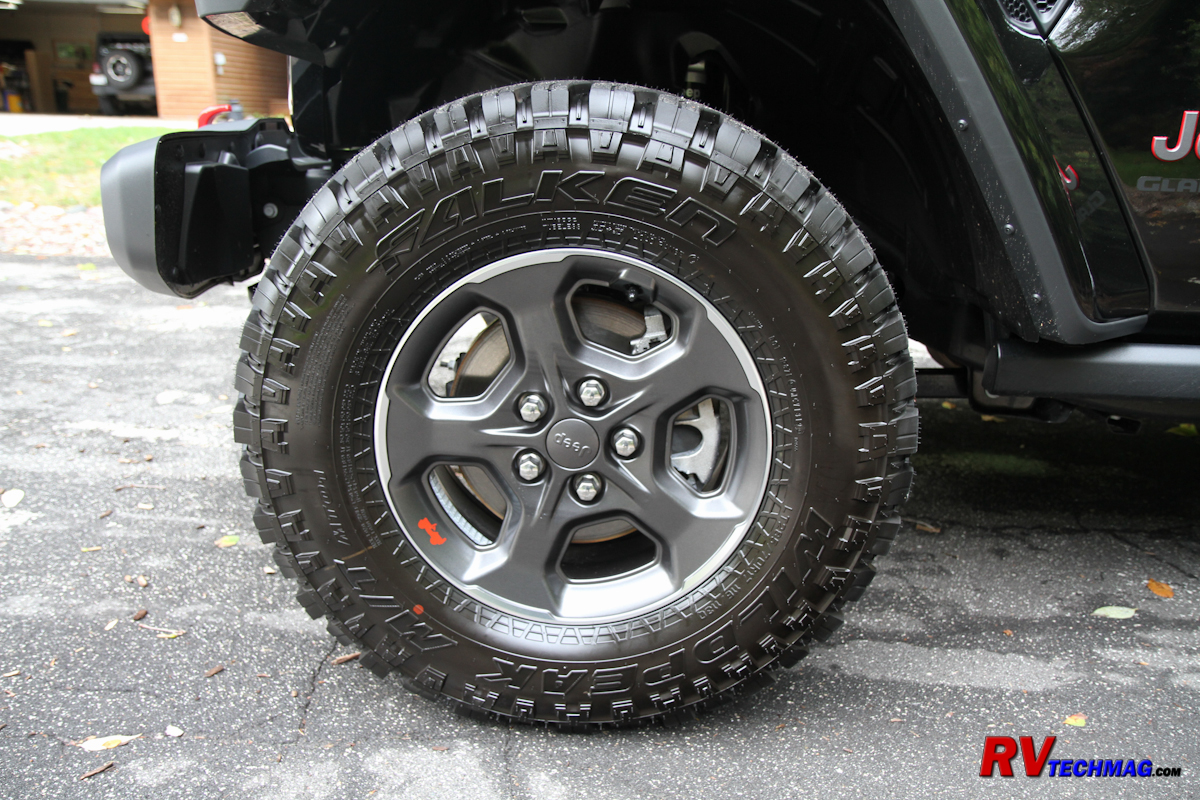
The Falken Wildpeak tires performed well on the Rubicon.
|
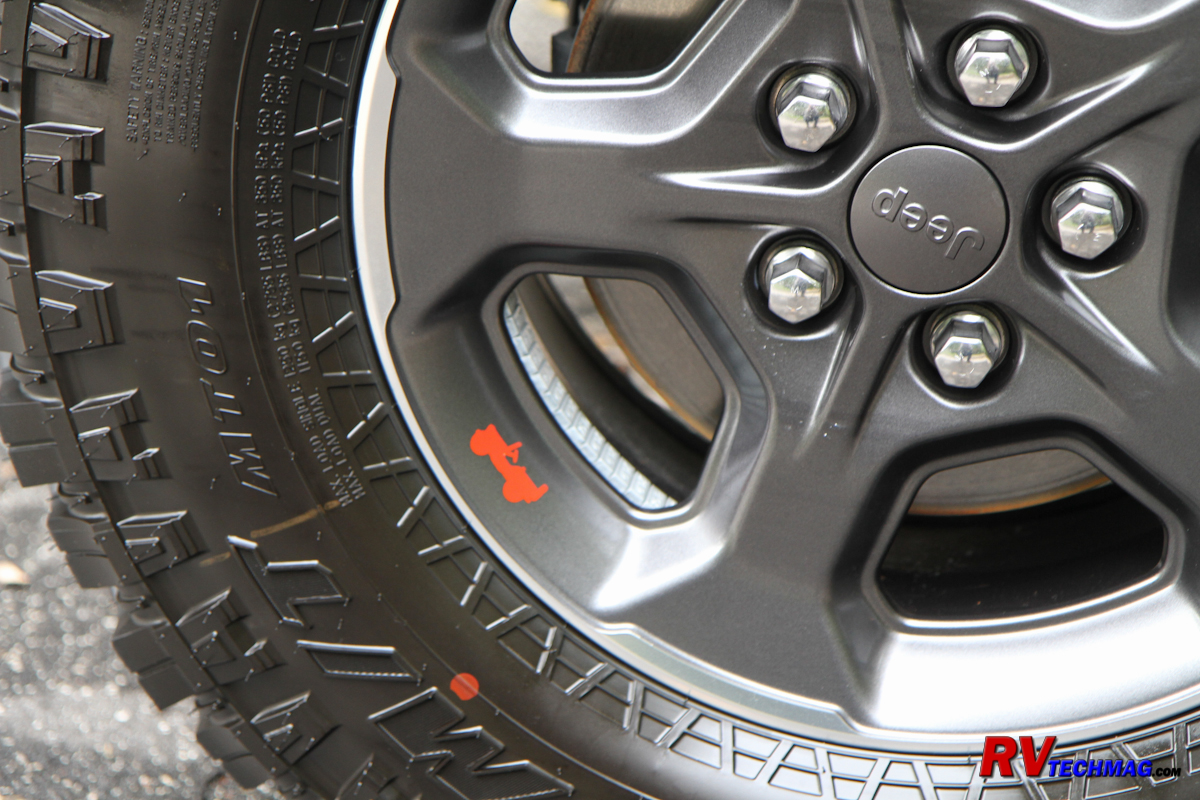
Red accent Jeep images on each wheel rim.
|
But the improved ride, handling and traction aren't just due to the tires. The Rubicon has Fox Racing shocks and some suspension
upgrades over the Sport that just make it handle that much better. The Rubicon seats were also an improvement and offered more than just a bit of red stitching
and Rubicon logos. The seat's suspension and side bolstering made for a more comfortable ride. The heated seats were fortunately equipped with three position
low-medium-high settings because the high setting would roast your butt. I found it great to start on high to get the heat going and then tame it down. That
didn't take long either because the heat came on fast, just like it did on the heated wheel. The heated steering wheel was nice because driving with thick
winter gloves on keeps your hands warm but you just don't have a good connection with the vehicle and removing the gloves in winter gets your hands pretty
cold and a bit on the numb side so the heated steering wheel is a plus for me.
Electronics Galore
The new electronics in the JT Gladiator were similar to the what the new 2019 JL Wrangler has, which is light years ahead of
what we have in our 2012 JK Wranglers. The radio was now used an 8.4" Touch Screen display that controlled the entertainment functions as well as GPS
navigation. But the screen had many other uses as well. One screen controlled your Smart Phone, which could be connected via a wireless Blue tooth
connection to allow hands-free use. Your Smart Phone could also be connected via a USB cable in the console or dash that allows you to use Apple
Car Play or Android Auto to operate various phone apps such as Goggle Maps, Waze or whatever from your touch screen display. Another screen display the
interior heating and cooling functions. Fan speeds and temperature settings can all be adjusted by simply tapping the screen or dragging your finger
across a slider. Dual zones are used so your passenger doesn't have to have the same temperature settings as the driver. You simply set the temperature
like a thermostat and let it do its thing. Screen icons also control the heated seats and heated steering wheel, which is nice feature in Wisconsin
winters. There are also switches beneath the screen that allow you to control these systems if you prefer that method. Lastly, if you really want to
feel like you're on the bridge of the starship Enterprise you can press the Uconnect button on the wheel and speak to the system saying things like
"Set passenger temperature to 72" or "Play song La Grange" and the computer will reply and perform that action. Pretty cool stuff.
|
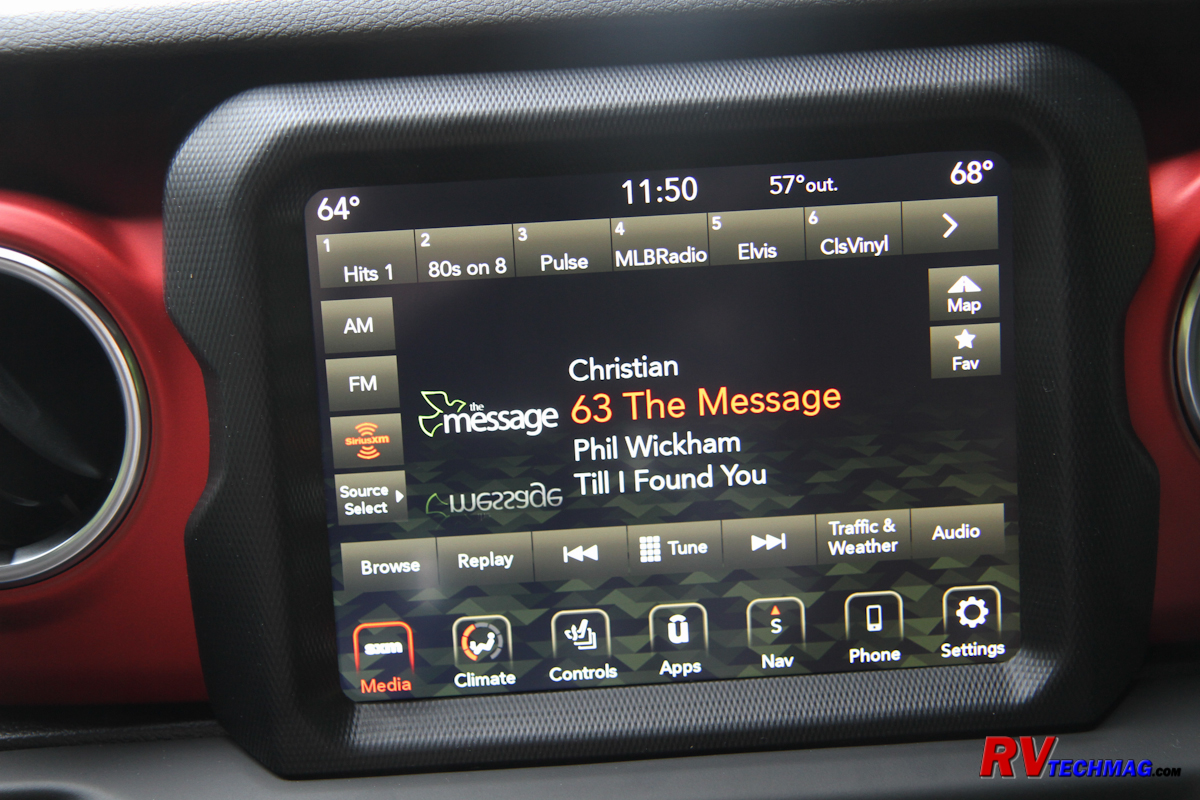
The entertainment system's media screen.
|
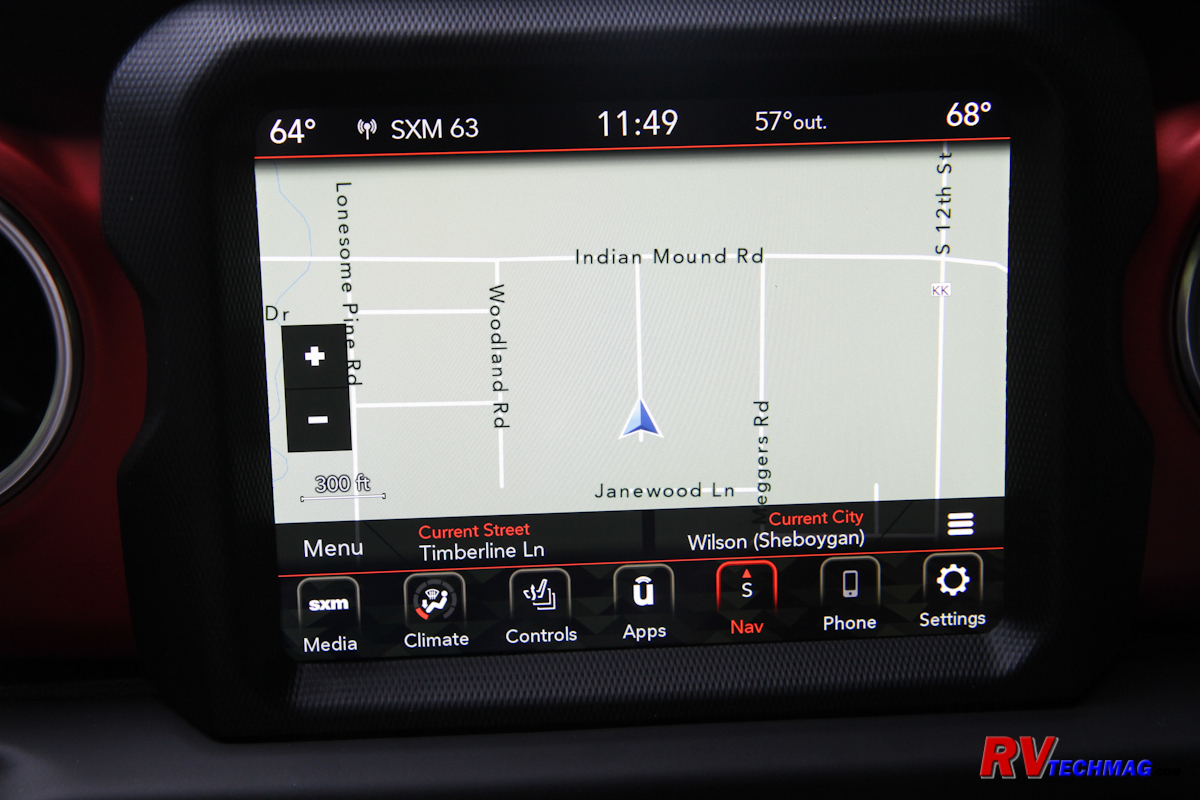
GPS map display.
|
|
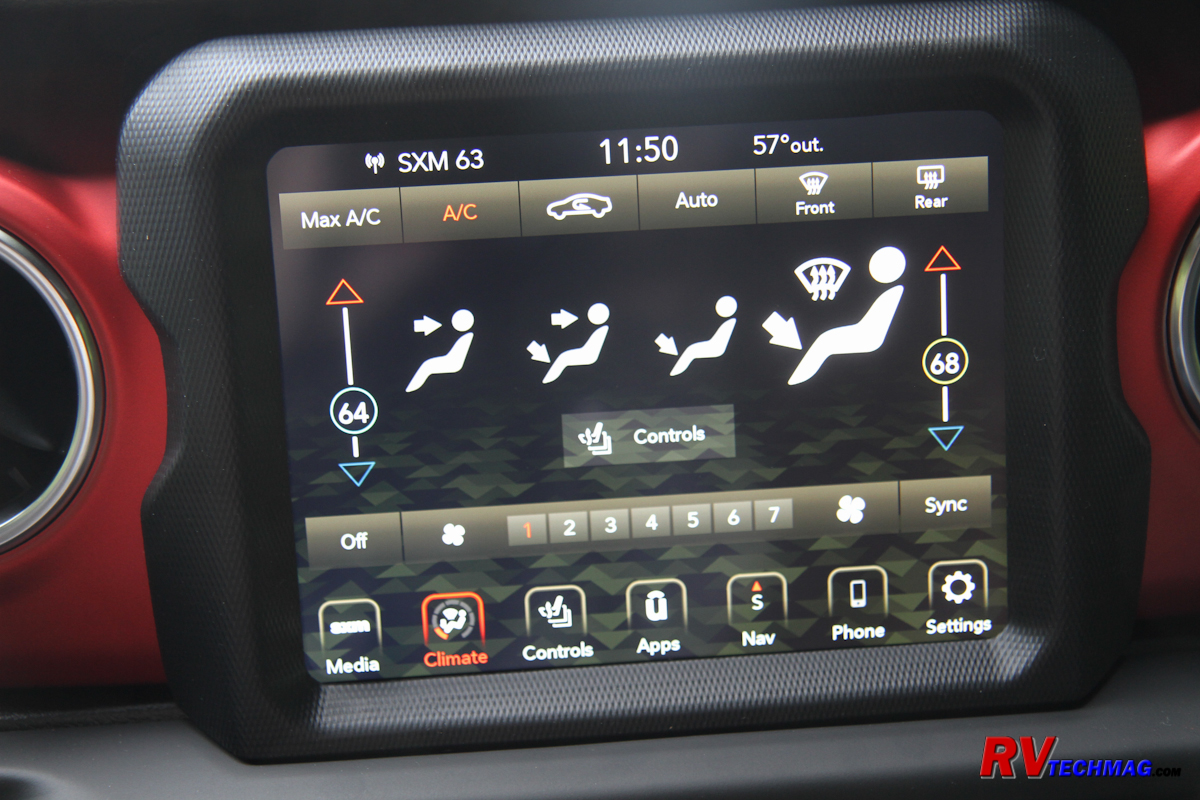
Climate control screen.
|
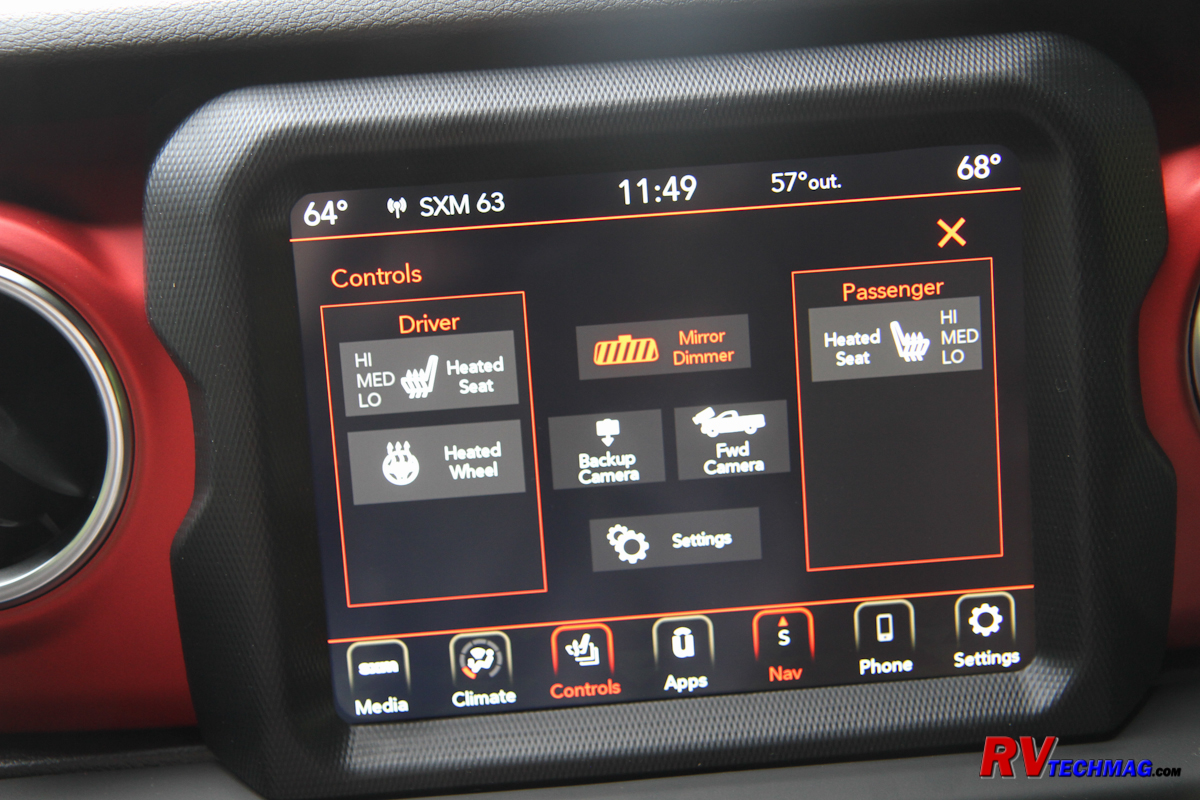
Controls for heated seats, steering wheel, cameras.
|
The Gladiator also has the Uconnect system that you can use to get help by pressing a button. This was demonstrated when we placed
a call for assistance during delivery when I had a question that could not be answered. Within a minute a helpful voice on the other end of the line answered
our question. In addition to the generic assistance button, a second button places an emergency call for help that Jeep will relay to a 911 dispatcher. This
is part of the Sirius advanced system package that also brings you weather information, warnings and radar as well as other advanced features available
through Sirius. One feature is the Uconnect app that you can download to your smart phone. This app can locate your vehicle from any where in the world
and display it graphically on a map your phone. It can also display your tire pressures, fuel level, percent of remaining miles left until you need to change
your engine oil and any vehicle safety warnings. You can also lock or unlock your doors, sound your horn or start your vehicle from your phone from anywhere
in the world as long as you have cell service at your phone.
But Jeeps are made for off-road use so the electronics accounts for that. One screen shows the off-road screen, which can toggle
between numerous displays. One screen shows an array of analog style gauges displaying everything, including oil and transmission temperatures. Another
shows the angle of you pitch and tilt so you know when you are getting into unsafe territory. Another shows a graphic of your drivetrain, which shows
your current steering angle as well as the status of your transfer case and locking differentials (Rubicon only). Lastly, the optional front-facing
trail cam can be displayed. This camera shows a forward looking view with overlays that show you where your tires will track. This view is dynamic so
will change as you turn the wheel. This is great for off-road use when you want to avoid a rock or pick your way through a narrow area. It's also great
for parallel parking so it can be handy for mall cruisers as well. When I first got my Gladiator I had to go through a narrow bank drive-through lane.
I wasn't yet familiar with clearances on my new vehicle so I switched on the front trail cam and tracked my way right down the center of the narrow lane.
This display can toggle between the rear back-up camera and the front trail cam just by tapping the correct screen icon. By the way, if your trail cam gets
all splattered full of mud, don't worry. Just press the "Clean" button to operate the camera washer nozzle which is fed from the windshield washer
reservoir and pump.
|
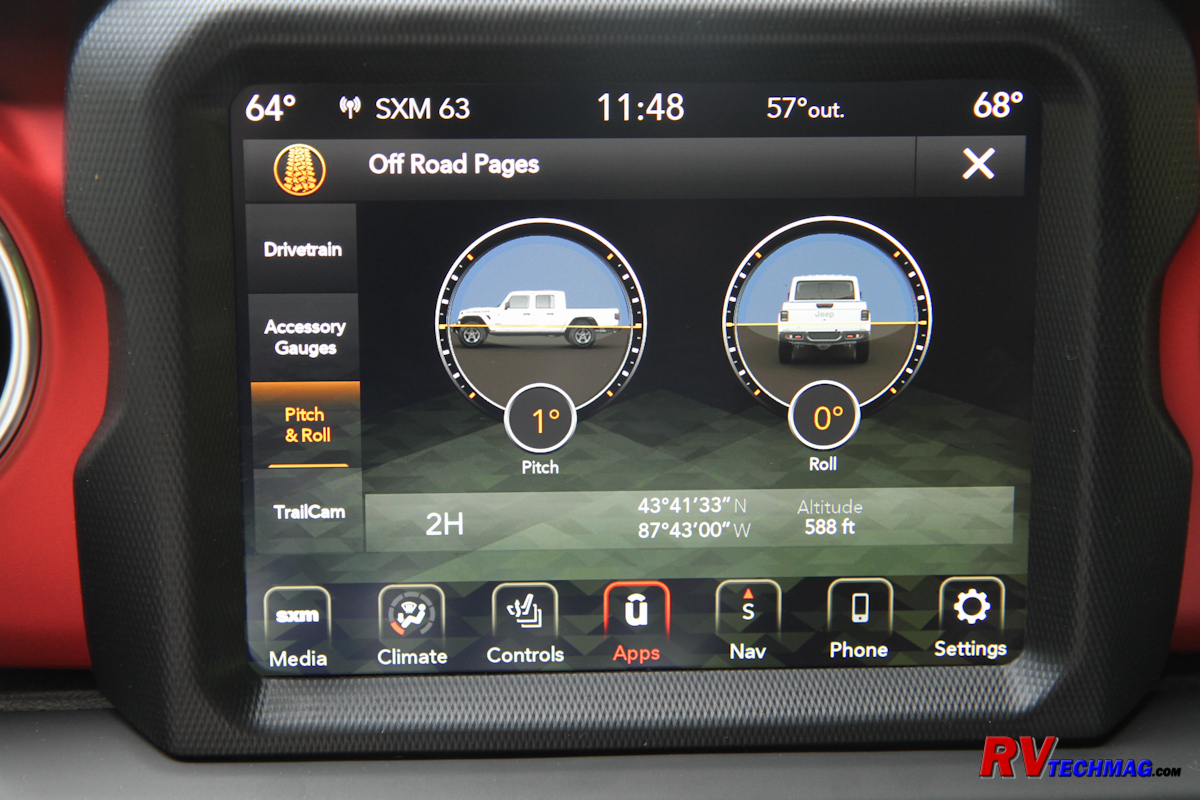
Off-road screen showing pitch and roll angles.
|
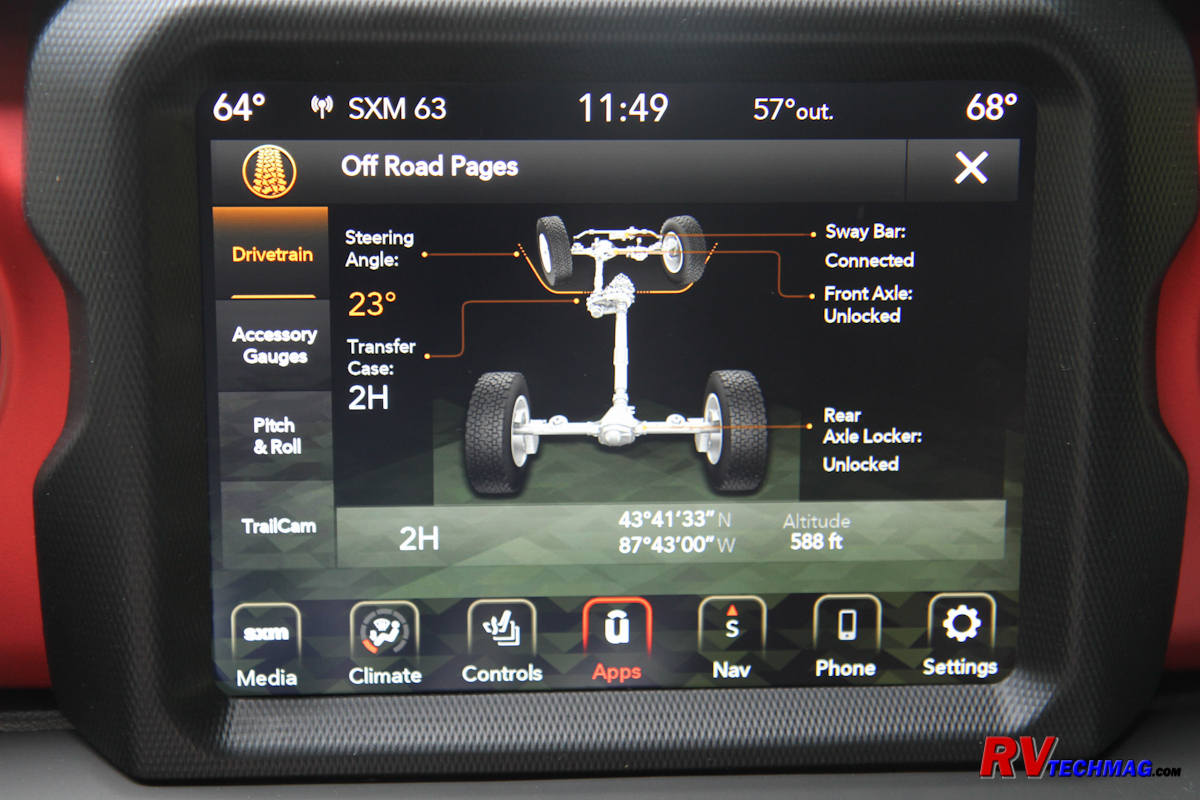
Off-road screen showing driveline status.
|
|
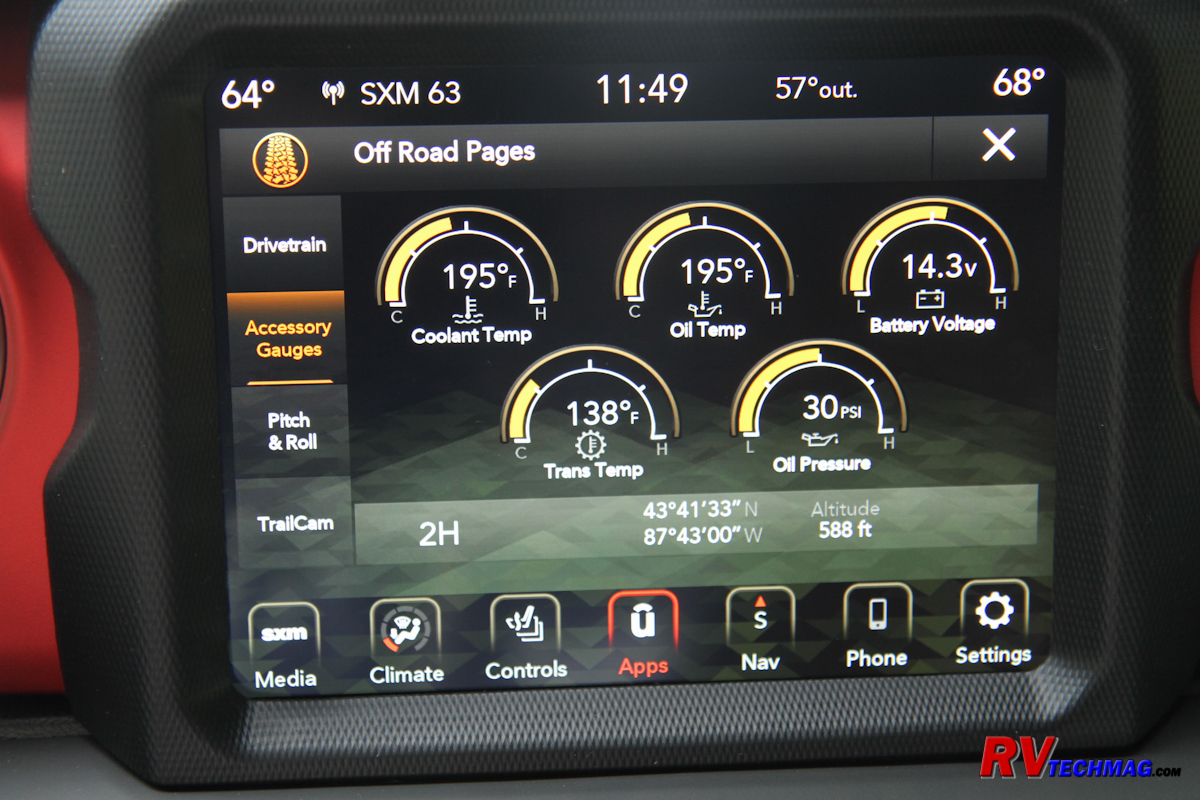
Off-road screen showing accessory gauges.
|
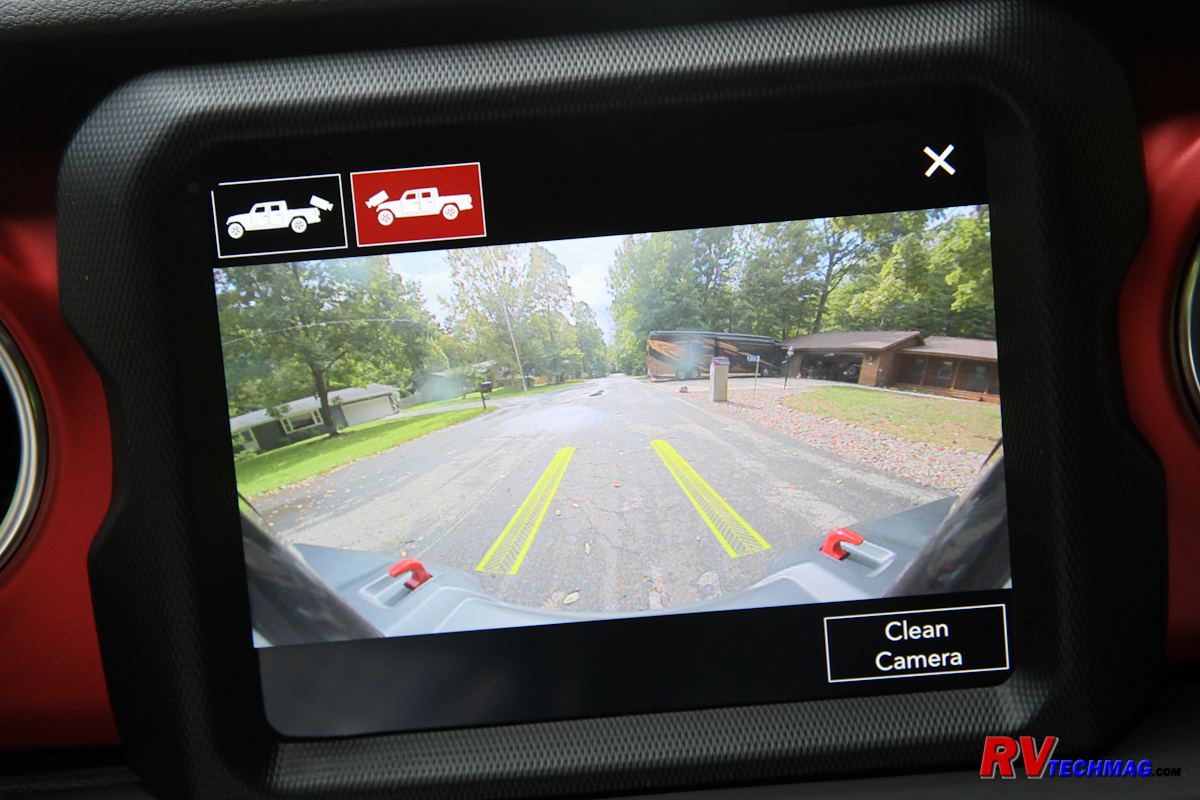
Front trail cam display.
|
|
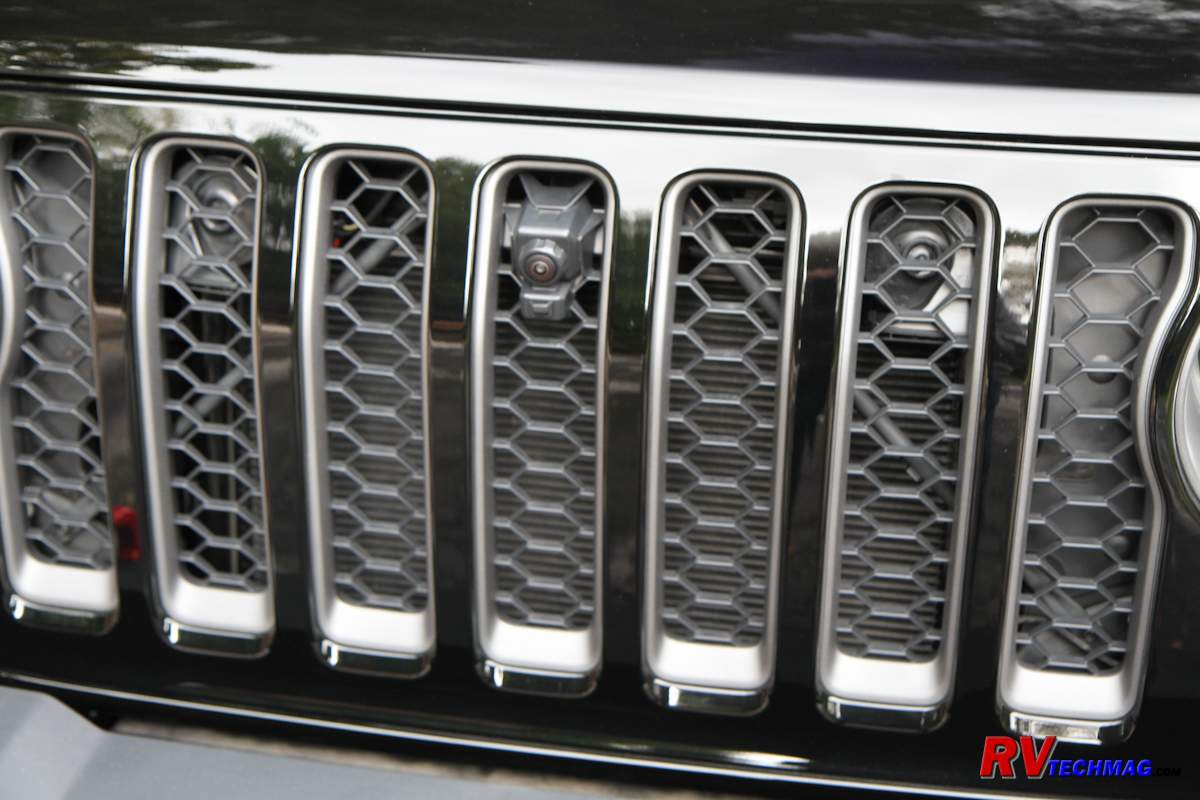
The Trail Cam is mounted in the front grill.
|
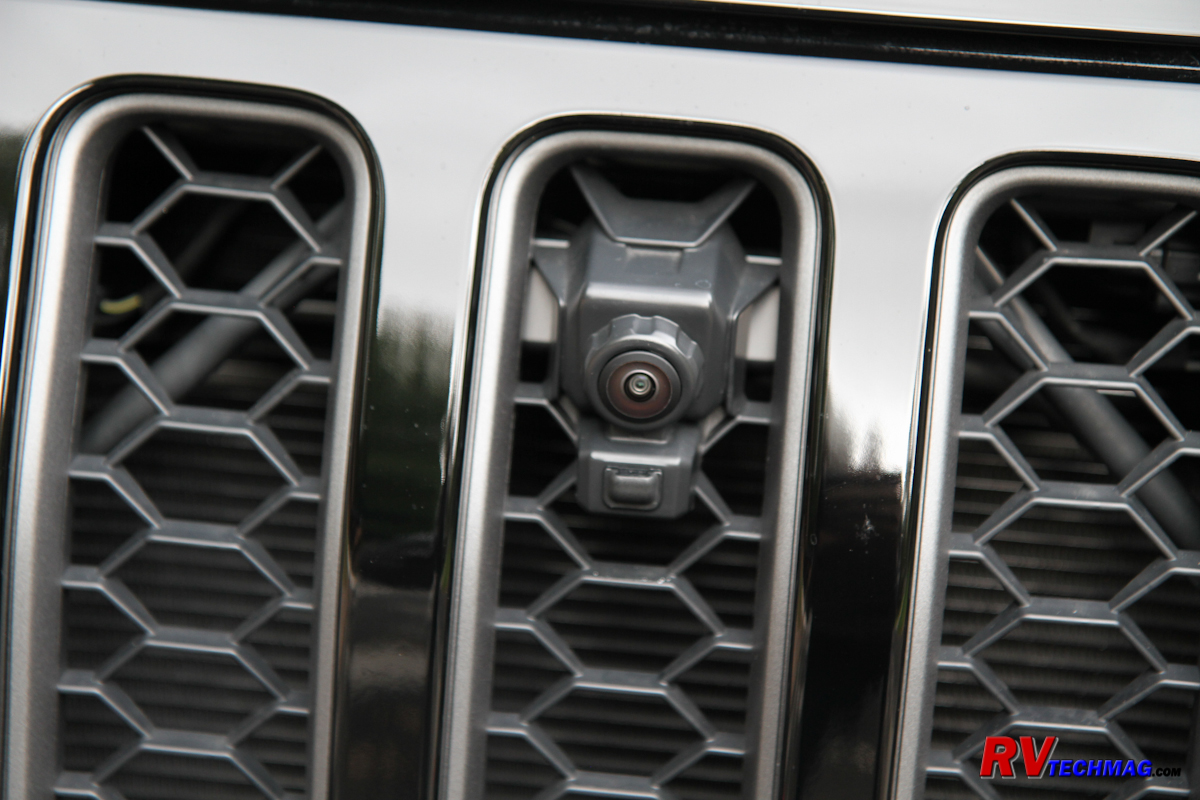
A washer nozzle is used to clean the camera.
|
The main instrument panel was also digital. Digital speedometer and tachometers were placed in round bezels to keep that traditional
look. Placed between these two instruments was a center color display that can be toggled between various screens. The steering wheel button toggles between
a large current speed display, tire pressures, trip miles and odometer, fuel economy or a number of engine and driveline gauges. All of these screens are user
customizable. Color vertical bar graphs on each side will always display your fuel level and engine temperature. A miles-to-empty reading is also displayed.
|
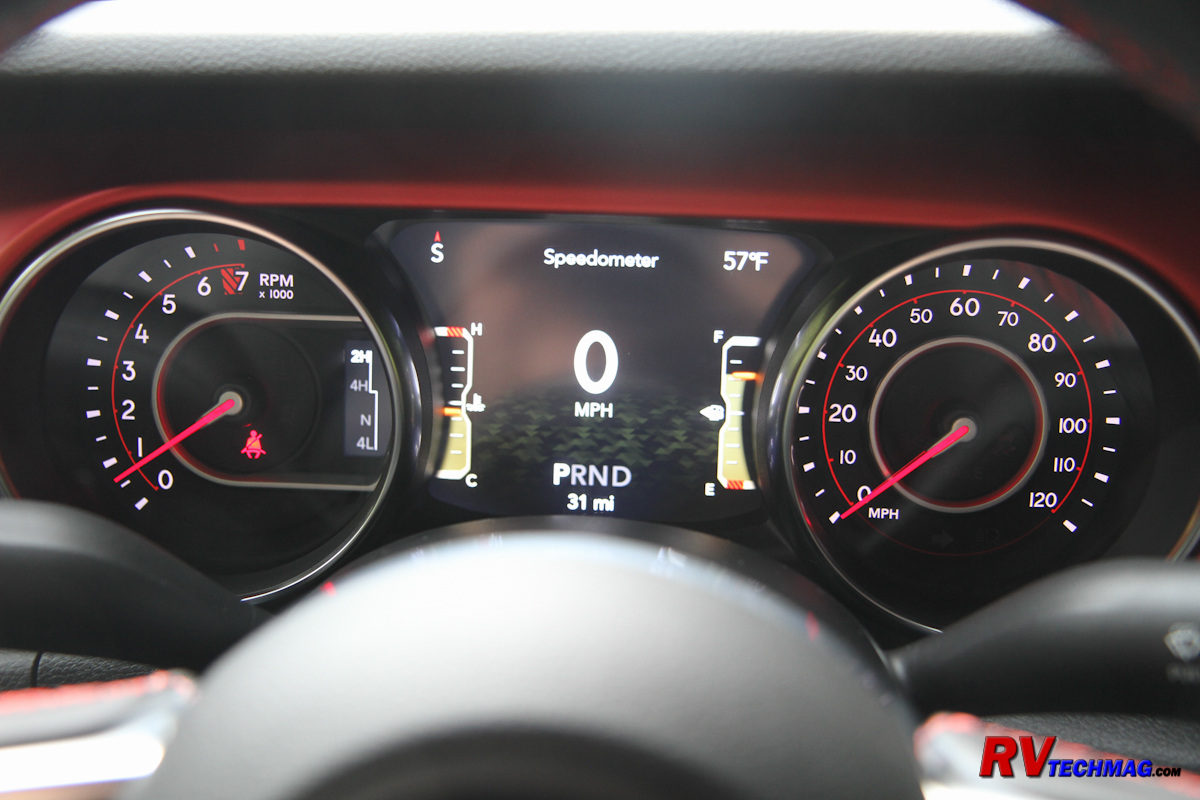
Digital instrument panel.
|
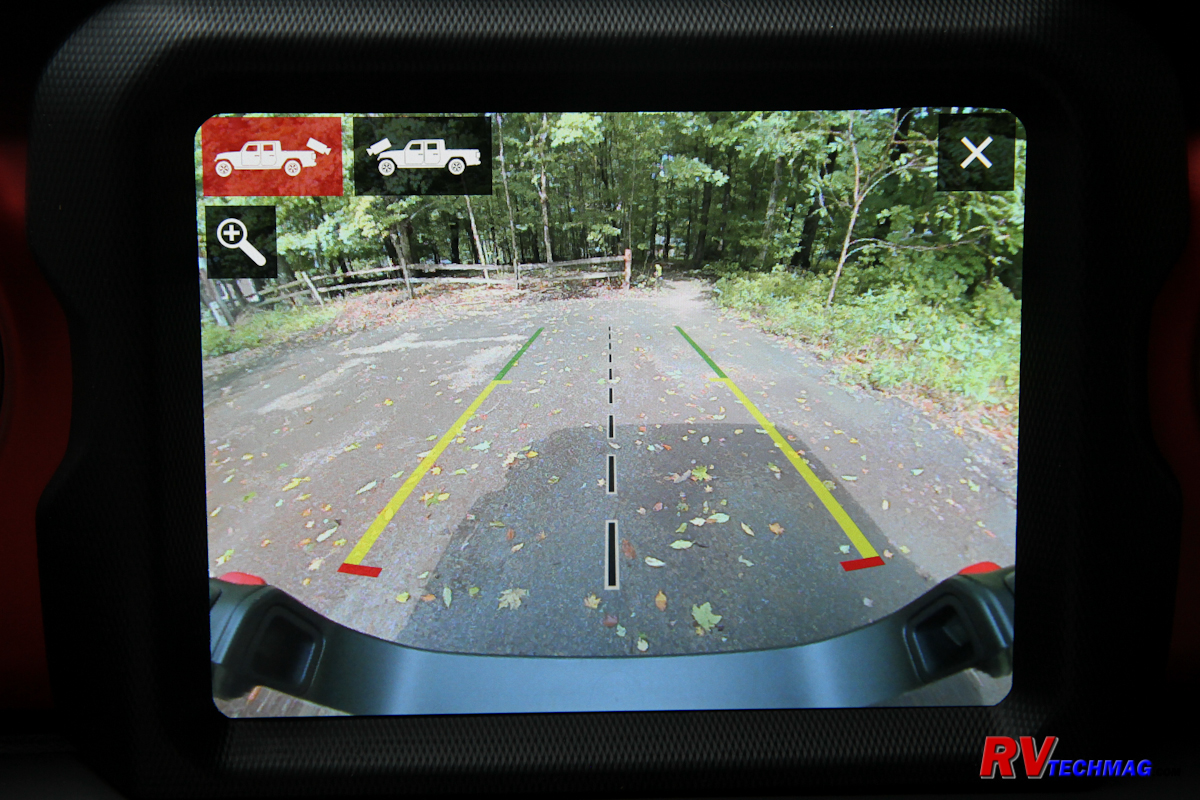
Rear camera display.
|
Interior Details
Rubicons get a few extra switches for engaging the electronic locking front and rear differentials. They also get a switch to unlock the
front anti-sway bar, which is a handy feature when wheeling in the rocks off-road. The console holds the shift lever for the 8 speed automatic as well as the
four wheel drive transfer case lever. The shifter can be bumper to the left to enter manual mode. It can then be nudged forward or backward to manually select
gears. Unlike earlier versions that selected the maximum gear the transmission would shift into, this version actually selects that gear so if you select 6th
gear, for example, it will stay in that gear as you slow down unless you bump the shifter to select another gear. However, it is smart so it will manually kick down
to 1st gear if you come to a stop to prevent stalling the engine.
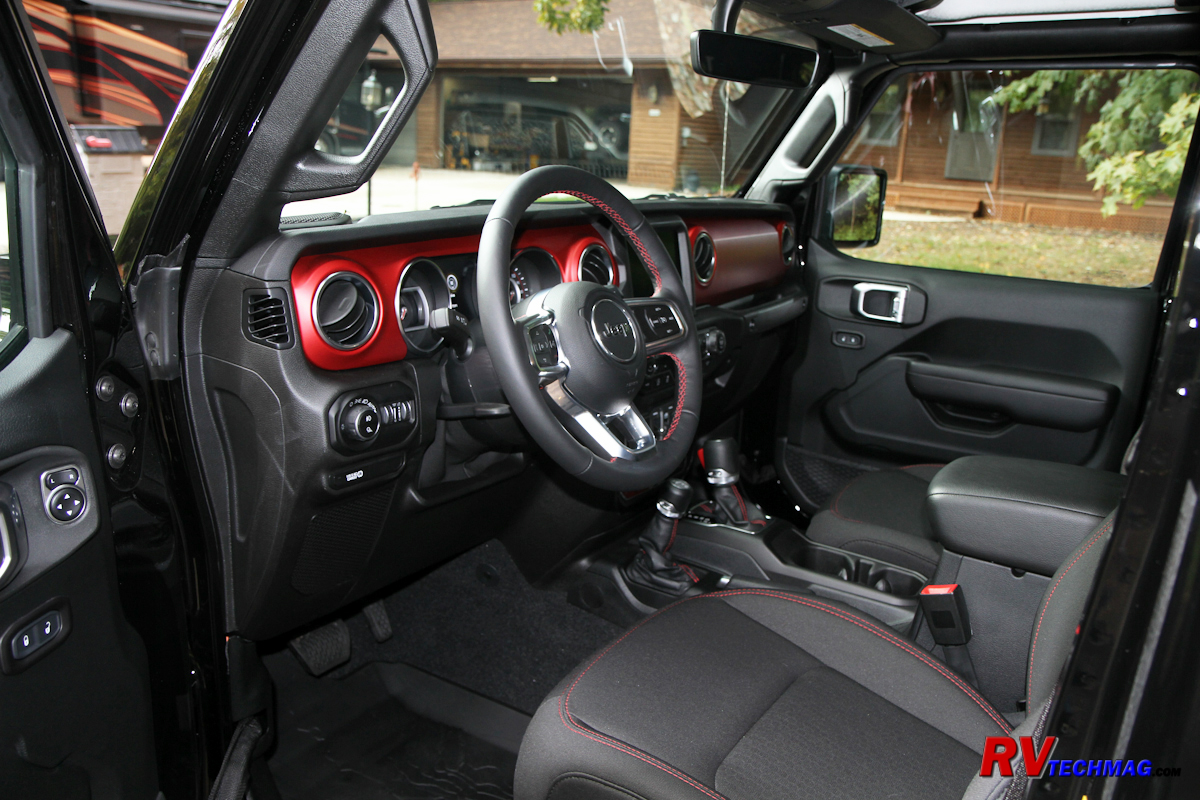
The interior features red trim on the instrument panel, steering wheel and seats.
The console also has decent storage. A rear-hinged padded lid is comfortable and at just the right height to use as an armrest. The lids
opens in two parts. The first paddle switch just opens the very top to expose a shallow tray capable of holding coins, key fobs or other short items. The second
paddle opens the deep main portion, which also is equipped with an illuminated USB port connected to the Uconnect entertainment center. You can connect your smart
phone and control it via the in-dash screen or you can plug in a jump drive to play music files through the system. There are a total of three USB ports connected
in this manner. In addition to the hidden console port there is also one in the center of the dash beneath the radio and a third at the rear of the console that
can be accessed by back seat passengers.
The rear seating area is also quite comfortable and rear seat legroom has been improved in the Gladiator. The seat backs fold forward to
reveal storage pockets in the back wall as well as car seat anchors. The seat belt buckles are mounted so that you don't have to fish around to find them and the
seat cushions flip up to exposed a full width lockable storage area. In our Wrangler stuff would come sliding out from beneath the seat when driving. This
compartment prevents that from happening, is lockable and holds much more cargo. The rear of the console also holds a pair of A/C ducts to help keep the rear
occupants comfortable in hot weather. In the past we had to divert out front dash vent to shoot over the console to keep our grandkids cool when wheeling in Moab
in summer. That will no longer be necessary. The rear window in the hardtop does have a rear window defroster but it is a manual sliding window. I wish that it
was available as a power window so that I could control it from the dash when driving.
|

Console and center controls panel.
|
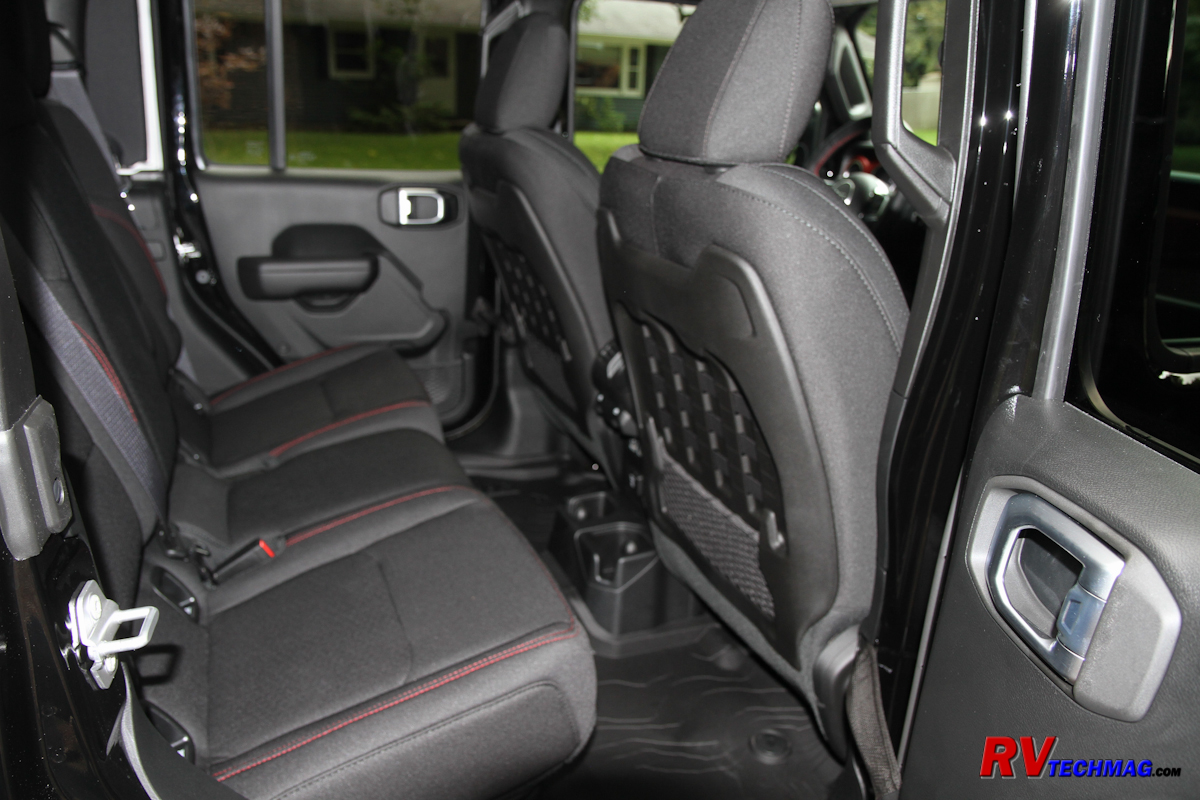
Rear seat area has plenty of legroom.
|
Exterior Details
The exterior of the Gladiator is striking. When approaching a Gladiator from the front it looks just like a JL series Wrangler,
which is undoubtedly why I am continuing to get the Jeep wave from fellow Jeepers approaching in the other lane. The Rubicon adds vented louvers in the hood,
which gives it a touch of attitude as well as the usual red trim accents and the red outlined Rubicon hood decals. The increased height of the Gladiator gives
it more ground clearance than the Wrangler but it also gives it a higher hood profile. The Gladiator's rear tail lights are fairly large and easy to see and
they are extended out a bit rather than flush to the sides in order to accommodate the lane deviation warning feature that is part of the Active Safety Group.
I did order the optional LED lighting package on our Gladiator and found there is a noticeable difference. The tail lights are much
brighter, which was one of my concerns when towing our JK Wranglers behind the motorhome at night. The front turn signals are also a big improvement. Our JK
Wrangler turn signals were small, not as bright and buried down low in the front grill, which made them harder to see if you have a nice off-road bumper on
the front. The JL and Gladiator embed the turn signals in the front fenders and the LED version are quite bright. When driving during the daytime there are
LED accent rings around the headlights and the fender lights, which serve as white DRLs. Whenever a turn signal is activated that particular fender DRL
switches over to a bright amber flashing turn signal that is hard to miss. The LED headlights do a great job of filling out the desired area and tend to go to
a set distance and stop. The high beams project farther down the road but both the high and low beams do a good job of filling in the areas to the side of the
road. Add in the LED fog lights and it's a big benefit when driving at night during the fall rut when deer tend to pop out from alongside the road at the last
minute. Even the bed lights are LED.
|
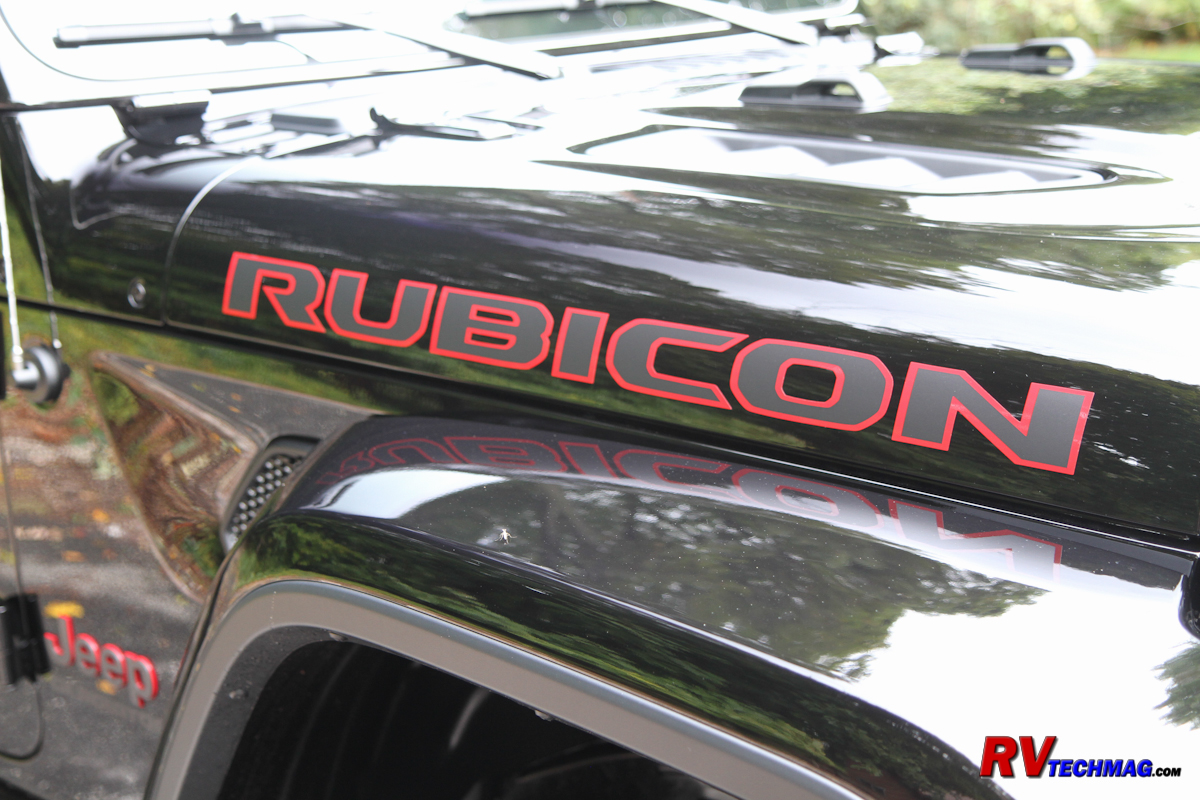
Red Rubicon badging on the hood.
|
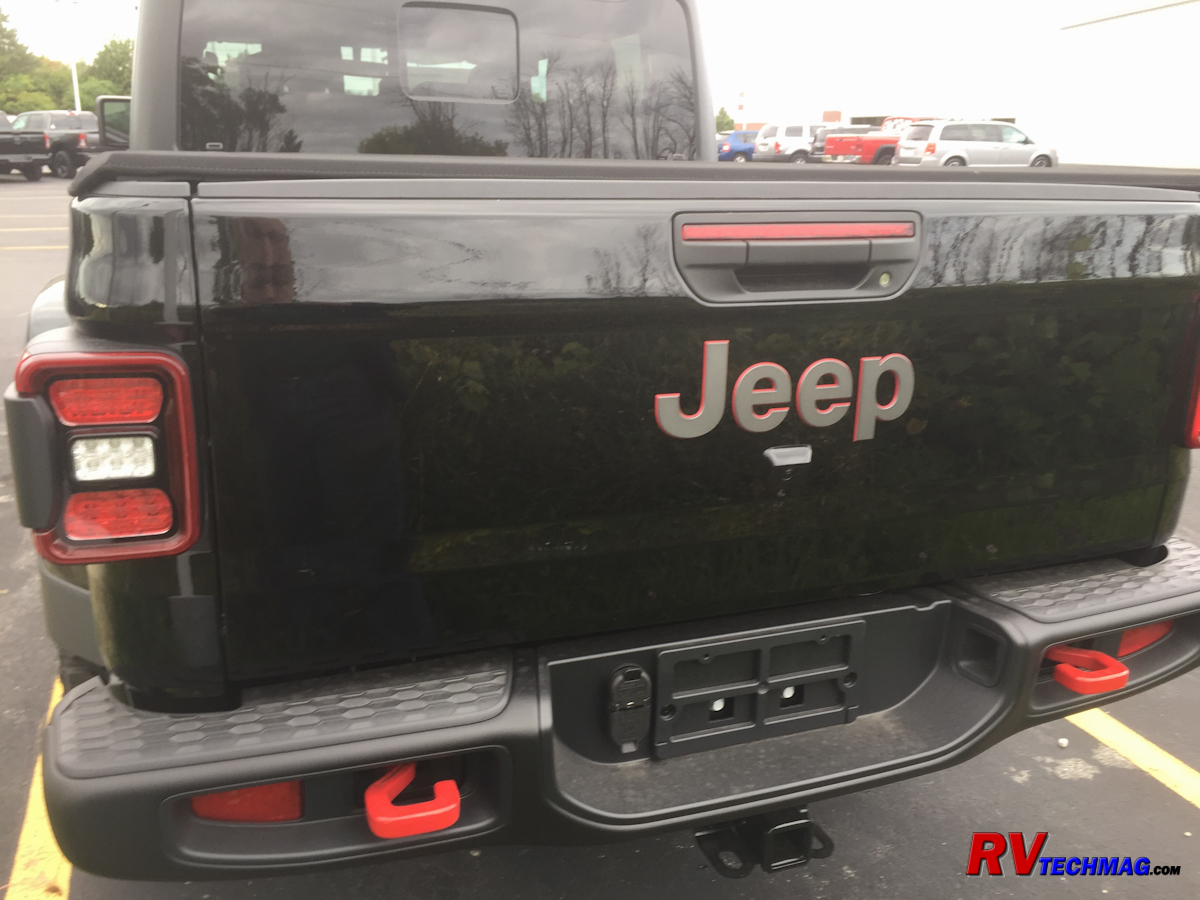
The rear tailgate showing the red accents.
|
Speaking of the bed, Jeep did a pretty good job engineering the bed's cargo area to make it functional. Most full size trucks sold no
longer have 8' beds unless they are work trucks. The trend is to go with shorter 5-6' beds with rear seating in the cab. Just like these trucks, the Gladiator's
5' bed isn't long enough to contain a full 8' sheet of plywood. What Jeep did was to design a tailgate that would fold down flat but also be able to lock in at
a 45 degree angle. The height of the gate is equal to the height of the wheel wells in the bed when locked in at that position. The bed width allows for a 4' wide
sheet of plywood to rest across the fenders and tailgate. Jeep has placed notches in the bed that accommodate 2x4s to span this area and supply additional
support for thinner materials that could otherwise sag. This allows you to carry multiple sheets of full size plywood in the Gladiator's bed.
I also ordered the cargo management system, which consists of trail rails that line the upper length of the bed's sides. A number of
tie-down latches are placed in these rails and can easily be slide from front to rear to place tie-down points where they are needed for each particular cargo.
The top of the bed was covered by a roll-up tonneau cover. This cover rolls up and can be secured at the front of the bed by a pair of straps or can extend the
length of the bed to securely cover it's contents. I can assert that the cover seals well because after driving through a car wash the bed was still dry. The
tonneau cover has an 8" flip up extension at the end which allows you to leave long pieces of lumber, conduit or whatever to extend out over the top of the
tailgate while still allowing the rest of the bed to remain covered.
Getting Ready to Flat Tow
When flat towing any vehicle behind a motorhome you first need to be certain that your vehicle can be flat towed. Many vehicles
cannot while some can be but need modifi8cations such as transmission lube pumps or driveshaft disconnects. But the Wrangler and Gladiator do not need any of
that stuff and are perfect for flat towing, which explains their popularity with motorhome owners. In order to flat tow you do need to make a few changes to
the towed vehicle. First off all you need a tow bar, which is normally folded up and stored right in the motorhome's hitch when not in use. You also need an
attachment point on the towed vehicle. Normally the tow bar manufacturer makes base plates that mount to the vehicle's frame and provide mounting tabs for the
tow bar to connect to. You also need a lighting system so that the towed vehicle's lights will operate in conjunction with the motorhome's lights. Finally, an
auxiliary braking system is required to apply the brakes on the towed vehicle when towing.
|
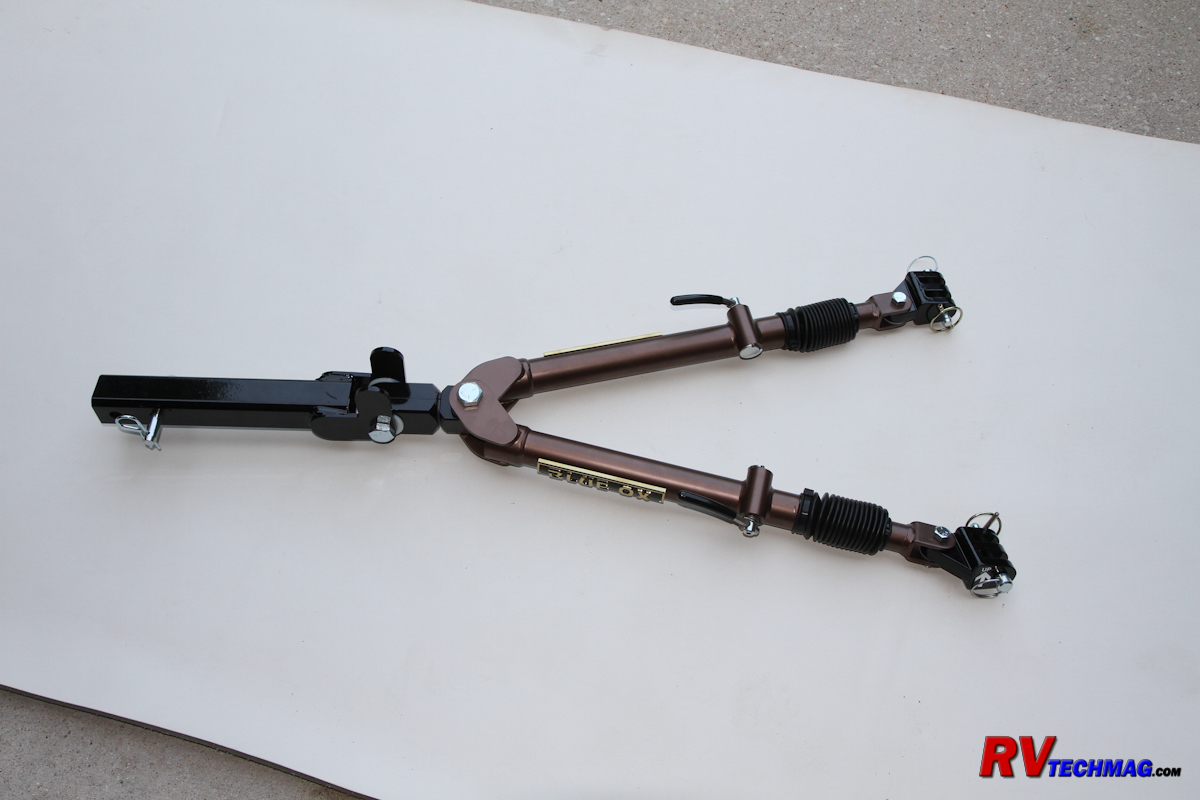
I selected a Blue Ox Avail tow bar.
|
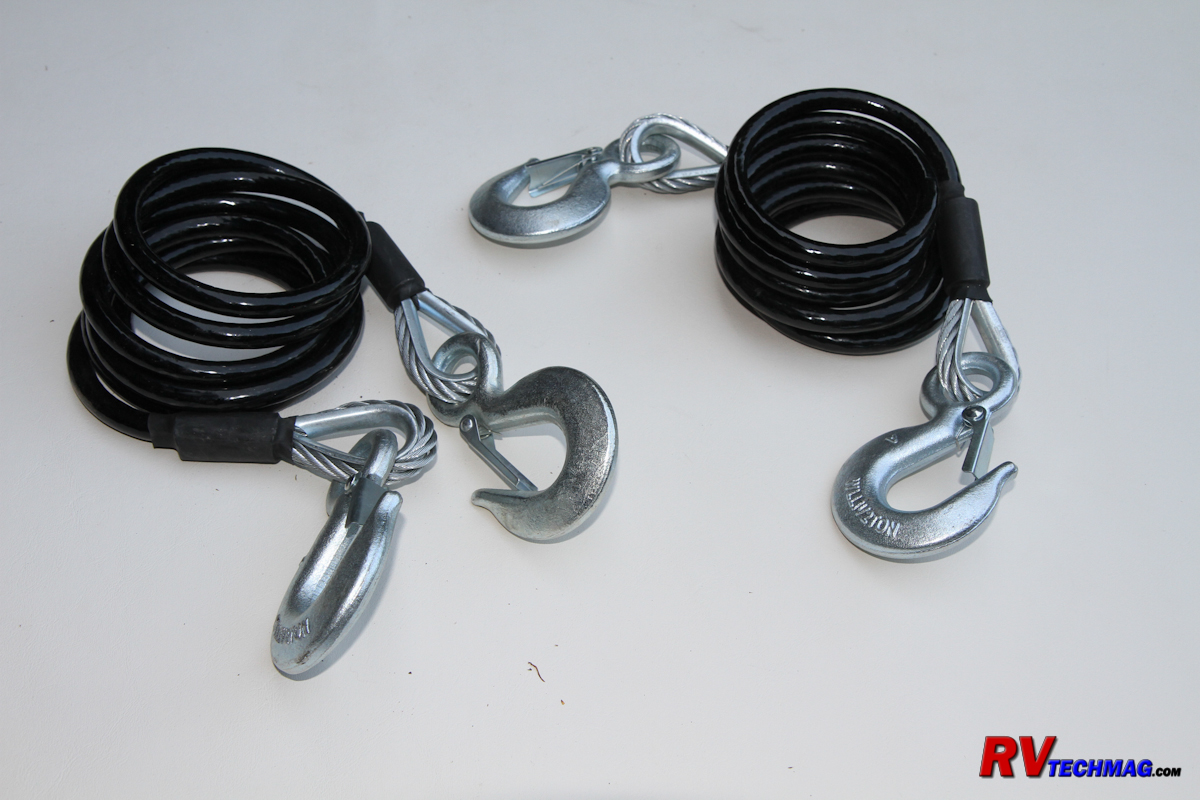
The tow bar came with coiled safety cables.
|
|
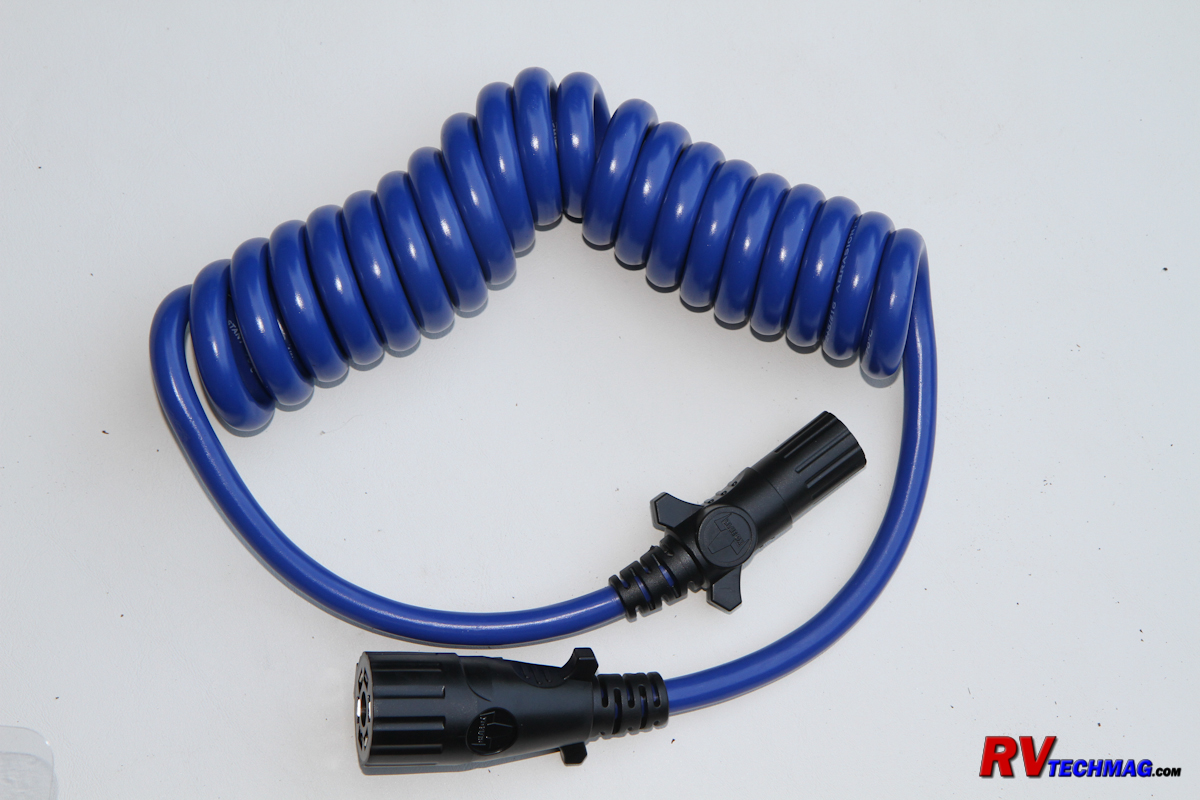
The 7 pin to 6 pin coiled lighting cord.
|
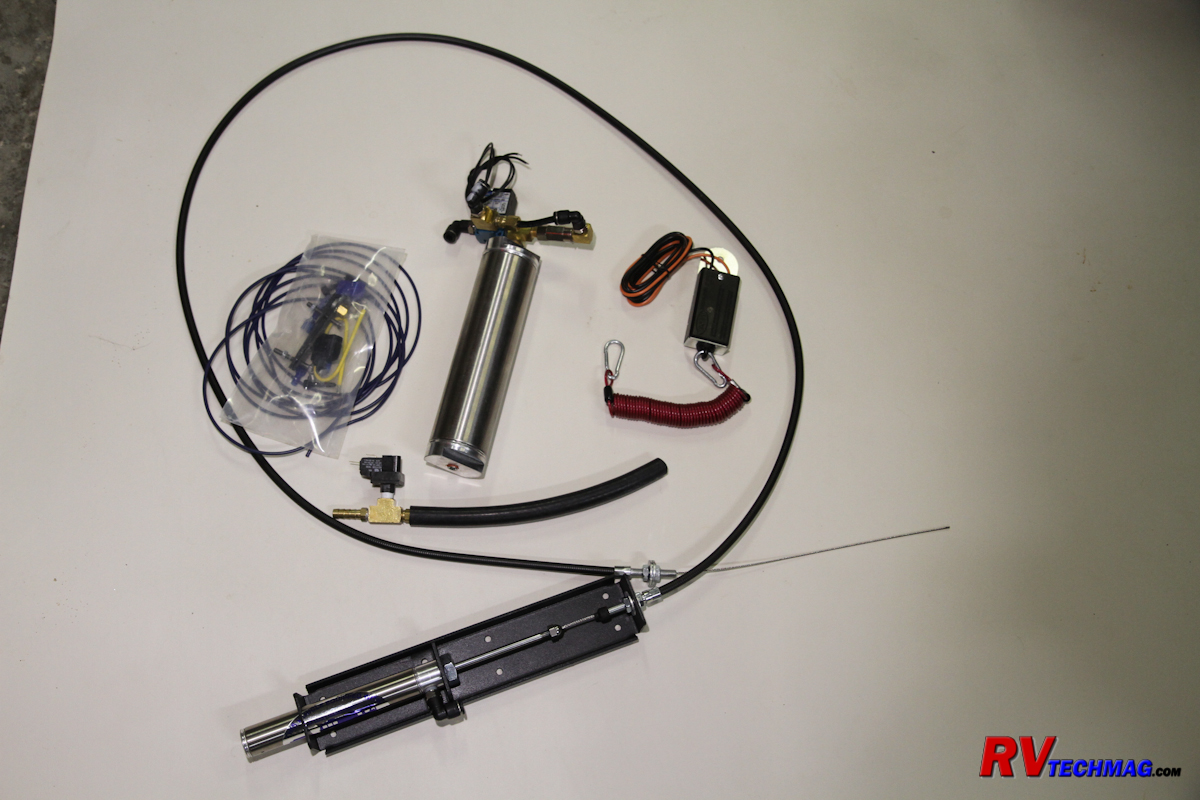
The M&G auxiliary braking system.
|
I had a tow bar and base plate setup on our older TJ Wrangler but I didn't care for it because we did plenty of off-roading and I didn't
like the idea of this bracket mounted low so that it could get damaged on rocks when wheeling. I planned on replacing the original front bumper with a nice heavy
steel bumper capable of handling off-0road travel as well as a solid place to mount a winch.
Rockhard 4x4 makes an excellent steel bumper and I have used them on our JK Wrangler
with excellent results. It is made from heavy 3/16" steel plate and offers a low mounting position for the winch, which gives the winch a better vantage point
for winching and also prevents it from blocking the air flow to the radiator. Rockhard also offers tow tabs for most major tow bar manufacturers. These tabs bolt
to the front of the bumper and use the existing factory bumper mounting locations so that they are pulling directly on the frame rails. This eliminates having to
use a base plate (which also saves some money) because the tow bar connects right to the bumper mounted tabs. The bumper also includes heavy duty D-ring shackle
mounts typically used for retrieval purposes that are perfect for attaching the towbar's safety cables to. This setup gives me the ability to flat tow the Gladiator
and go off-road with no limitations. On our JK Wrangler I did have chance to test the strength of this once when my 5/8" hitch pin sheared and the entire tow bar
slid out of the receiver. I felt a strong jerk and noticed that our Wrangler< was following about 10' back from the coach. I pulled over, replace the pin with a
spare and went on our way. The safety cables held up fine and did their job so I was sold on Rockhard's system. In fact I may get their entire skid plate system
for the Gladiator like I did on one of our Wranglers.
|
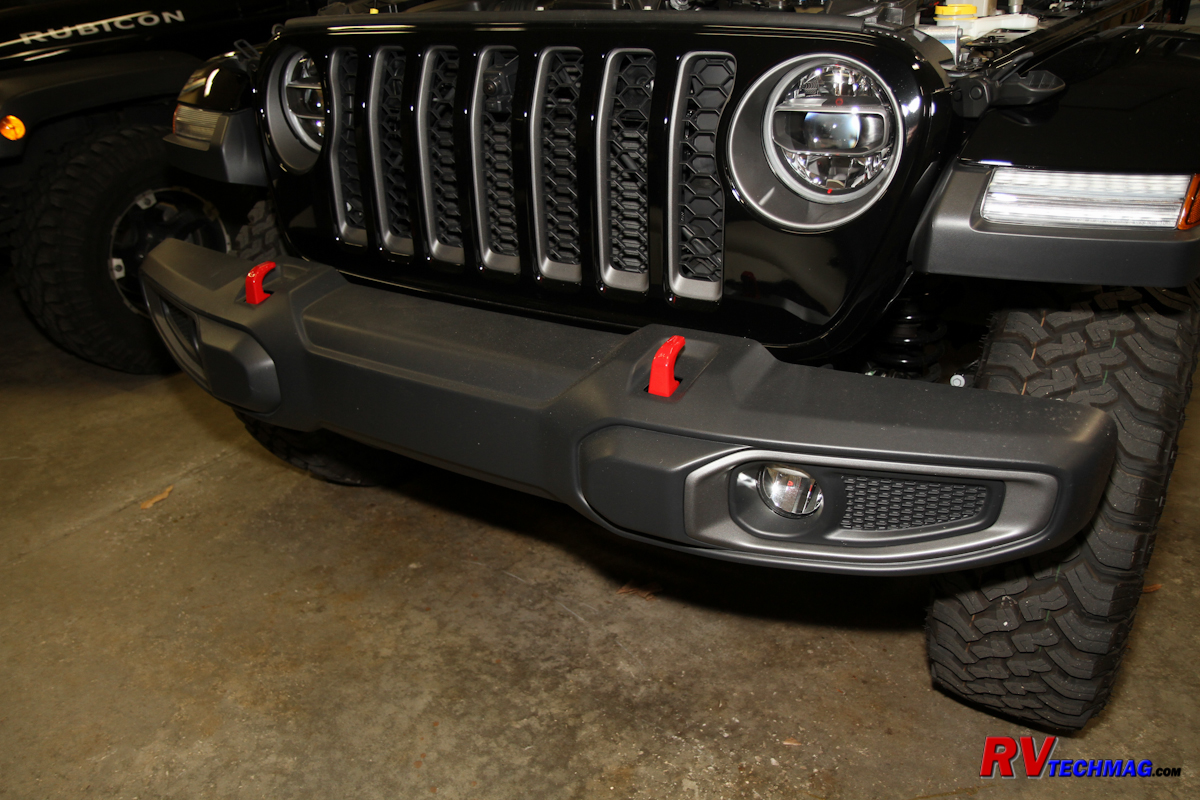
The original bumper wasn't suitable for flat towing.
|
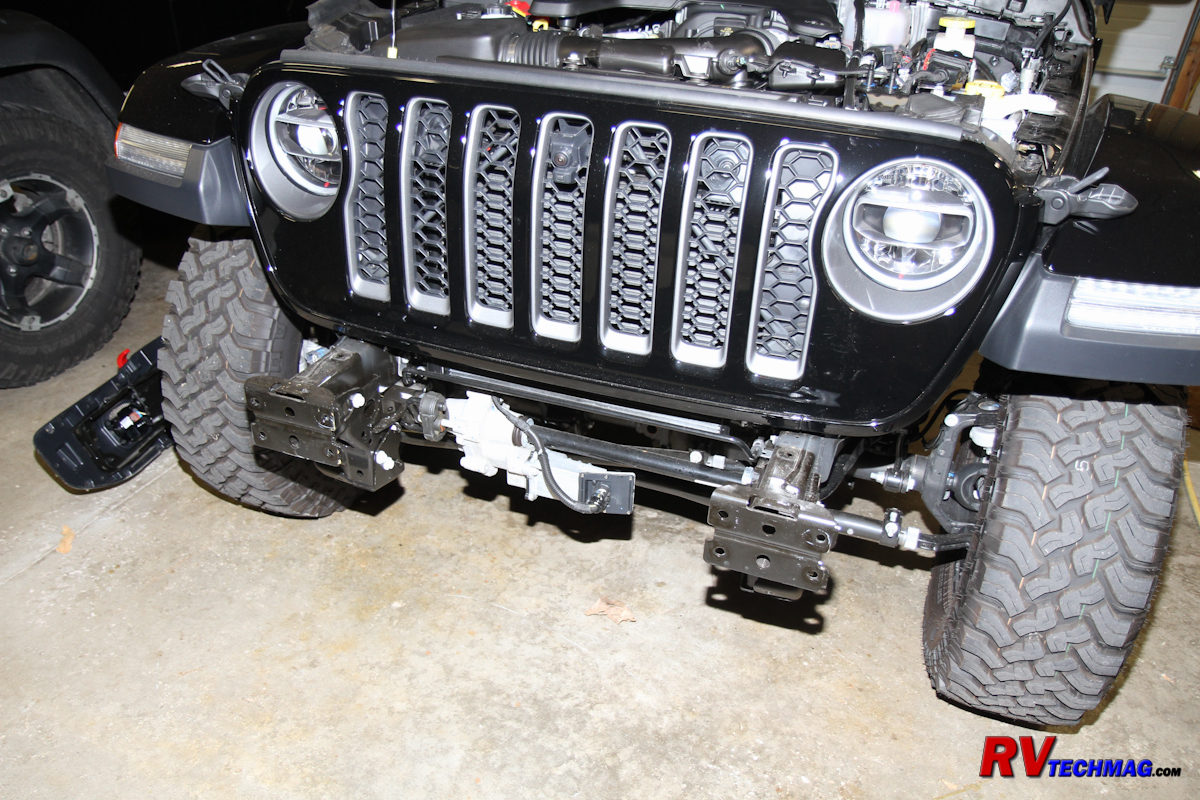
I removed the OEM bumper to prepare for the Rockhard bumper.
|
|
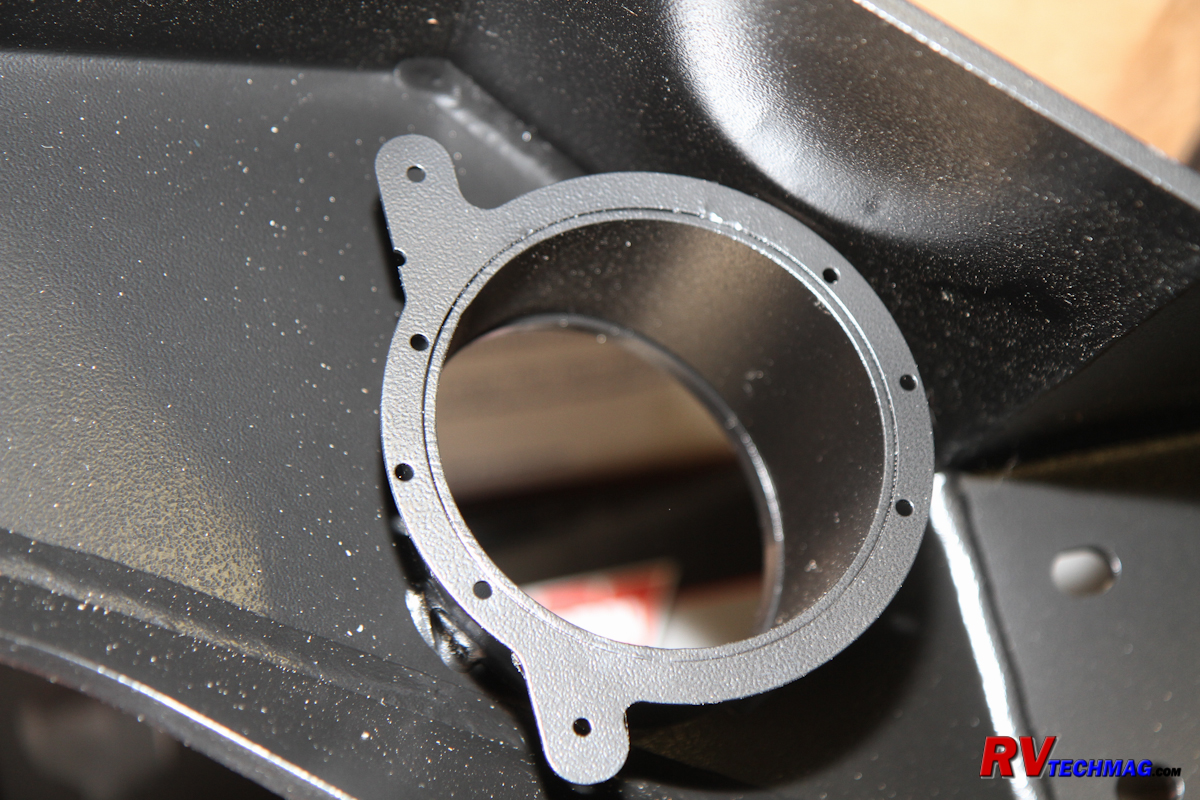
The Rockhard bumper is machined to accept the factory fog lights.
|
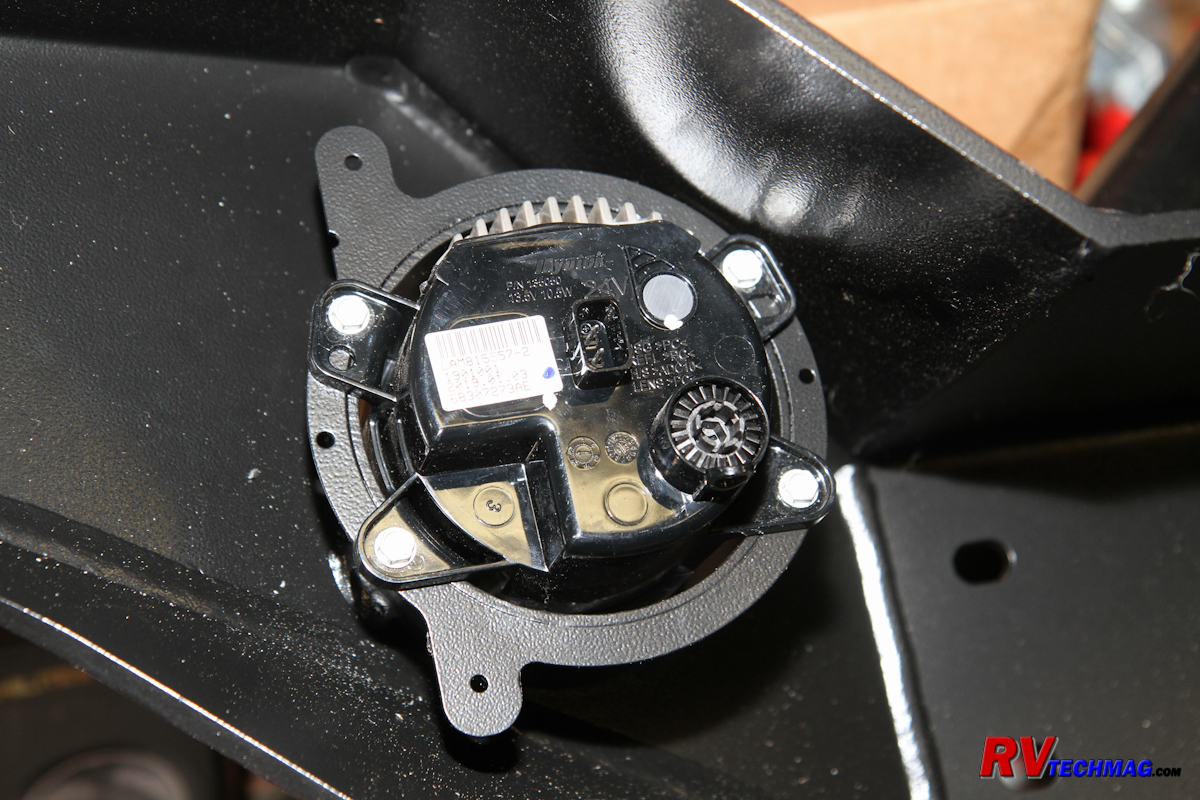
Fog lights installed.
|
|
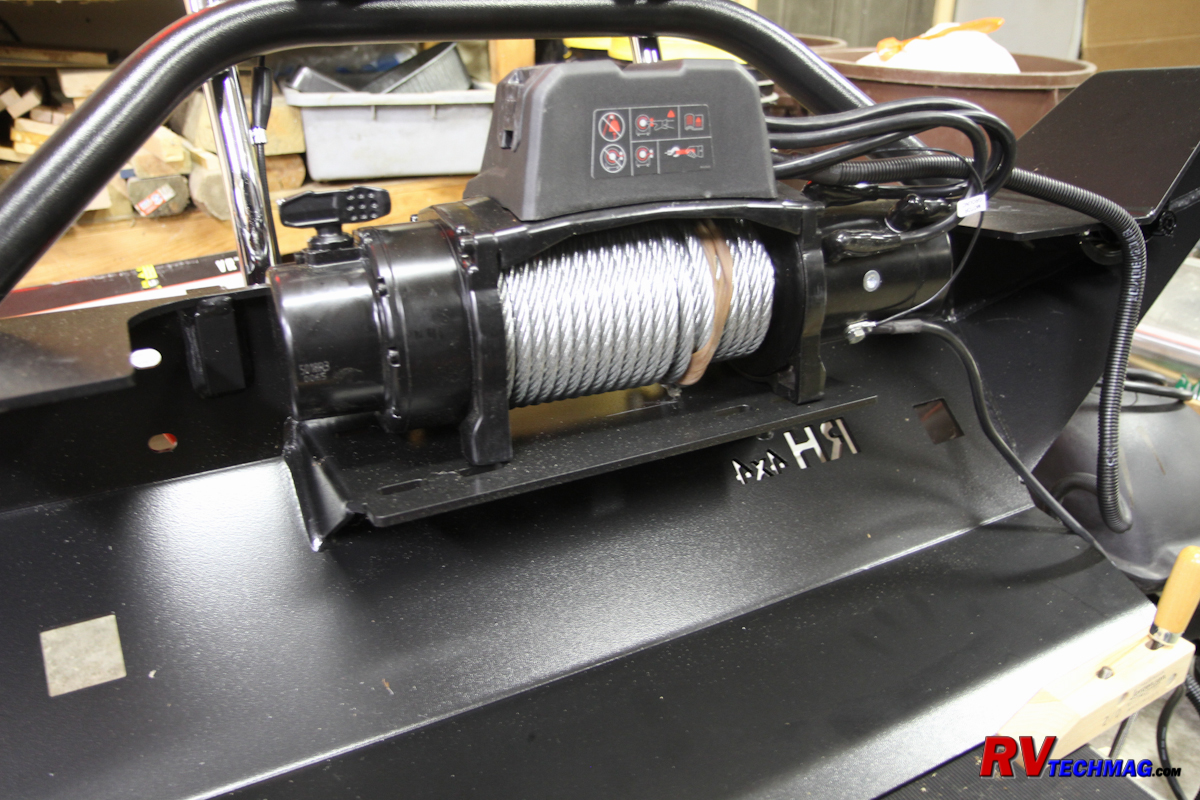
The Warn winch installed into the Rockhard bumper.
|
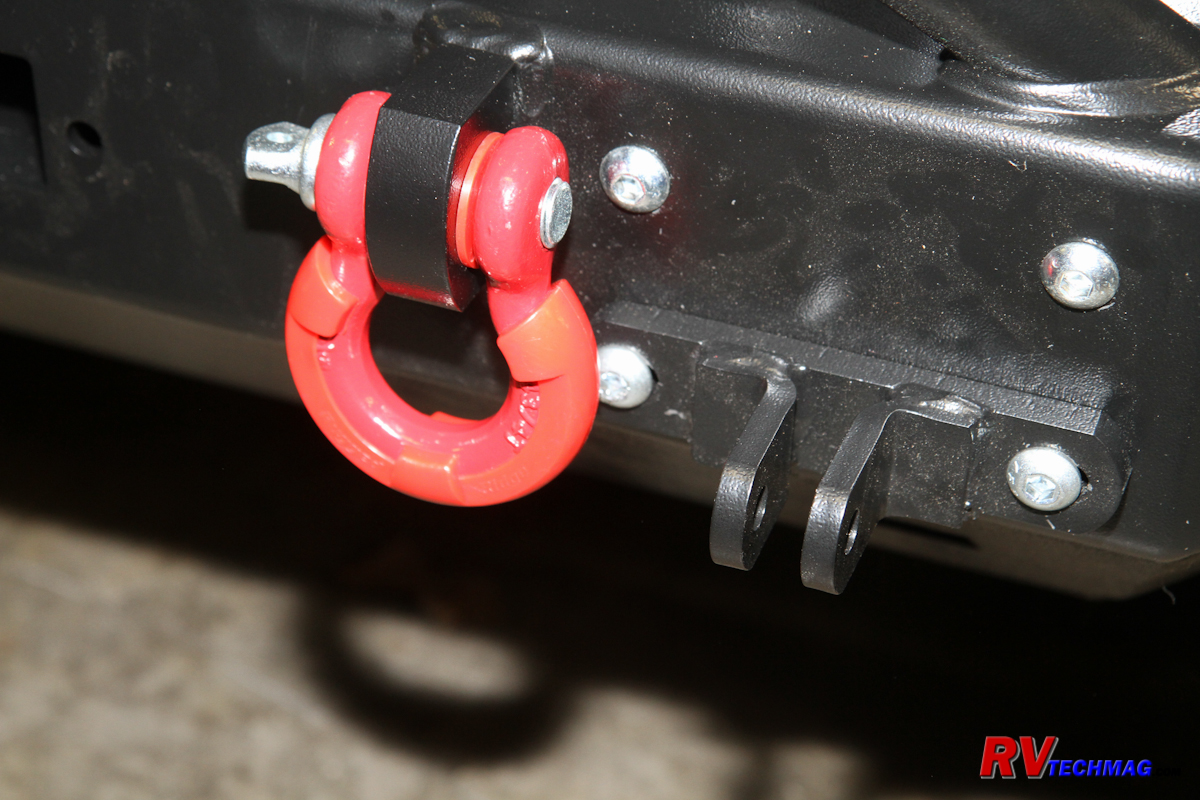
Towbar mounting tabs and shackles for safety cables.
|
Now that the Gladiator was hooked up, the next step was to connect the tail light assemblies to the RV. The motorhome was equipped with
the standard 7 pin RV connector that is commonly used. Tow bar manufacturers sell a popular 7 pin to 6 pin coiled umbilical cord to connect the RV to the towed
vehicle. A 6 pin socket is generally inserted someplace into the front of the vehicle for this cable to plug into. I decided to mount my socket into the
Rockhard front bumper because it was a convenient location and there were a number of flat surfaces where it would be easy to mount the socket in. The next step
was to connect the socket to the rear lights and there are several ways to do that. Method one is to add a second set of bulbs to the taillight sockets and
connect them directly to your lighting socket. But this only works if your sockets are particularly large which is usually the case. The most popular method is
to run your wires to a set of diodes and then to your existing lights. This prevents backfeeding to the towed vehicle's electrical system. But this method isn't
perfect because the towed vehicle's auxiliary braking system can actuate the brake lights. For example - if you turn on the right turn signal when preparing to
make a turn the towed vehicle's right turn signal will begin to flash. However, when you step on the motorhome's brake pedal the auxiliary braking system on the
towed vehicle will most likely apply the brakes on the towed vehicle, causing the brake lights to go on. But the steady brake light signal from the towed
vehicle will override the flashing turn signal from the RV so the turn signal will stop flashing and you'll just have two steady brake lights.
Of course this won't happen if the towed vehicle has separate red brake and amber turn signal lights but that is typically not the case.
The way to eliminate this unwanted scenario is to completely isolate the towed vehicle wiring from the motorhome's wiring. Mopar makes flat towing wiring harness
kits for both the JK and JL series Wranglers. These kits consists of a custom wiring harness that eliminates having to cut into and patch any of the existing
wiring. The plug and play harness includes solid state relays that switch between the two electrical systems automatically. All you have to do is plug in the
cord from the motorhome to the Jeep and the relays will sense 12 volt power on the charge line pin and energize the relays to disconnect the rear lights from
the Jeep and connect them to the RV. Once you unplug the lighting umbilical the lights automatically return to the Jeep circuits. As of this writing Jeep does
not yet make a kit for the Gladiator but the lighting sockets use basically the same connectors as the JL Wrangler so I purchased Mopar wiring kit part number
82215382 and cut the middle wiring loom and extended it by a couple of feet to allow for the 18" longer wheelbase of the Gladiator and ran that.
|
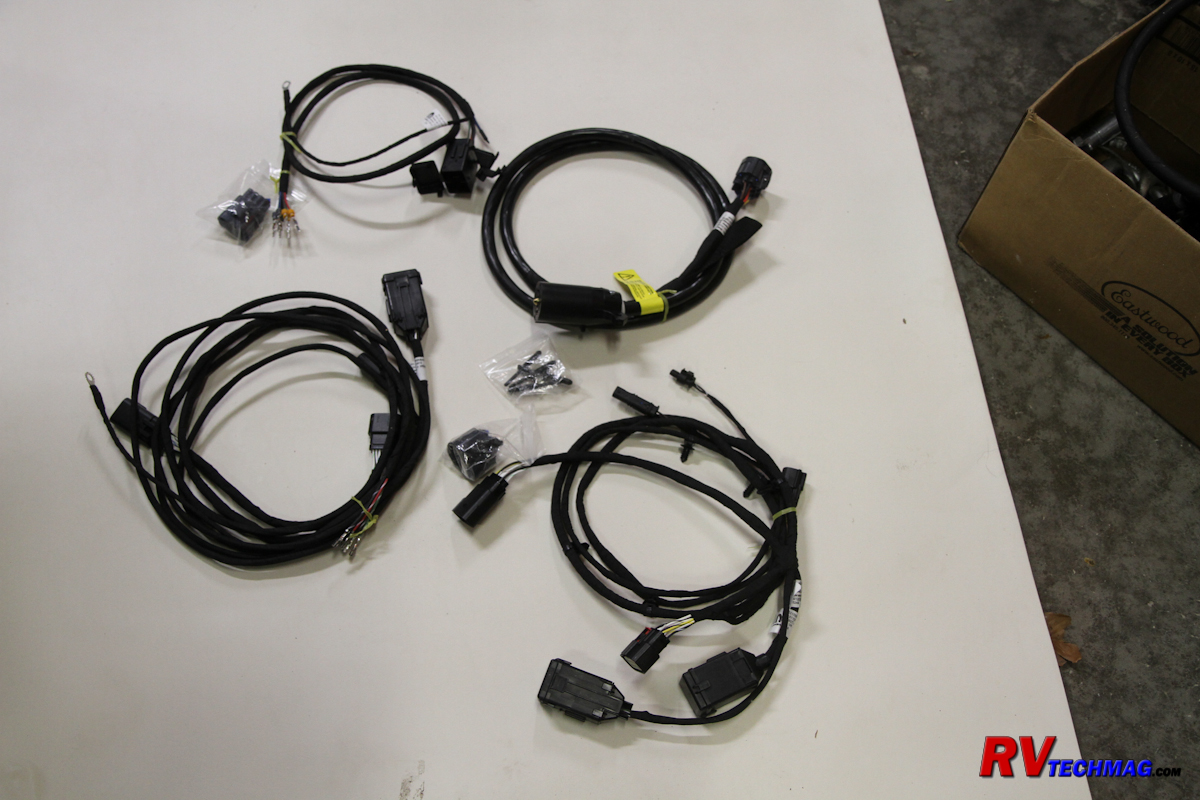
The Mopar flat towing wiring harness kit.
|
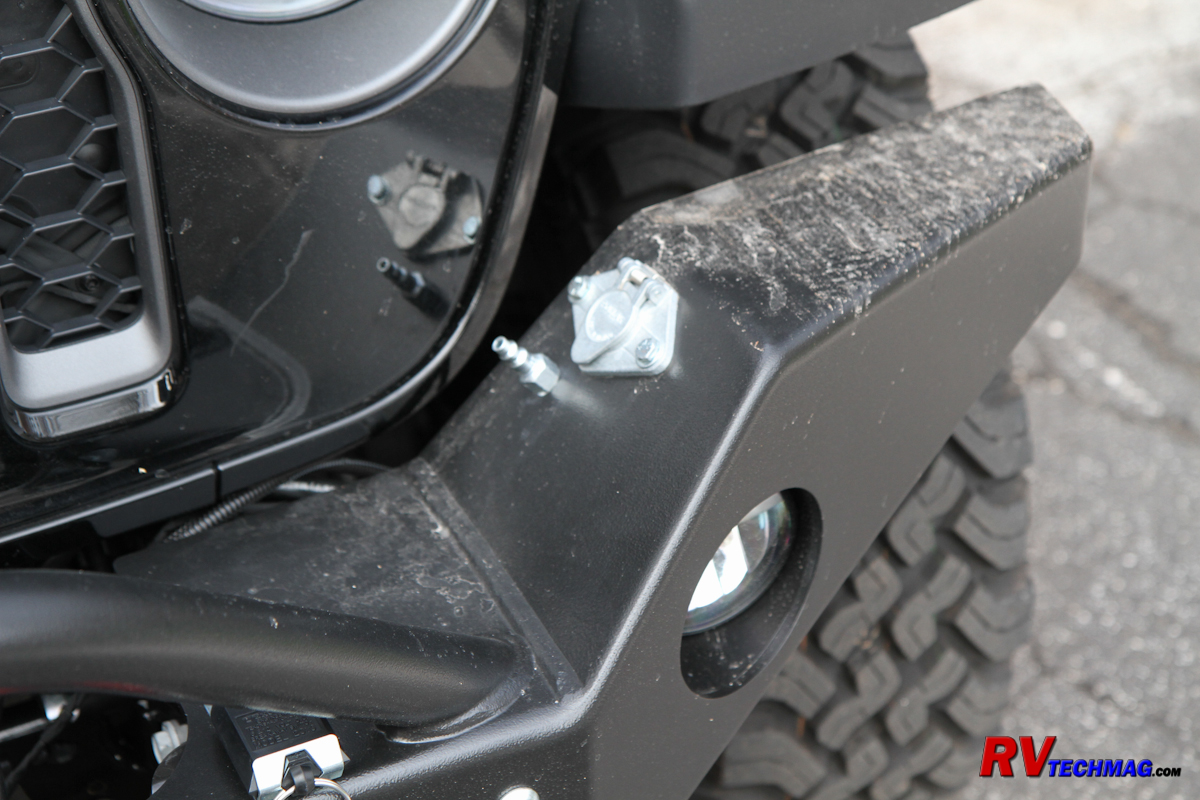
I installed the lighting socket and the auxiliary braking system connector into the front bumper.
|
Lastly, I needed an auxiliary braking system. I chose to go with
M&G Engineering's towed braking system 2.0. This system uses an air cylinder
with a stainless steel cable that connects to a bracket on the brake pedal. An air hose connects the motorhome to the Jeep via quick disconnect couplings. When
the air brakes on the motorhome are applied, the RV sends an equal and proportional air pressure to this cylinder, which then applies the Jeep's brakes. The bracket
that mounts to the brake pedal arm is unobtrusive and doesn't get in the way of my big feet. I mounted a quick disconnect fitting on my Rockhard bumper and my
braking system is also automatic. I did order the optional breakaway system as well, which utilizes an air cylinder and breakaway switch (again, mounted on my bumper)
to apply the brakes should something go wrong and the Jeep become disconnected from the motorhome when towing. The M&G system also requires the brake booster to
be charged up with vacuum when towing. They can supply an auxiliary 12 volt vacuum pump to do this when towing but most Mopar products already have a 12 volt pump
so all I had to do was tap into the pump's power line and connect it to the incoming battery feed from the motorhome. I then added an
RVI Towed Battery Charger to prevent backfeeding when not towing while
allowing the motorhome to keep the Jeep's battery charged up.
|
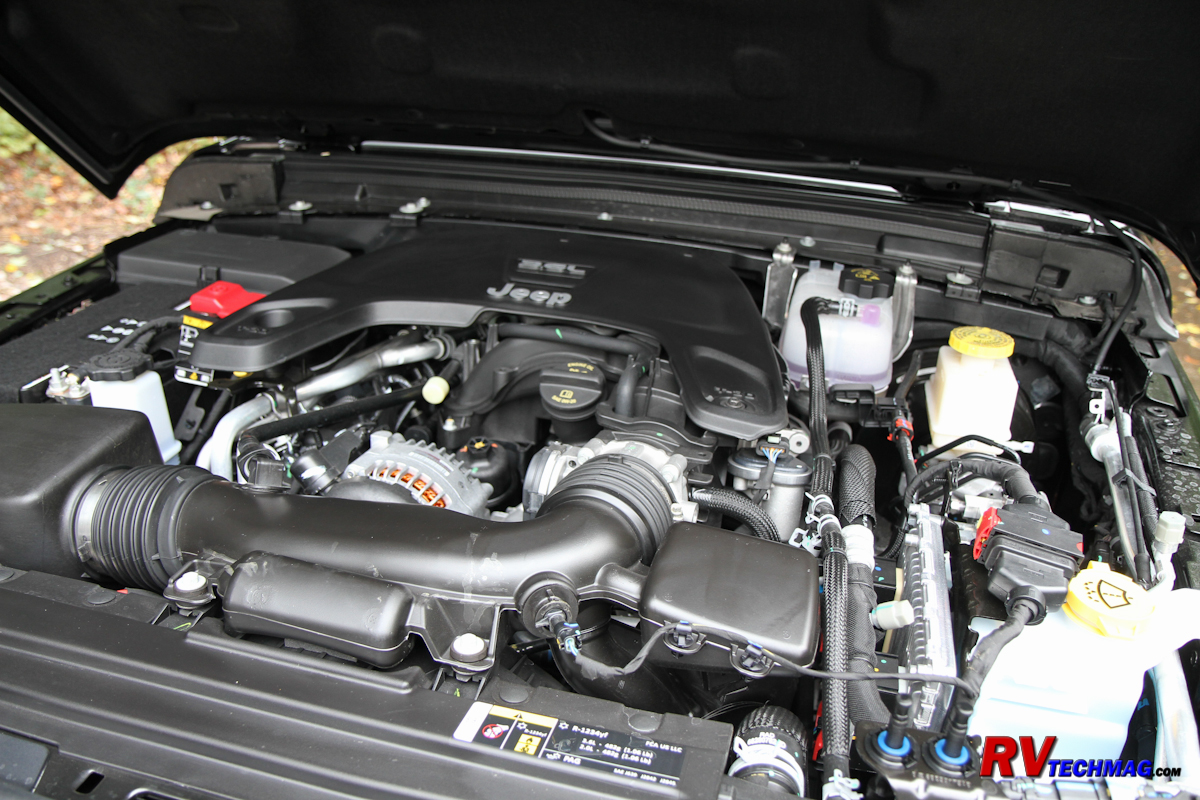
The under-hood area had just enough room to install the M&G braking system.
|
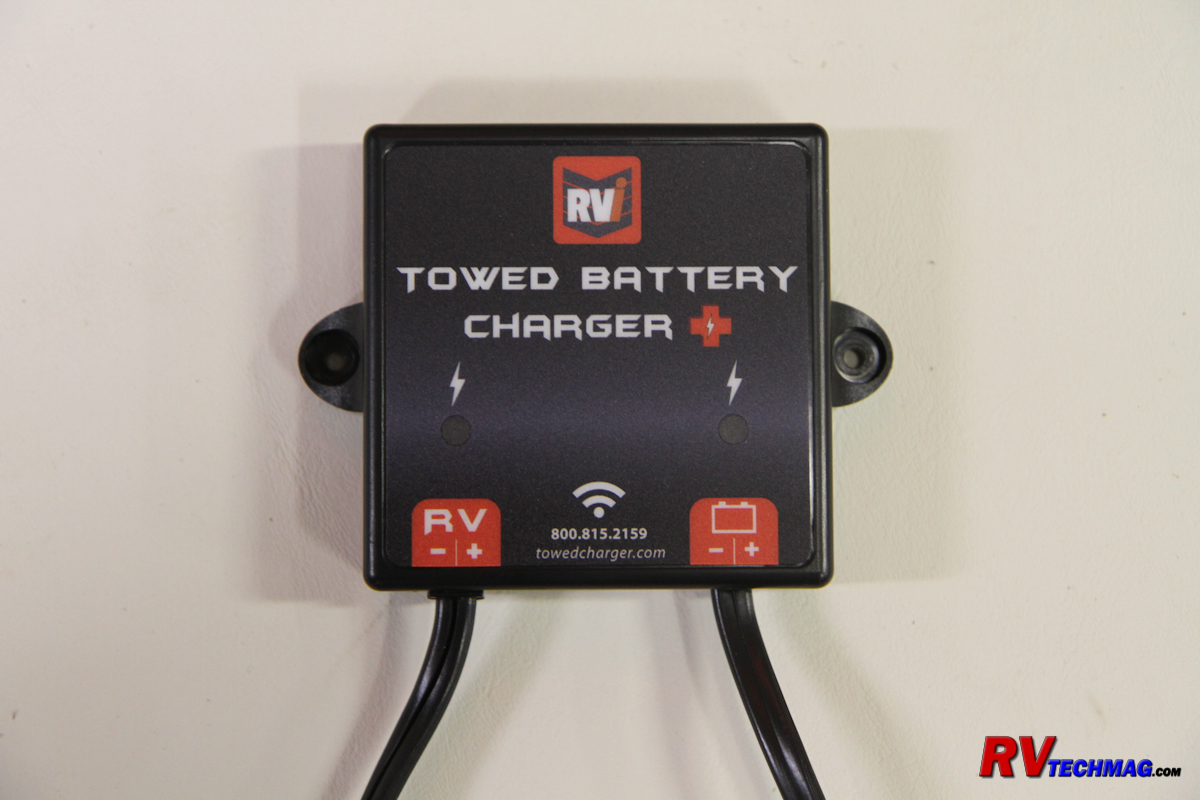
An RVI Towed Battery Charger prevented any battery drain.
|
Finally, I did add a pair of K-C Hilites LED driving lamps to help illuminate the night under certain conditions and added a shorty
antenna. I dropped a Warn winch into it's new home in the Rockhard bumper and made sure to order red D-ring shackles and winch hook to keep the black with red
accents look. Even the factory rims had little red Jeep's accenting each wheel rim. I also added a second set of SmarTire tire pressure monitoring sensors. These
Bendix TPMS sensors mount on the inner ring of the wheel rim and communicate with the SmarTire TPMS system in the motorhome that monitors both the motorhome and
the towed vehicle when being towed.
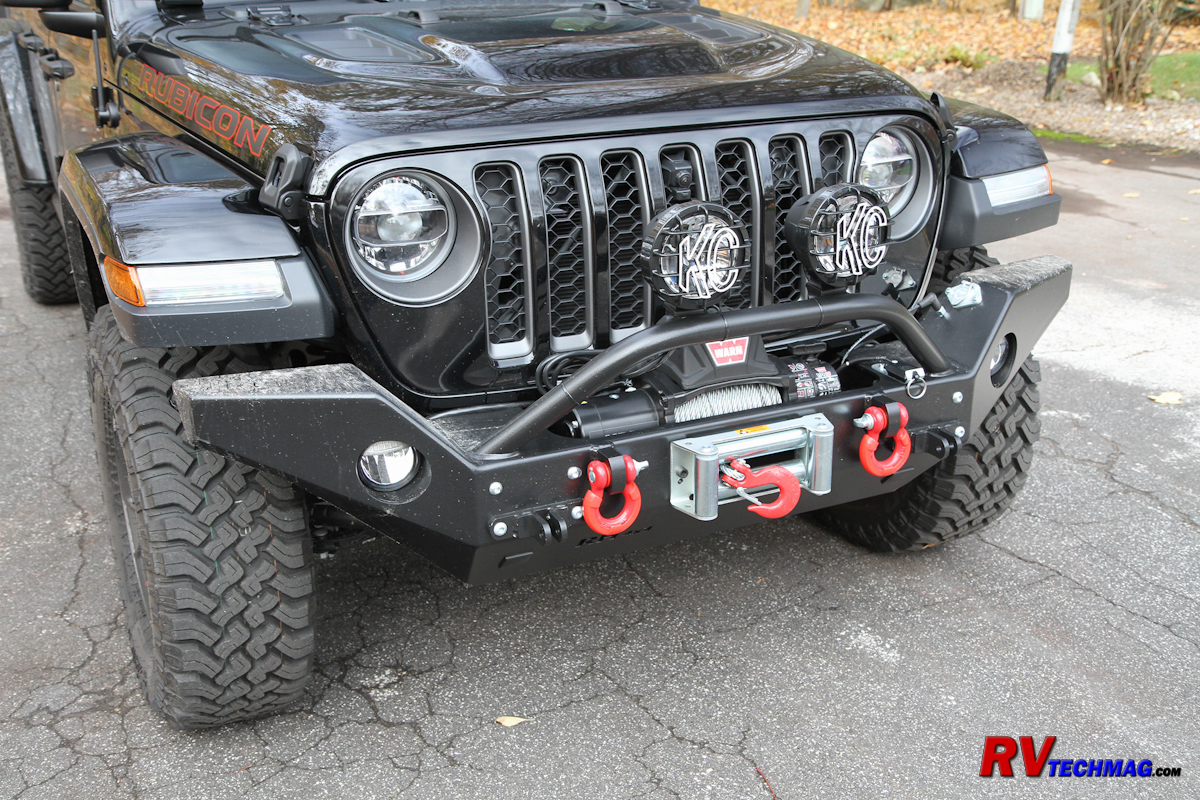
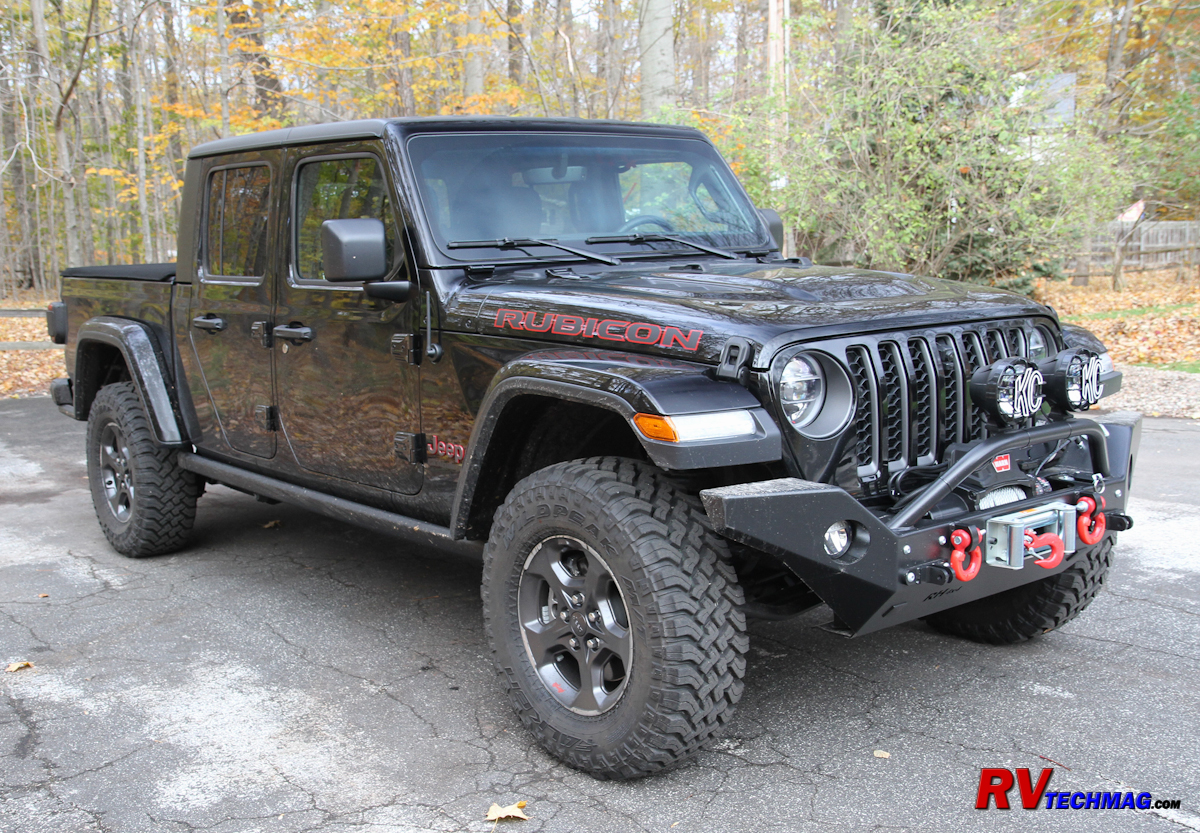
The finished project.
All in all I am extremely happy with my Gladiator. I can't wait for spring to come so that we can hook it up behind
the motorhome and head out west for some off-road wheeling.
Sources
Return to Home Page
If you enjoyed this article be sure to recommend RVtechMag.com to your friends, like us on Facebook or Twitter
or subscribe to our RSS feed.


|
