2021 Jeep Wrangler Modifications
Creating a Flat Towable Rock Crawler
Article Date: July, 2021
Article and Photography by Mark Quasius
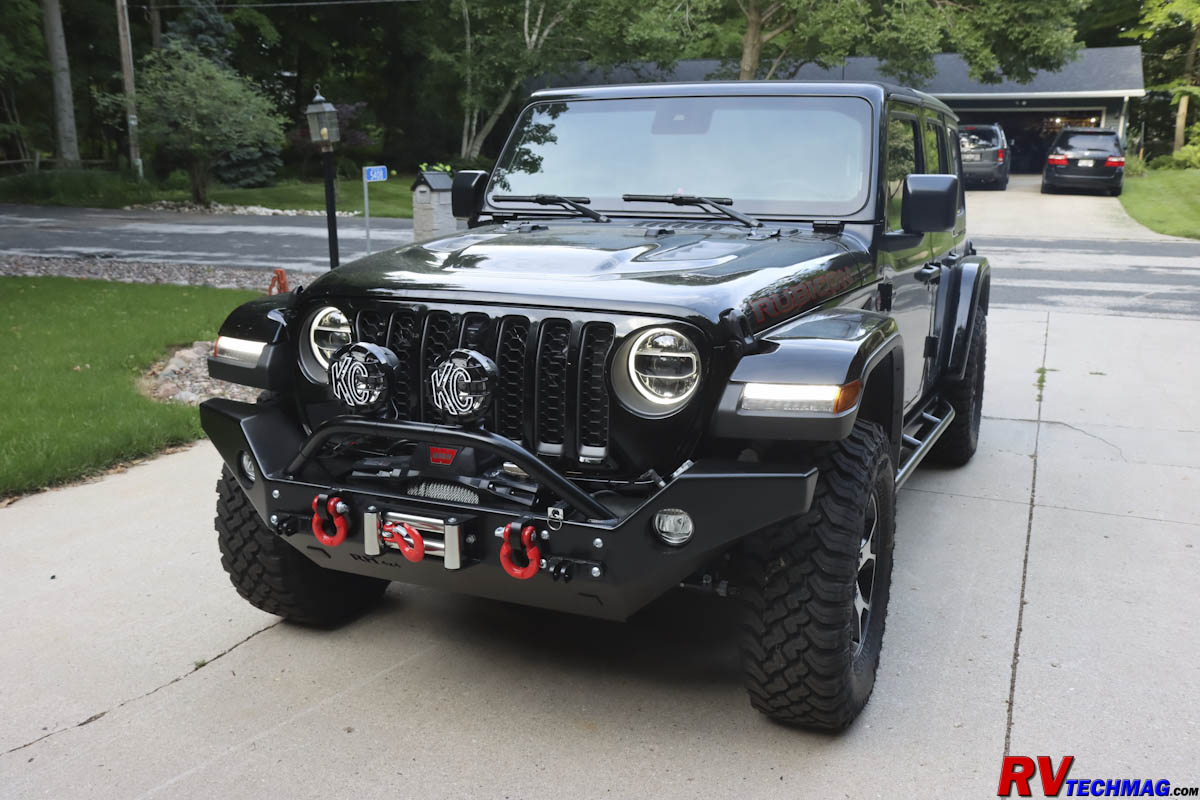
Installation
I found that the flat towing portion of the installation somewhat depended on the rock crawling portion. For instance - the Mopar wiring harness
was originally designed to connect with a plastic plug that attaches to the original urethane bumper and then a special whip hose connects to the motorhome's 7 pin
lighting socket. But this whip has a special connector that attaches to the Jeep's bumper and if this cord is ever damaged, good luck finding another. Seeing as how I
was replacing the bumper with the Rockhard steel bumper anyway I simply cut the oddball connector off of the Mopar wiring harness and wired it into a standard 6 pin
lighting socket commonly used in the RV industry on towable vehicles. This allowed me to use a nice slinky cord, which is available at any place that sells RV accessories,
to connect the RV to the Jeep. This meant that I could not complete the Mopar wiring harness installation until the new front bumper was installed. In addition the M&G
supplemental brake system also needed to be connected to the coach and I decided to install a standard Milton quick disconnect fitting on the bumper to accommodate this.
The Mopar wiring harness also required running some wire loom through the frame area to get from the front to the rear of the Jeep. The skid plates would make that a
difficult task so they would have to wait until the wiring harness was installed. So the front bumper became my first installation task, followed by the rear bumper,
then the wiring harness, then the braking system and finally the skid plates and rock rails.
Front Bumper
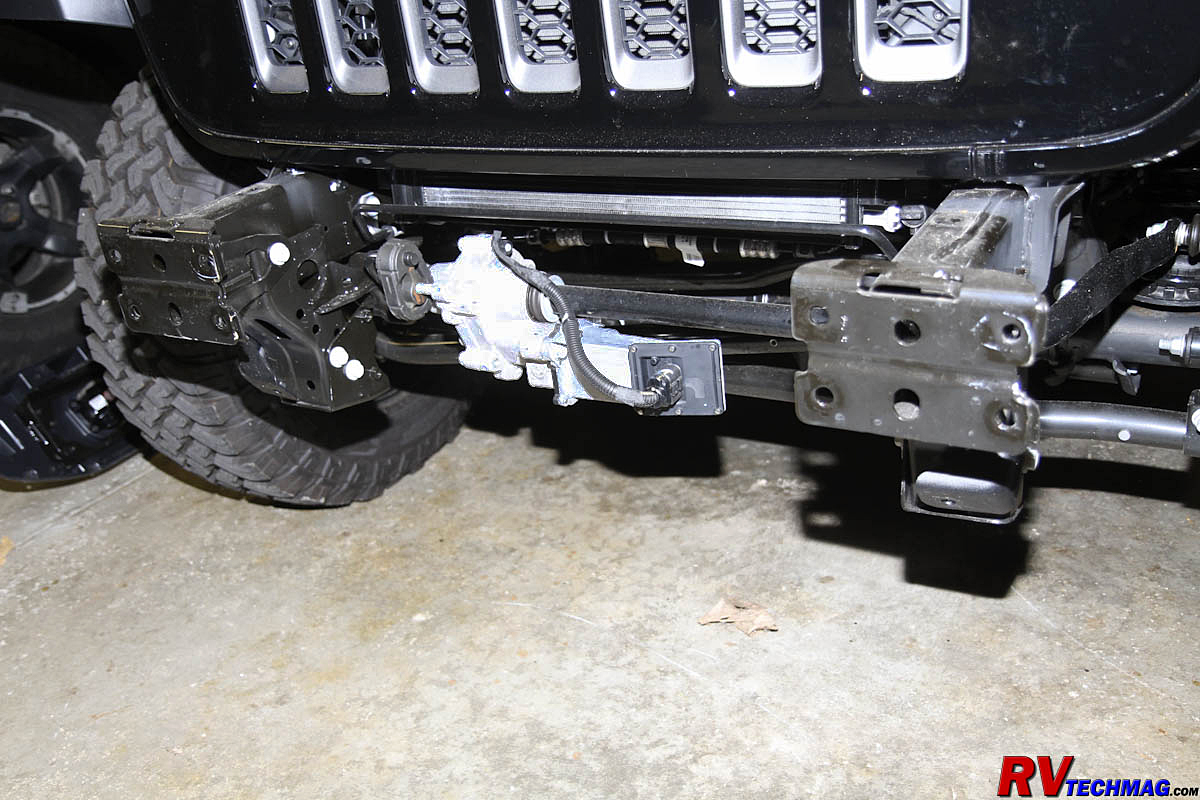
Bare Frame Rails After Removing the OEM Bumper
Removing the plastic Jeep bumper was easy enough. Much of it was held together with nylon push pins so I removed the mounting bolts and misc splash
panel trim to take the bumper off. I still needed to take the bumper apart though in order to retrieve the original LED fog lights so that I could relocate them to the new
bumper. That wasn't hard but it took some time and when I was done I had a pile of pieces and lots of small screws and nylon push-pins all over the floor. Once the bumper
was off the lower front portion of the Jeep was open and the frame rails exposed. It was now time to prepare the new bumper for installation.
|
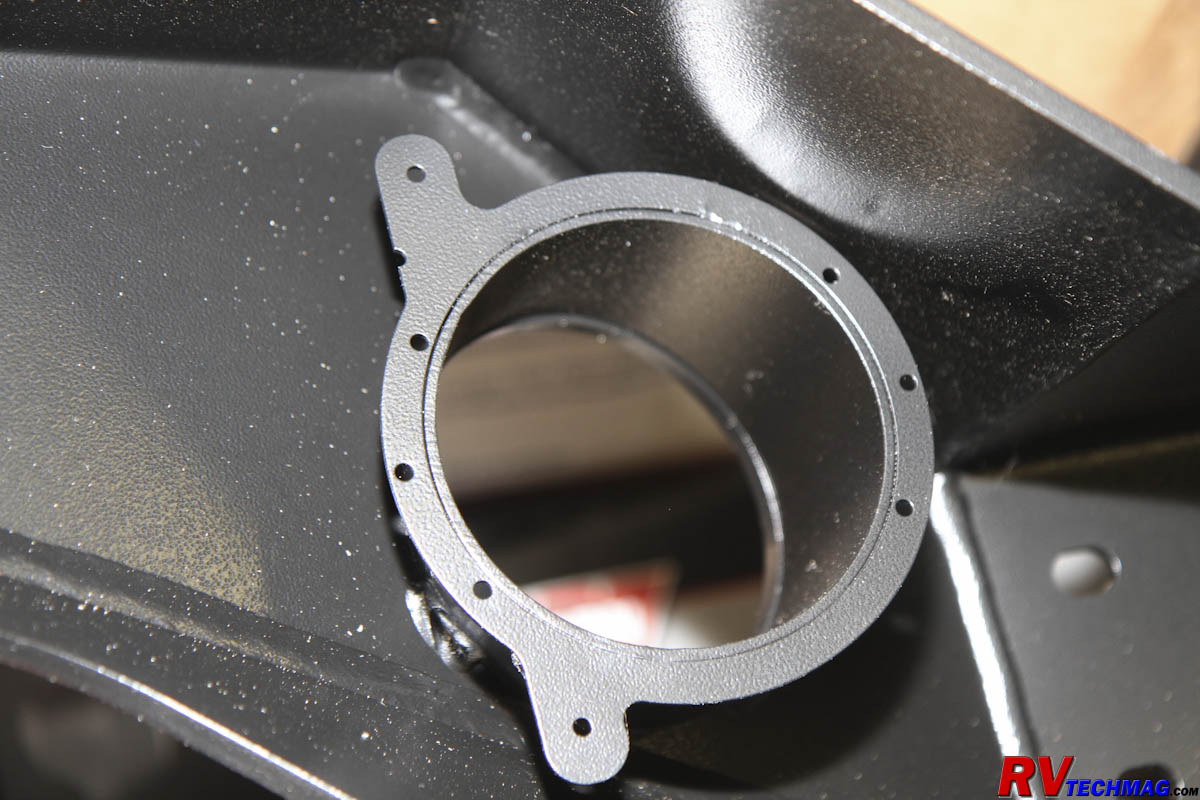
The New Bumper was Prepped for the Jeep's Fog Lights
|
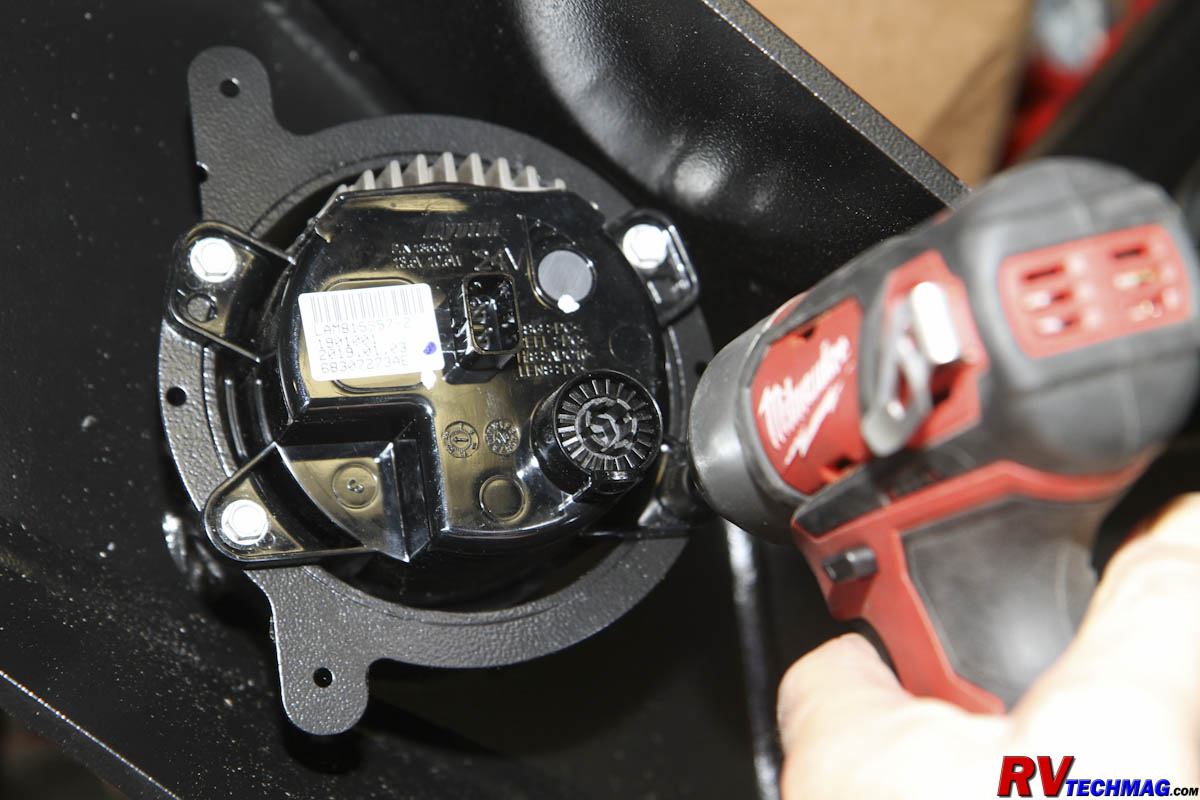
Installing the Fog lights into the Rockhard Bumper
|
At 137 lbs. the Rockhard bumper was heavy. Fortunately I had a small hydraulic lift cart so I picked up the bumper and set it onto the cart so
that I could easily maneuver the bumper into position on the Jeep. My Warn winch fit nicely into the bumper's winch tray but that added even more weight to the bumper
and it was near impossible to get to the winch's mounting bolts to tighten them after the bumper was installed so my best choice was to mount the winch to the bumper prior
to hanging the bumper on the Jeep. My first step was to install the LED floodlights that I had previously removed from the original bumper. Rockhard's floodlight mounting
locations were perfect for accepting the factory lights without any drilling or fabricating and the lights easily mounted with the self-tapping screws provided with the
bumper.
|
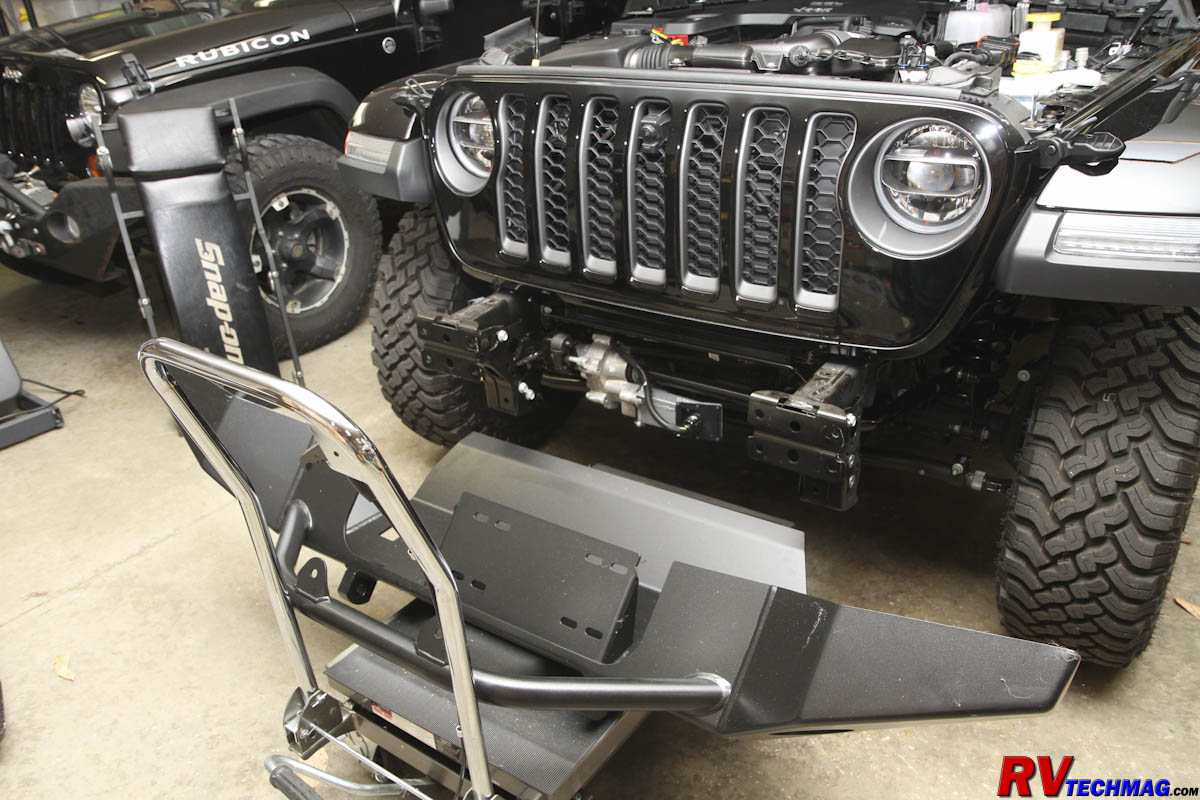
A Hydraulic Lift Cart was used to Make the Heavy Bumper a One Man Installation
|
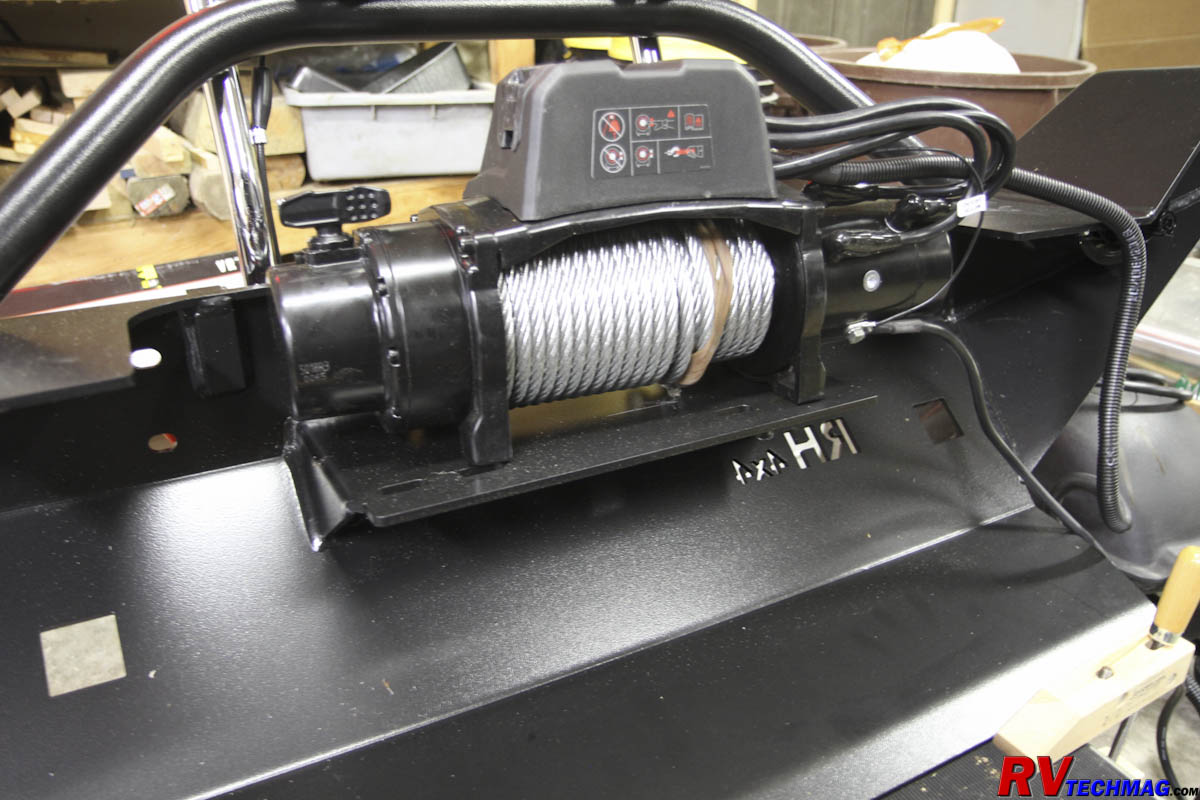
The Warn Winch was Pre-mounted to the Bumper Before Mounting the Bumper on the Vehicle
|
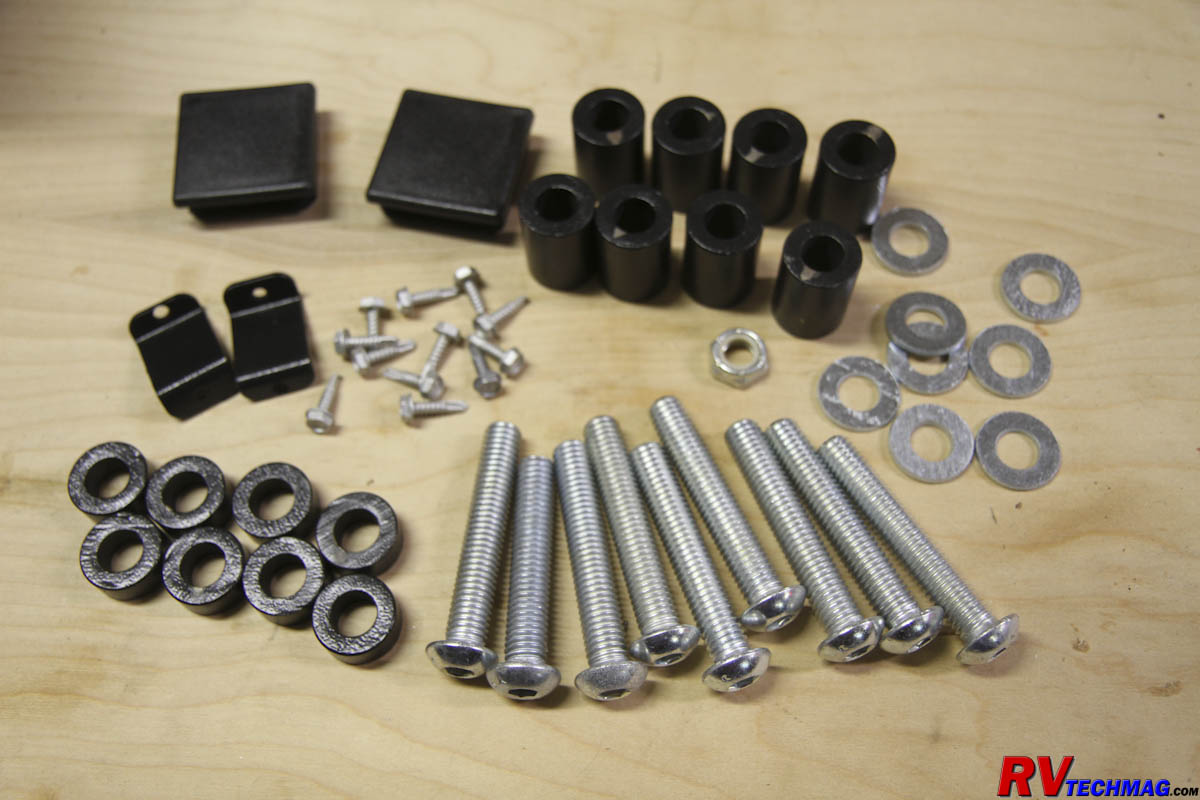
The Rockhard Bumper Came with a Complete Set of Fasteners
I also needed to find a place to mount the tow lighting socket, the breakaway switch and the air hose connection for the M&G
supplemental braking system. There were plenty of flat spaces on the Rockhard bumper which gave me a number of choices. I decided to mount them on
the top of the bumper, off to one side. This left me with plenty of room to make my connections without having to crawl on the ground to connect to
a lower location. This location was also fairly well protected from any off-road damage or dragging of the cords when towing and the lighting cord and
air hose were of sufficient length to easily reach that location. I also made a dust cover for the air hose connector to prevent any dirt from entering
the air line to the supplemental braking system. The under-hood air line cannot be tightly capped off or else the air in the line will expand and apply
the brakes as the under-hood temperatures rise so I used a right angle rubber spark plug boot and inserted an 18" piece of poly air line hose into the
boot to allow the air in the system to vent as it expands. The air line simply hangs behind the bumper and is removed and kept inside the Jeep when
connected to the motorhome's air hose when towing.
|
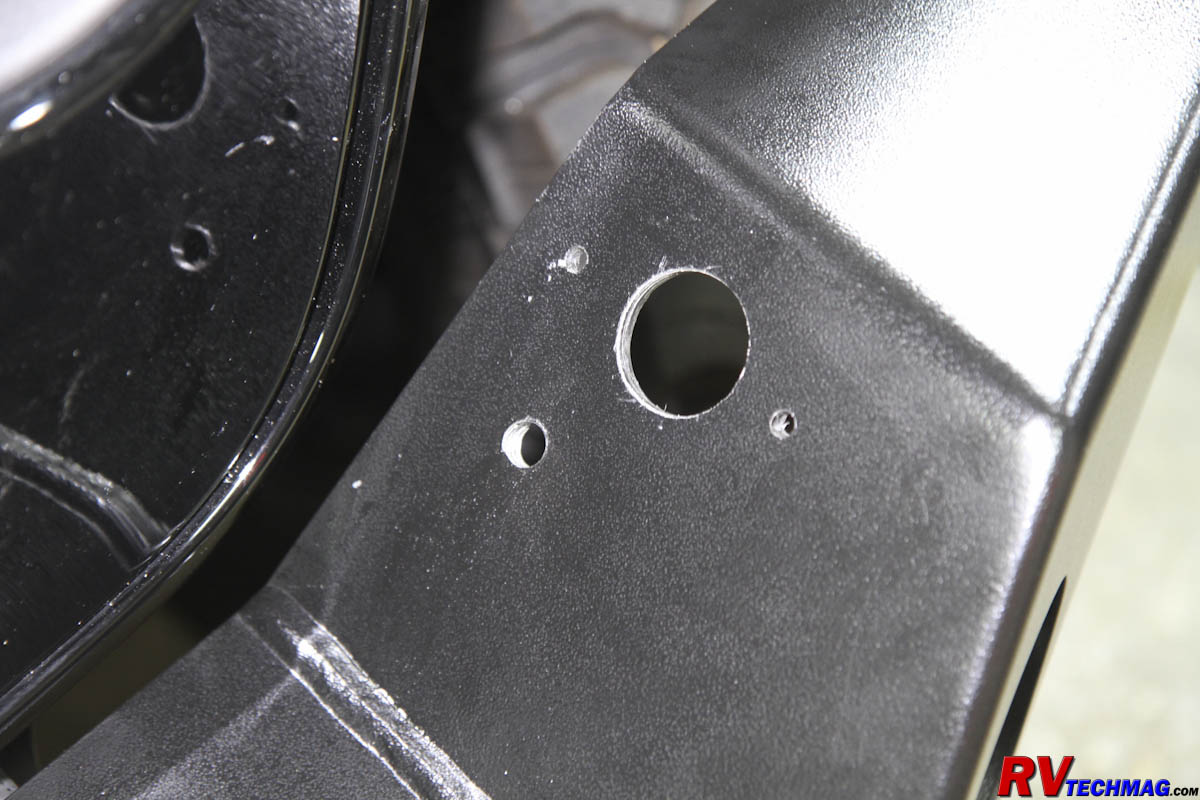
Pre-Drilling Holes for the Lighting Cord and Brake Hose
|
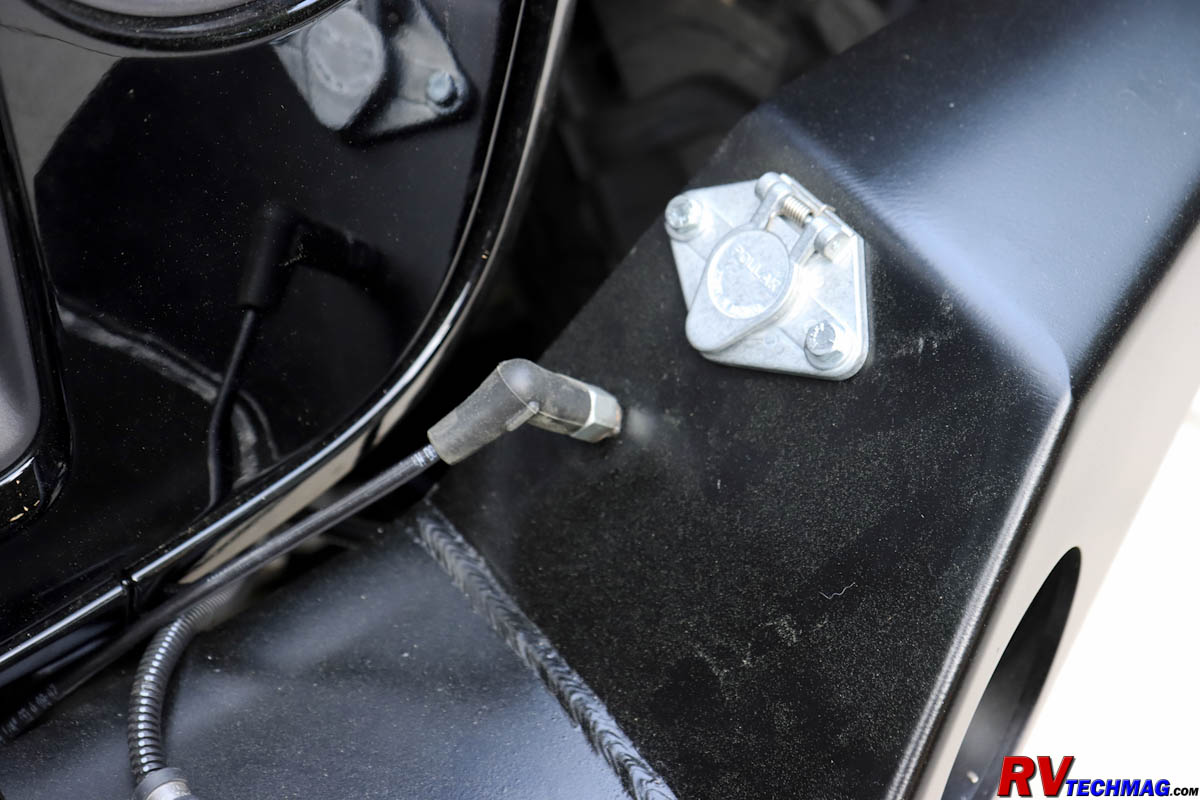
Lighting Socket and Air Hose Connectors Installed
|
Rear Bumper
The next step was to install the rear bumper. Removing the existing plastic bumper was easy enough but once again, it had
to be disassembled so that I could remove the parking sensors that were mounted in the bumper. Once I removed a ton of screws and nylon push-pins
I could access the sensors. They simply popped out of their holders and I could insert them into the new holders that came with the Rockhard bumper.
Rockhard pre-drills locations for these sensors and also supplies plugs to fill those holes in the event the owner does not have the parking
sense option on their Jeep. The biggest issue was that the original Jeep bumper has sensors mounted evenly across the width of the bumper. The
Rockhard bumper has an integral trailer hitch in the middle of the bumper and relocated the license plate to a safe spot just off-center of the
bumper while still allowing locations for the retrieval D-rings at the strongest point of the bumper, which is close to the frame rails. This places the
sensors further apart and closer to the ends of the bumper. This method works fine but the original Jeep wiring harness won't reach all four of
the sensors. The solution was to cut into the harness and extend the two middle connectors so that the harness will reach all four of the sensors. The
wires were of a small gauge and wrapped in a protective nylon mesh loom so it took a bit of effort to cut through the loom without damaging the wires
so that they could be lengthened and soldered when modifying the harness. Once that was done, the rest of the task went easily. The original
trailer hitch is removed because the new bumper has one built into the bumper. I installed the license plate, the license plate light, the trailer
lighting sockets and hung a pair of red D-ring shackles on the retrieval lugs.
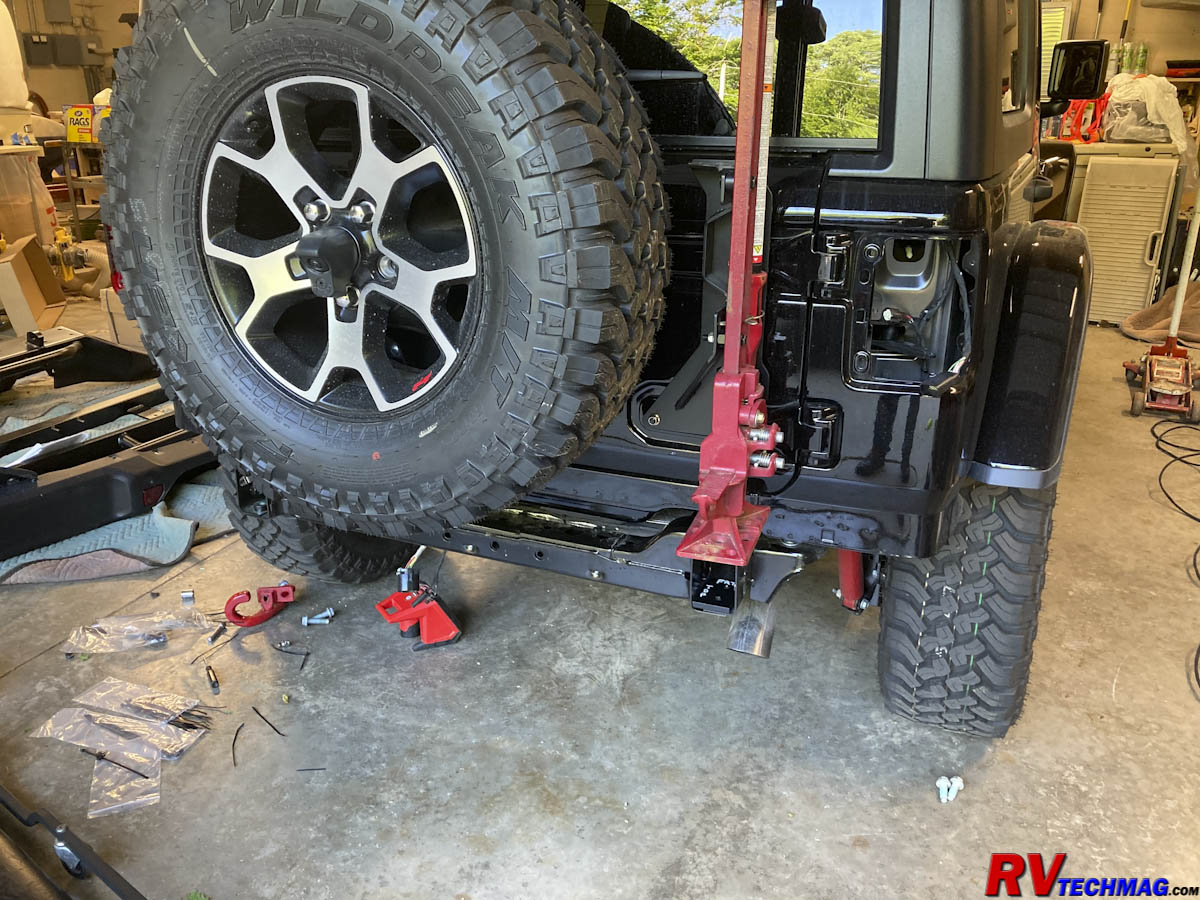
The original bumper removed
The original bumper also had a dished cutout to allow the spare tire to be mounted low enough on the tailgate. The Rockhard bumper is
designed with higher ground clearance and is stronger so the tire does not have a cutout to drop down into. This requires raising the tire up a bit to
clear the bumper. Rockhard offers an adjustable spare tire carrier that can raise the tire up to 6" and can handle a 35" tire if necessary. The carrier replaces
the factory tire carrier and does not require any drilling to mount, using the original mounting holes in the tailgate. It also has brackets for mounting a pair
of CB antennae if desired and will retain the factory third brake light. It utilizes the same mounting system for the rear backup camera so you won't lose
any of your original factory equipment.
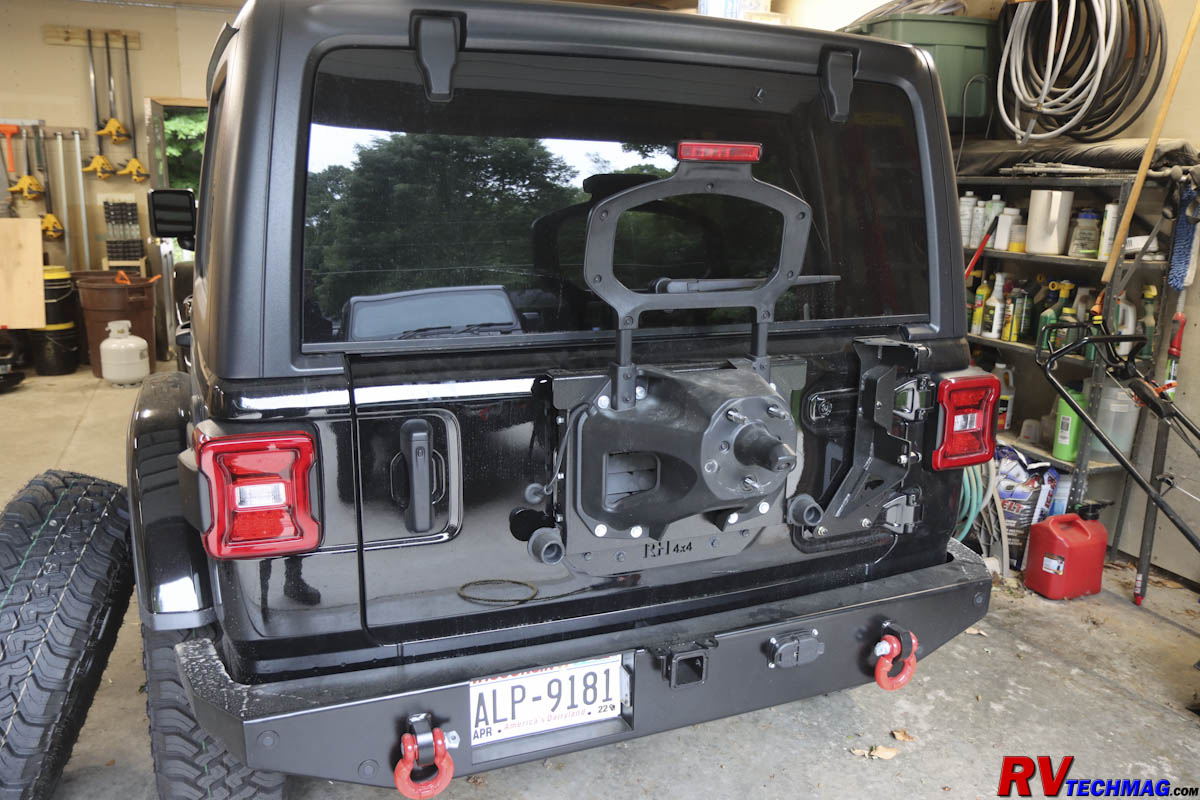
The Rockhard Spare Tire Carrier and Terraflex Hi-Lift Jack Mount Installed
I also installed a Terraflex Hi-Lift jack mount on the rear tailgate. This allowed me to carry my Hi-Lift jack in an out-of-the-way location.
The bracket mounted to the existing hinge bolt locations and will work with any rear bumper. In fact, as one of the above photos show, I actually installed this
prior to the rear bumper installation.
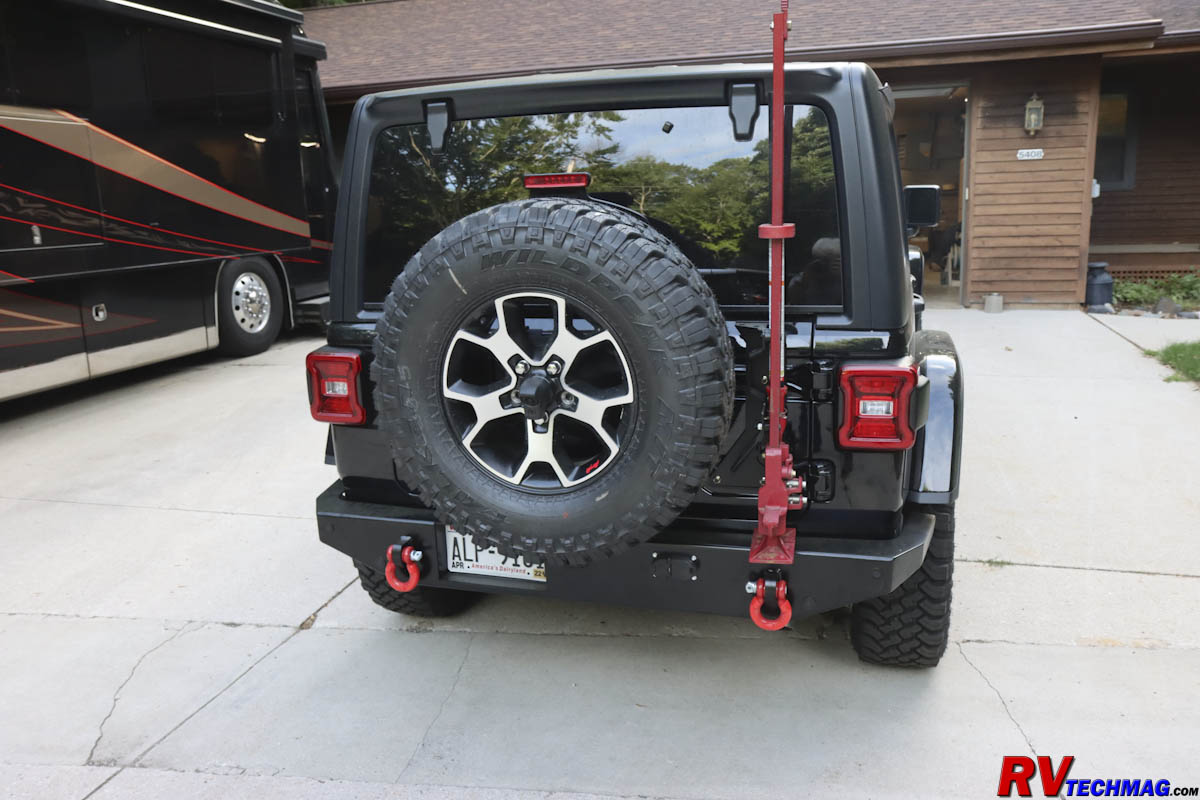
The Completed Rear Bumper and Jack Mount
Tow Lighting Harness
The next step was to install the Mopar wiring harness for flat towing lighting, which was actually 4 separate harnesses. I
began with the rear harness at the back of the vehicle. The tail lights were removed and the harness was fished between the two tail light
housings. Male and female plugs on the harness intercepted the plugs that ran to the lights. The harness also included wires for the existing license
plate lamps so that they too would operate when towing. A tail on the harness hung down from the right tail light area and connected to a second harness,
which ran from that location up to the engine compartment, terminating near the battery.
The middle harness required removing the right-rear tire so that I could access the nylon push pins in the inner fender. The harness
then passed behind the inner fender and the push-pins were replaced with new ones, which came in the Mopar harness kit. The harness then went forward inside
the frame rails and I used nylon cable ties to secure it in place, eventually popping up in the engine compartment near the battery. This was the perfect location
because there was a recommended ground stud close to the battery that the harness needed to be connected to. There was a small plastic box that contained 4 fuses to
protect the lighting system and the front harness also plugged into this connection. At this point I should mention that the relays that control the lights are
located behind the tail light housings and are part of the harness.
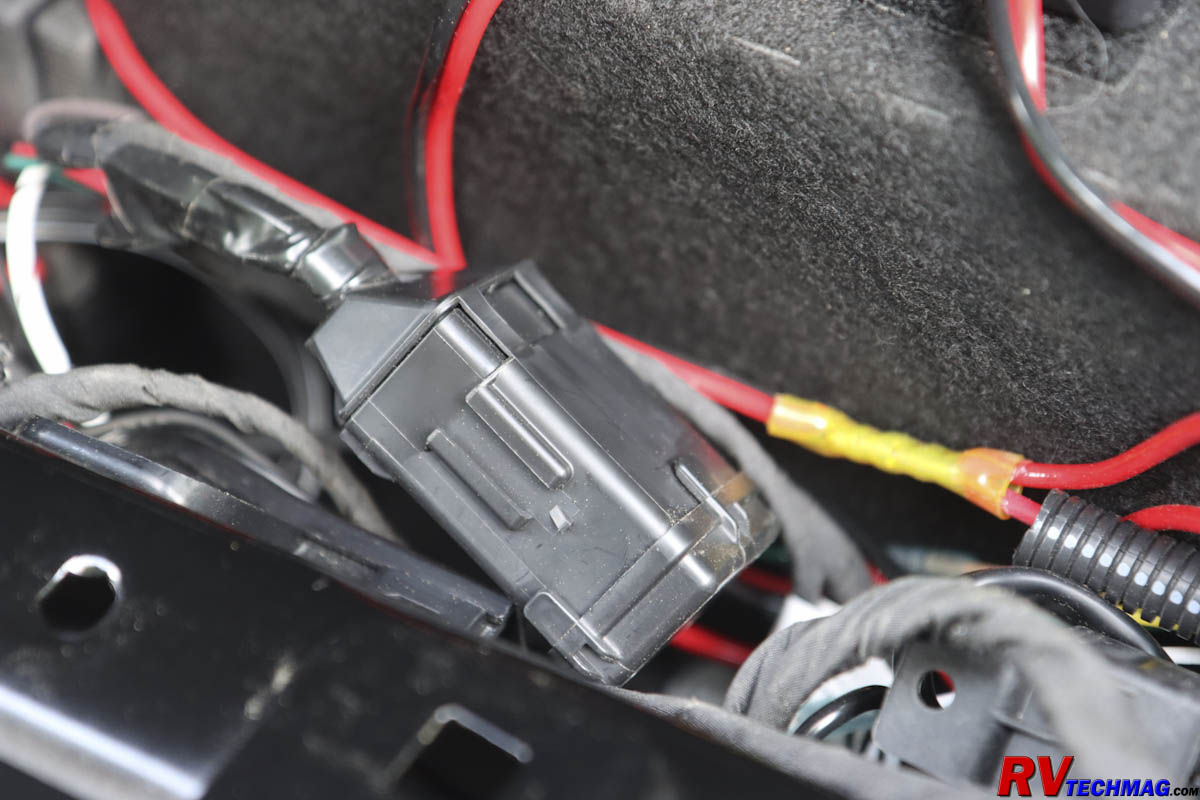
The Mopar wiring Harness Fuse and Connection Box
The next step was to install the front harness. This required a bit of modification
because the harness was originally designed for the
factory plastic bumper. A special DIN style connection was to mount to the plastic bumper and a stiff cord with a 7-pin RV style plug on the other end would be
used to connect to the motorhome. I didn't like the stiff cord nor did I want to use Mopar's funky connector, plus I eliminated the plastic bumper. So I cut the end
the front harness off to remove the oddball connector. I was then able to extend the wires slightly so that it would reach the far corner (driver's side) of the bumper,
where I had installed a standard 6-pin connector commonly used in this application. I then used standard 7-pin to 6-pin slinky cord to connect to the RV.
Once finished the Jeep's lights worked normally when driving. As soon as I plugged into the motorhome the Mopar harness knew it was connected
by sensing the 12 volts on the battery charge pin from the RV and immediately engaged the relays to switch the Jeep's lights over to the motorhome circuits. I also added
an RVI Towed Battery Charger underneath the
Jeep's hood. This allows for a regulated charge from the motorhome to the Jeep's battery. It protects the wiring from any short circuit fires and acts as a one-way
check valve to prevent the Jeep's battery from draining out and backfeeding to the coach when parked.
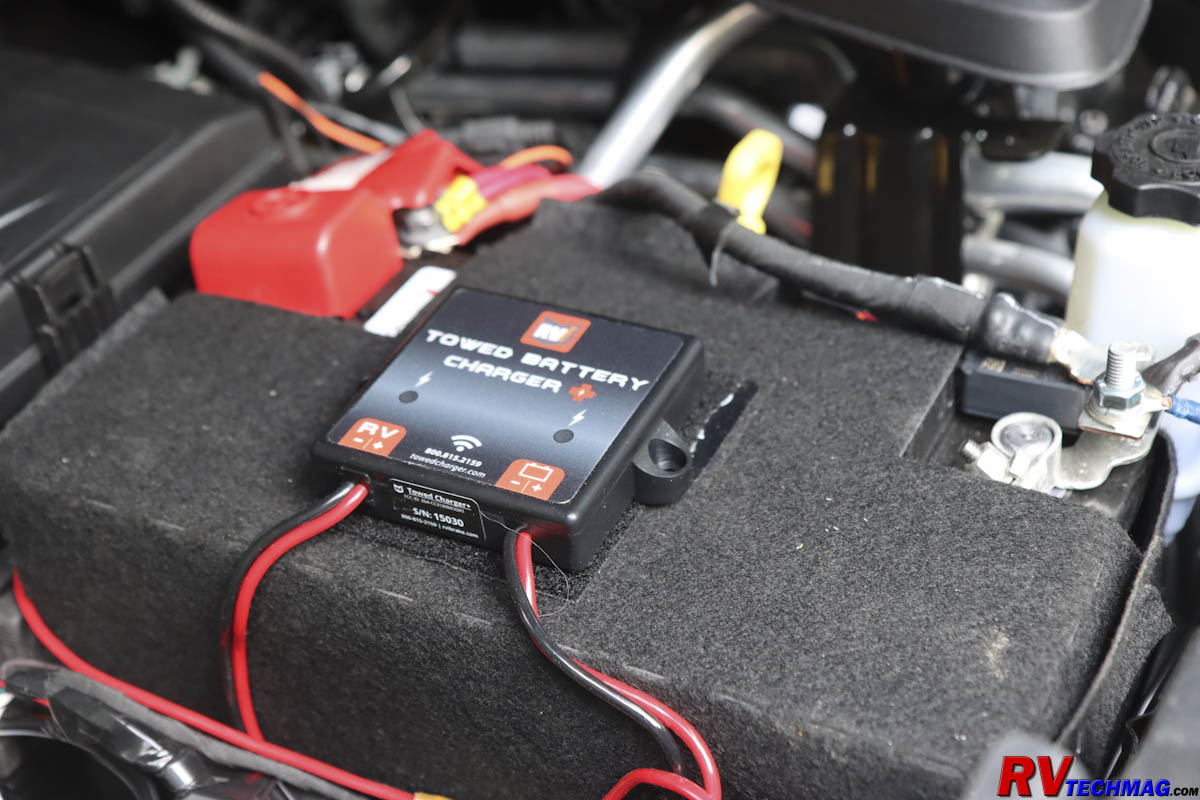
The RVI Towed Battery Charger
Return to Home Page
If you enjoyed this article be sure to recommend RVtechMag.com to your friends, like us on Facebook or Twitter
or subscribe to our RSS feed.


|


