2021 Jeep Wrangler Modifications
Creating a Flat Towable Rock Crawler
Article Date: July, 2021
Article and Photography by Mark Quasius
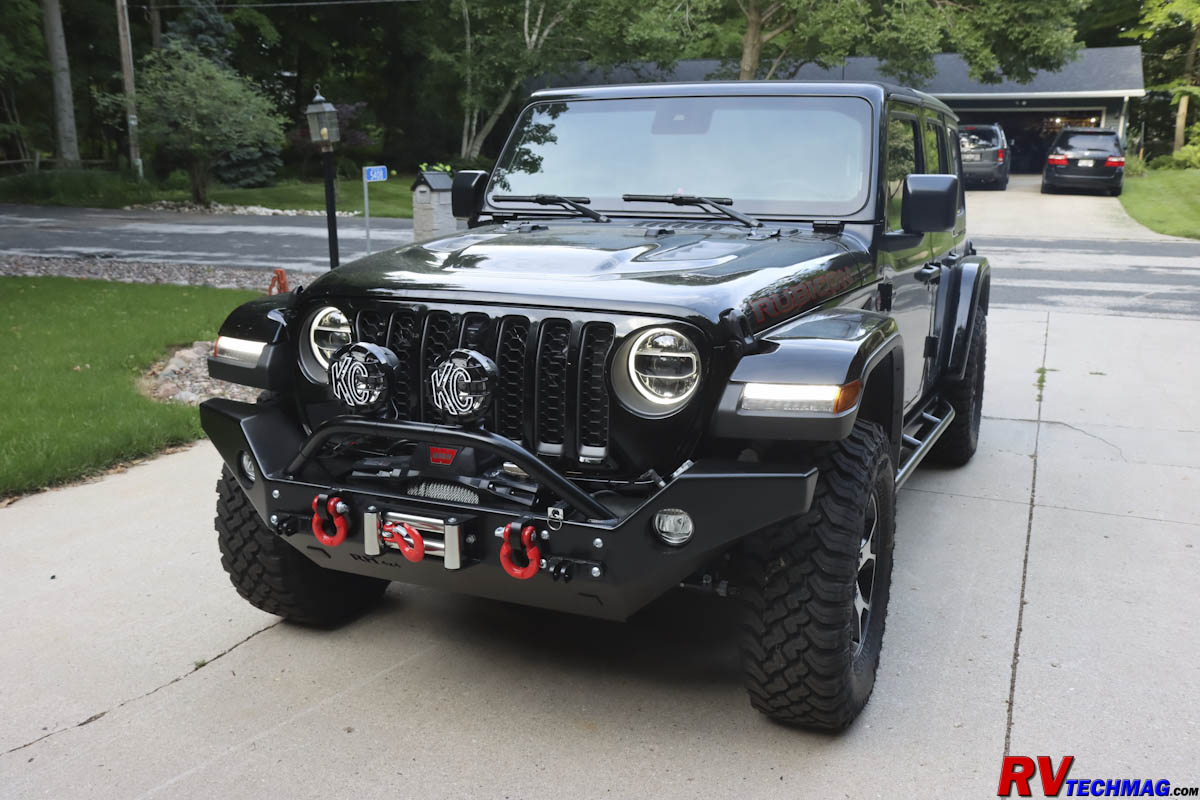
M&G 2.0 Tow Brake
The next step was to install the M&G 2.0 supplemental braking system so that the Jeep's brakes would operate in tandem with the motorhome's
air brakes when towing. This system utilizes an air cylinder with cable that connects to the brake pedal to actuate the Jeep's brakes whenever the motorhome brakes
are applied. This cylinder mounts underneath the hood, along with a breakaway valve that utilizes a small air tank operated by a 12 volt solenoid valve to apply the
brakes should the vehicle become disconnected from the motorhome while in transit. This valve is triggered when the bumper mounted breakaway switch completes the
12 volt circuit to the solenoid, allowing the charged up air reservoir to operate the braking system's air cylinder that operates the brake pedal.
|
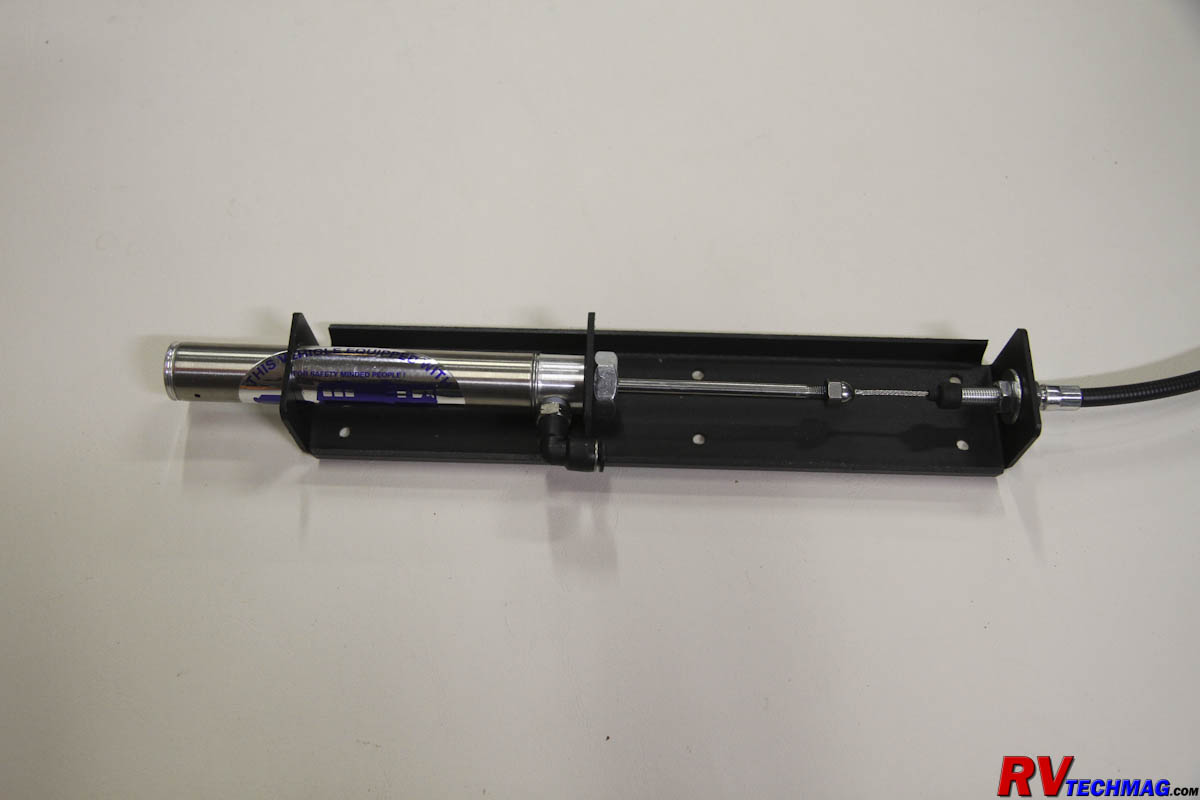
The Air Cylinder Mounts in the Engine Compartment to Control the Brake Pedal Via a Stainless Steel Cable Assembly
|
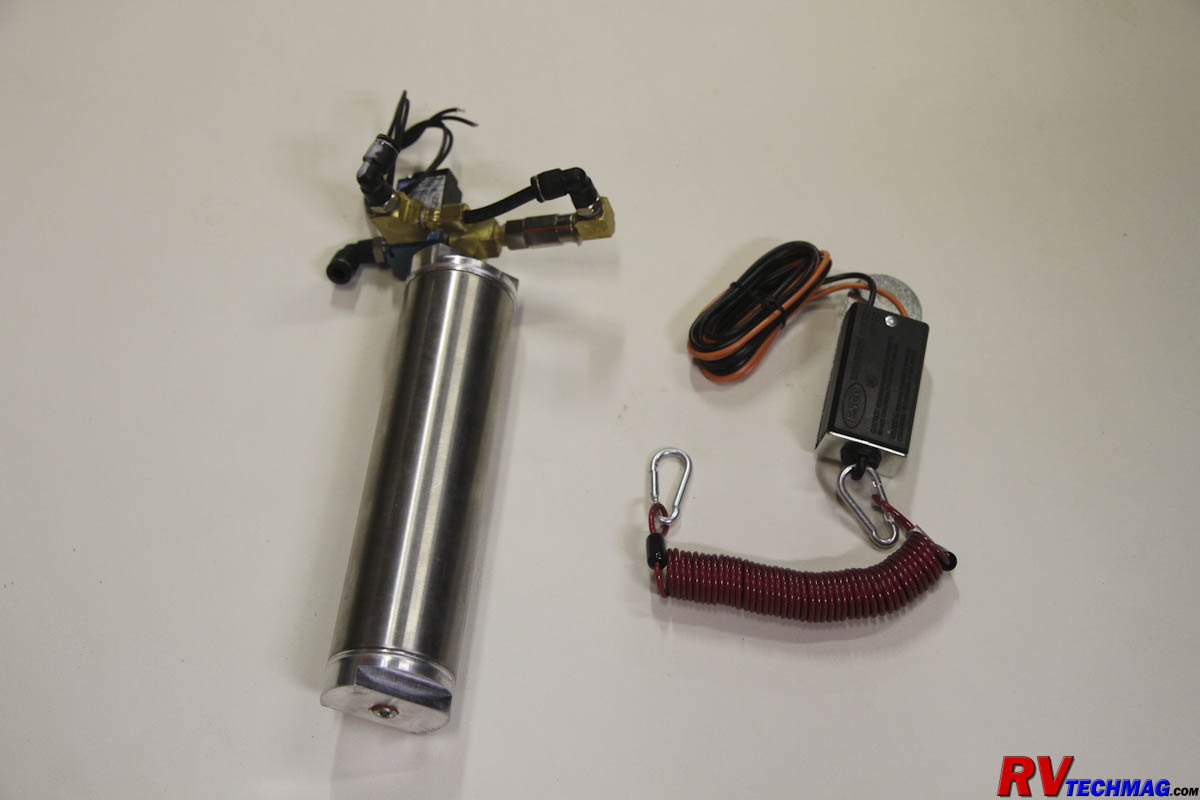
A 12 Volt Solenoid Valve, Mounted on a Small Air Tank and 12 Volt Breakaway Switch is used to Apply the Brakes in the Event of a Breakaway
|
The breakaway switch was mounted to the front bumper and wires connected it between the battery and the solenoid valve, which was
mounted under the hood on the driver's side. Room was limited and I
found the best way to mount it was to use heavy duty nylon cable ties to secure it to
existing wiring looms. Air lines were then run from the quick disconnect fitting on the front bumper and the M&G air cylinder to the solenoid valve.
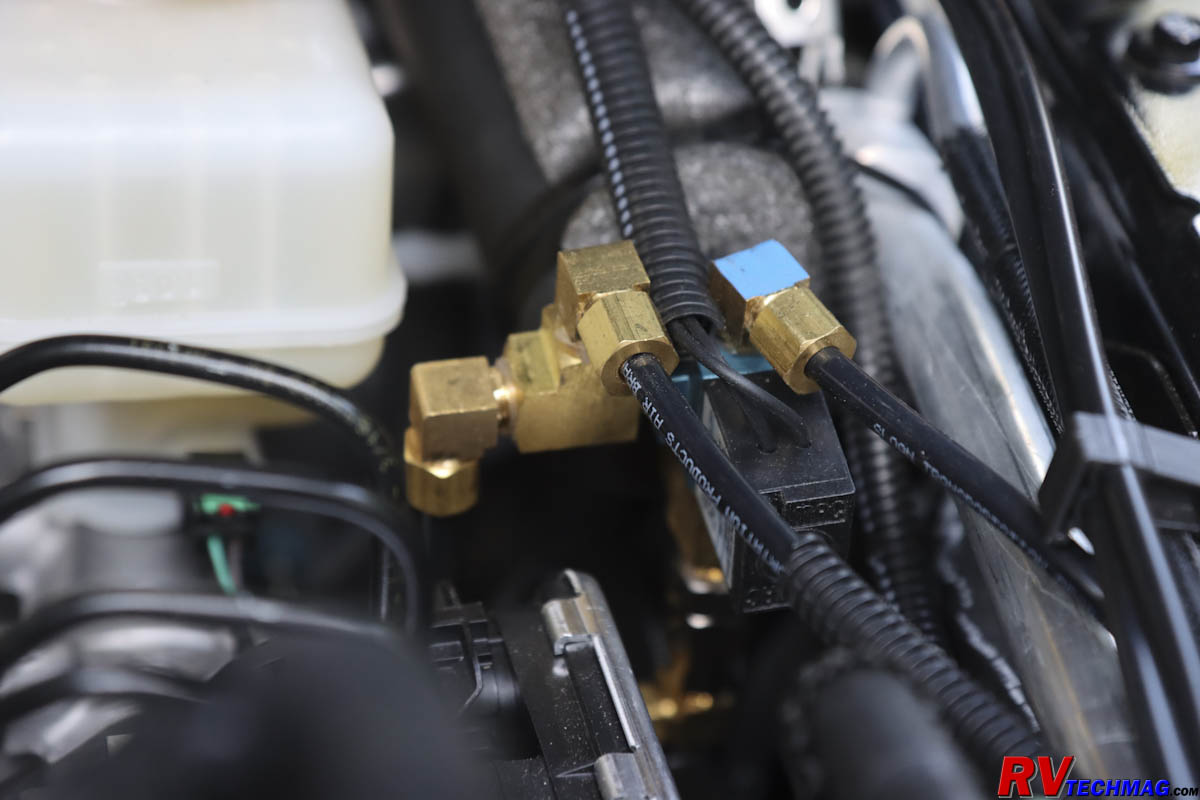
The Solenoid Valve and Tank Assembly Were Installed on the Driver's Side of the Engine Compartment
Supplemental braking systems require a constant supply of vacuum to operate the power brakes. Most Mopar products already have a
12 volt vacuum pump on board that provides vacuum when the ignition key is on so there is no need to add another but you do have to wire it so that it will
operate when towing and the ignition is not on. This entails tapping into the existing vacuum pump wiring so that the pump can be powered from the 12 volt
battery hot feed from the motorhome's trailer lights socket. However, you don't want the pump to run non-stop so a vacuum switch is provided by M&G to
allow 12 volt power to the pump only when the power brakes booster is low on vacuum. This unit gets mounted in the vacuum line by the booster and 12 volt
power is run from the motorhome's battery hot power feed to the switch and then on to the Jeep's vacuum pump,
where you tie it into the pump's existing
wiring.
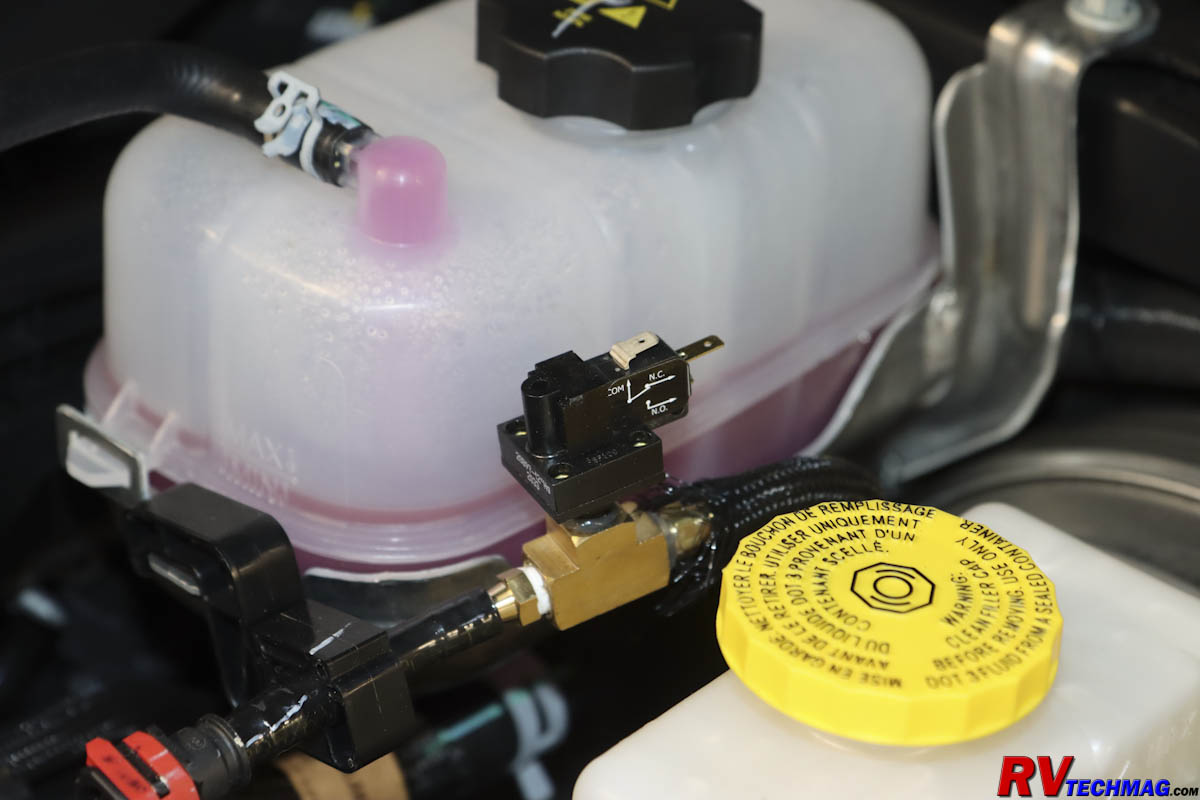
The Pressure Switch for the 12 Volt Vacuum Pump was Mounted in the Vacuum Line to the Power Brake Booster
The original purpose of the battery hot feed from any RV or tow vehicle to a trailer or towed vehicle is to allow the towing vehicle
to keep the battery on whatever you are towing charged up as you drive. You do have to prevent backfeeding or else the towed vehicle's battery will discharge
back to the motorhome when you are parked. It's also important to have a fuse at each end of this circuit to prevent burning up your wiring if a short circuit
develops in that circuit. Most motorhomes will have a fuse but a short circuit can draw power from the towed vehicle's battery as well so you need to install
a fuse on that end too. The easiest way is to add a toad charge module. I chose the
RVI Towed Battery Charger. This module
is placed under the hood and connects the Jeep's battery to the battery feed from the RV. It serves as a check valve to prevent backfeeding as well as a fused
cutout to prevent damage from short circuits. In addition it's a smart module and will regulate the voltage flow from the RV. It will also monitor the toad's
battery voltage and RV voltage and control the current flow accordingly to prevent overcharging. LED status lights on the module will inform you of voltage
levels in both vehicles.
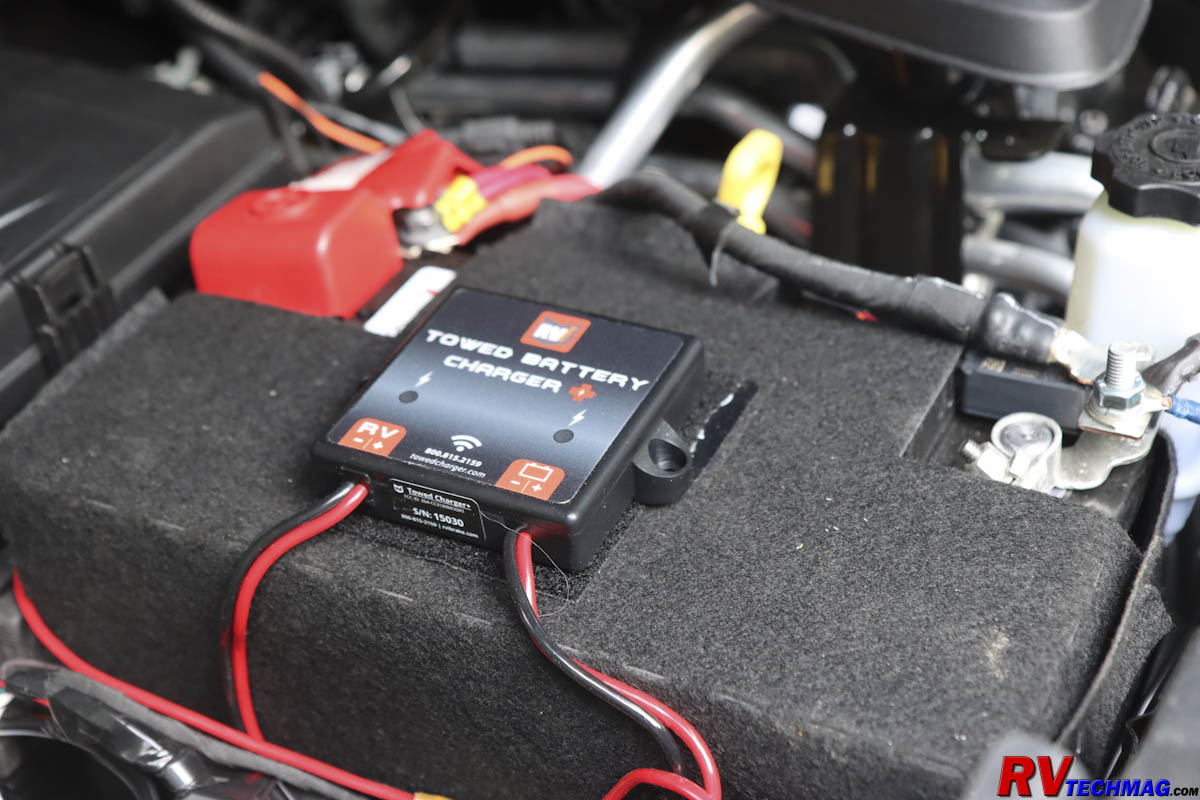
The RVI Towed Battery Charger Was Attached to the Jeep's Battery Cover with Velcro
I mounted the RVI module on top of the Jeep's battery cover, which was sort of a fuzzy fiberboard cover. I applied the hook portion of some
Velcro to the backside of the module and it stuck perfectly on the battery cover. I then connected the wires to the Jeep's battery and the incoming battery feed from
the motorhome. This module was really required and it just would not work to use a simple 12 volt wire, fused at both ends for my application. The Mopar wiring harness
senses the presence of 12 volts on the motorhome's change wire. If that wire is also connected to the Jeep's battery it would fire the relays all the time and I wouldn't
have any rear lights when driving the Jeep. In the same manner the 12 volt signal from the RV also is used to power the Jeep's vacuum pump for the power brakes, which
would have power all the time, even when parked in the driveway. The only way around this would be to strictly use the motorhome's charge line to power these two
circuits and not connect that line to the Jeep's battery or else to insert a diode near the Jeep's battery to prevent any backfeeding. However, I did want to keep
the Jeep's battery charged while driving and I don't trust diodes because I've seen too many fail. I could just see me driving around with no rear lights because I didn't
know that the diode had suddenly failed. So I installed the RVI controller to realize all of its benefits and made sure that I connected the Mopar wiring harness hot
lead and the M&G vacuum switch for the booster to the RV side of the RVI module to isolate those circuits from the Jeep's battery.
Final Skid Plate Installation
Now that all the wiring was run it was time to close up the bottom of the Rubicon. Rockhard's complete bellypan skid plate system
consisted of a number of skid plates that were installed in steps. The first step was to remove the existing sheet metal skid plates that protected the transfer case
and part of the transmission. These were mounted on light tubular cross beams that spanned the frame rails and wouldn't be able to withstand much more than light brush
so they wound up in the scrap iron barrel pretty quick. Rockhard found out during the Moab Jeep Safari that the newer JL and JT frames are stronger but also thinner
so they would twist when under heavy off-road articulation. To combat this Rockhard added two new crossmembers to prevent twist as well as provide a strong location
to mount the center section skid plate section too. Rockhard provided a complete set of hardware with their skid plates for places where the factory hardware could
not be used. Once the crossmembers were installed the large center section was hoisted into place with a floor jack and bolts were inserted to mount the skid to the
new crossmembers. All fasteners were left loose to allow shifting during assembly. Once all of the skid plates were mounted, the fasteners were fully tightened.
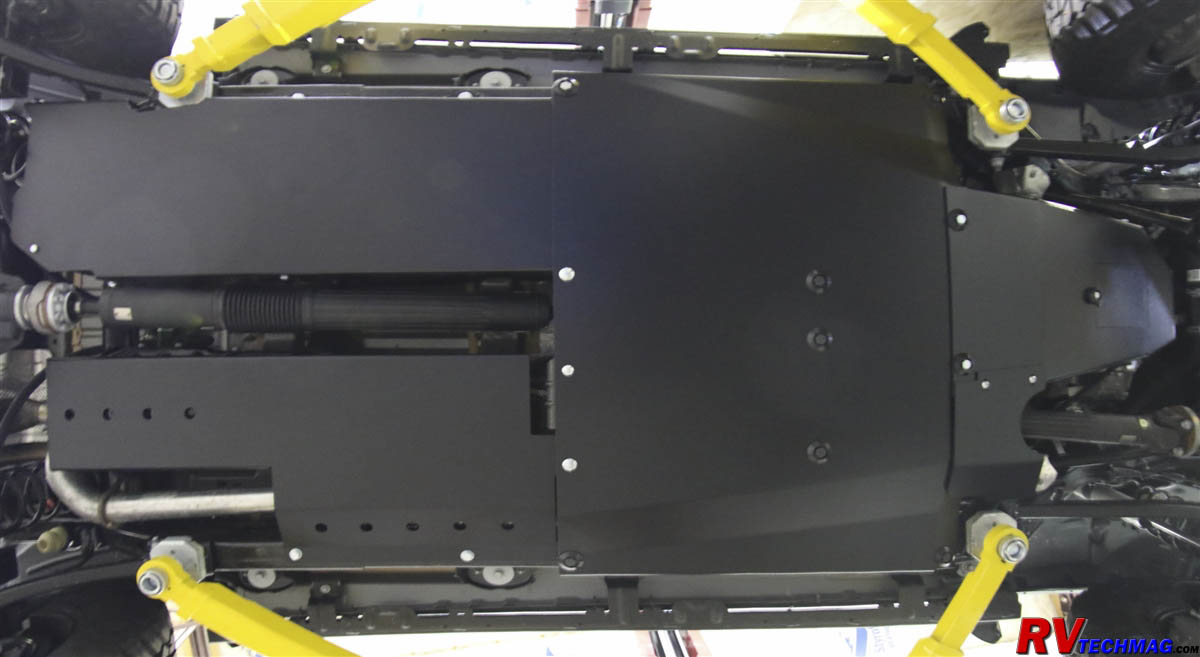
The Complete Bellypan Skid Plate System
The next plate was the fuel tank skid, which placed right over the existing fuel tank mounting tray and held in place with bolts to the existing
holes in the body and to a couple of new heavy steel braces provided by Rockhard. This skid tucked in above the main center skid plate at the front edge and was bolted
in place. A resonator skid plate was placed alongside the driveshaft opposite the fuel tank, leaving a slot for the driveshaft to pass between the two skid plates.
This plate was hung on some new brackets and also covered the 48 volt battery for the E-Torque V6 to protect it from damage. Up front the engine skid plate was added.
This skid plate mounted to the main center section plate at the rear and to a pair of Rockhard-supplied brackets that attached to the motor mounts at the front. The
oil pan skid contained a removable steel panel to allow easy access to the oil pan drain plug for easy oil changes.
While not part of the complete bellypan system, I felt it was necessary to also install the muffler skid plate. This skid protects the muffler at
the rear of the vehicle from damage and mounts to the frame and a pair of hanging brackets. At this point the bottom of the Wrangler was starting to look like the bottom
of a Panzer but we weren't done yet. I also installed the lower front and rear control arm skids, the front axle disconnect skid and a pair of Rough Country differential
skids to protect these areas from potential damage when rock crawling. I replaced the standard Rubicon rocker panel rub rails with Rockhard's tubular sliders as well.
They were a simple bolt-on except I did need to clean up the holes in the pinch rail a bit with a drill to allow the sliders to slide into place.
|
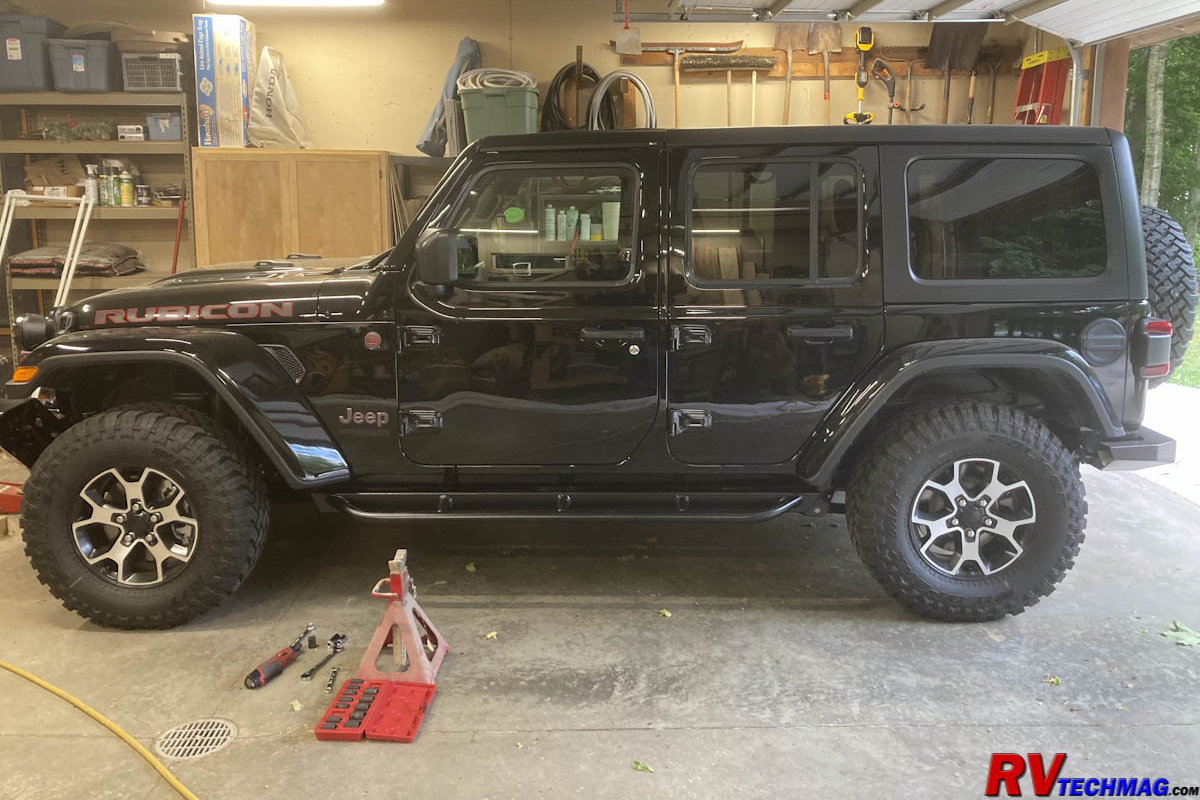
Installing the Rockhard Rocker Panel Sliders
|
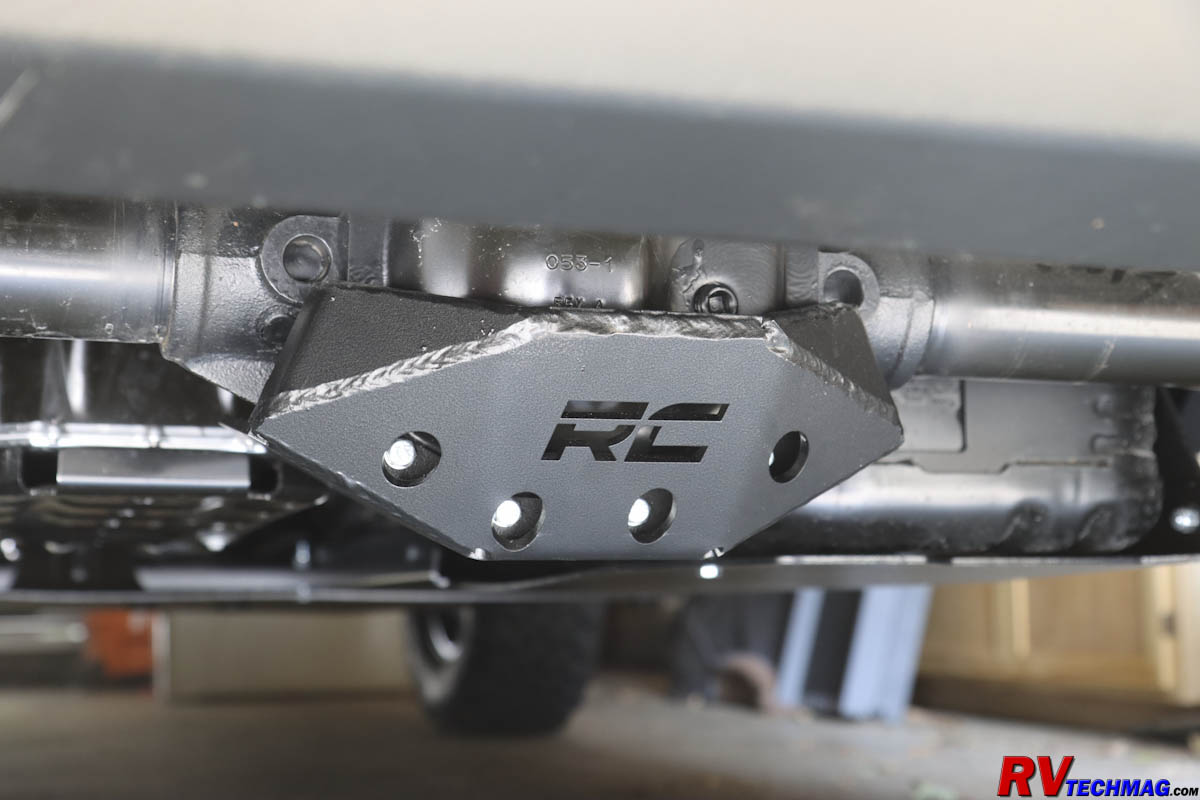
Rough Country Differential Covers Were Installed on Both Axles
|
Once everything was installed I test drove the Jeep to detect any rattles. Everything was fine and the lighting and braking systems worked
as they should but I took height measurements both before and after and found that the Jeep had settled, mainly in the front end, after adding all the extra
weight from the heavy bumpers, winch and skid plates. The end result was that the front end drooped down about 1-3/4" from it's original height and the rear end dipped
almost 1/2". To compensate for this I added a Daystar 1-1/2" front end lift kit. This kit consisted of front coil spring spacers and shock absorber extensions. I
jacked up the Jeep's front end and placed a set of jack stands under the frame rails behind the front wheels. I then disconnected the axle's sway bar and shock absorber
mounting bolts. I also removed the bolt holding the brake line's bracket to the lower control arm so that it wouldn't stretch the brake hose when I raised the Jeep and
dropped the axle to remove the coil spring. The spring came out easy enough and I added the new 1-1/2" spacers and reinserted the coil spring, using my floor jack to
raise and lower the axle.
I decided not to use Daystar's shock absorber extensions that came in the kit because I really wasn't lifting the Jeep. I was simply returning
it to its previous level so the shock absorber travel would remain as it was. Had I actually wanted to lift the Jeep I would have bought a better kit with new springs,
shocks and other components. The end result was that the front end returned close to its original height. Because I did not do anything to the rear axle the new weight that
caused it to drop 1/2" was acceptable. Wranglers come from the factory with a 1" rake to them, which might be nice for fuel economy but they look better if they sit flat.
The slight drop at the rear brought it very close to flat and the Wrangler looks better so
everything worked out just fine. And we are ready for out next trip and
off-road adventure.
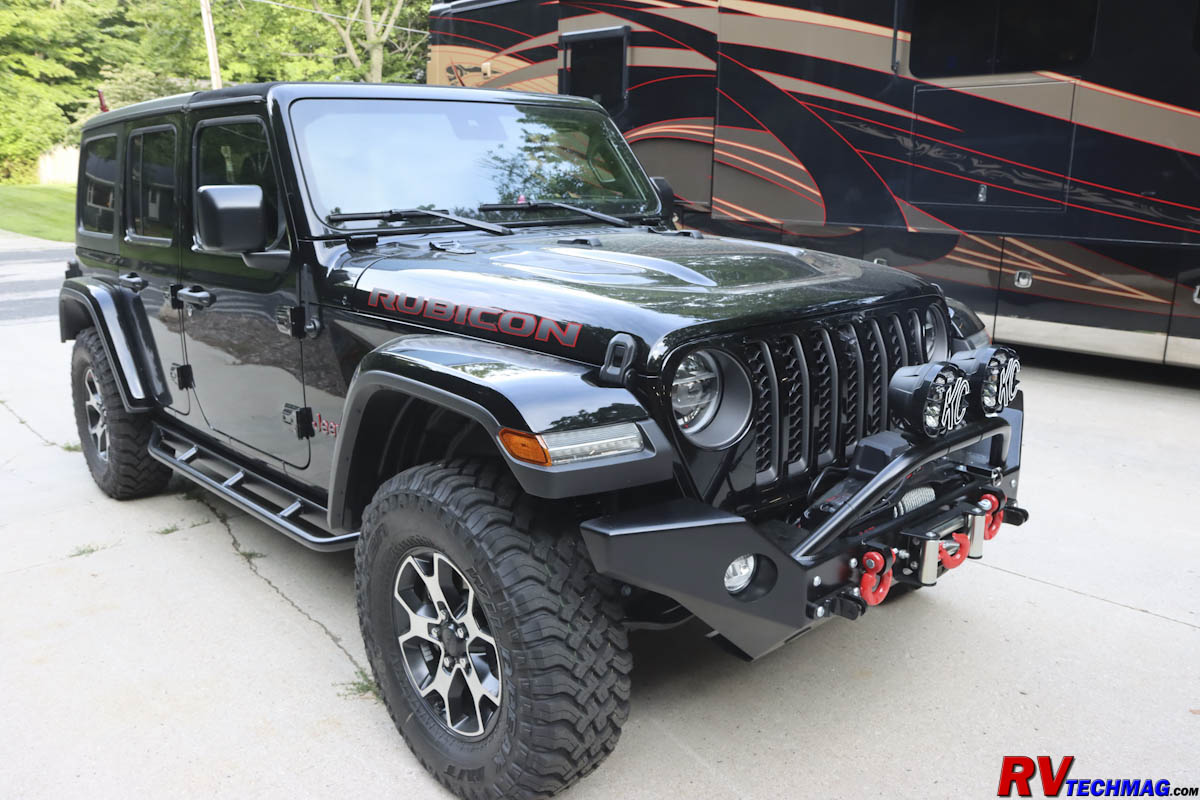
The finished project.
Sources
Return to Home Page
If you enjoyed this article be sure to recommend RVtechMag.com to your friends, like us on Facebook or Twitter
or subscribe to our RSS feed.


|


