RV Chassis Lubricants
Selecting the Correct Lubricant
Application for Your Motorhome
Article Date: September, 2014
Article and Photography by Mark Quasius
A motorhome chassis is made up of quite a few moving parts. Engines and transmissions that propel these large vehicles
require lubrication to keep all of these moving parts operating in harmony. Chassis components also require lubrication. If you put the wrong
lubricant in or fail to keep adequate lubrication levels or service intervals up and you'll have some expensive repair bills looming in your
future. In this section I'll try to detail some of the basics behind the various lubricants. Most lubes are designated with a series of API or
MIL category numbers. Choosing the proper lubricant consists of reading the owner's manual for your specific RV in order to determine which API
service level you need to meet, then matching the lubricant's viscosity to the specs that relate to your operating environment. Note that this
tutorial only serves to enlighten you as to some of the differences between the various lubricants. It does not replace your owner's manual,
which will be the ultimate guideline to the service schedule that pertains to your RV. I've broken each section down by lubricant class so that
you can easily access any specific area of interest that you may have.
Engine Oils
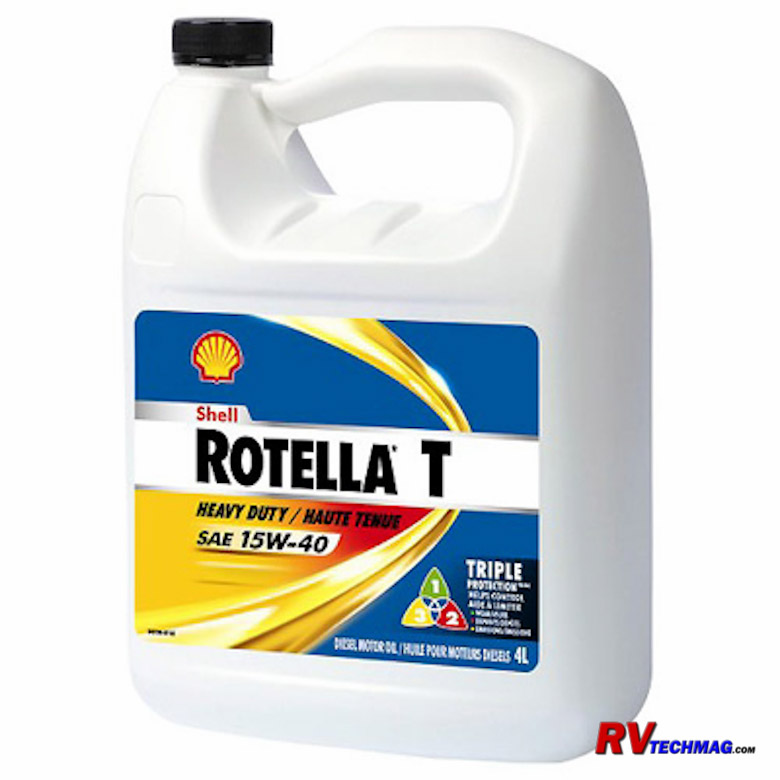
Motor oil is the life blood to your motorhome's engine. Without it, your engine will just be a big, heavy pile of scrap.
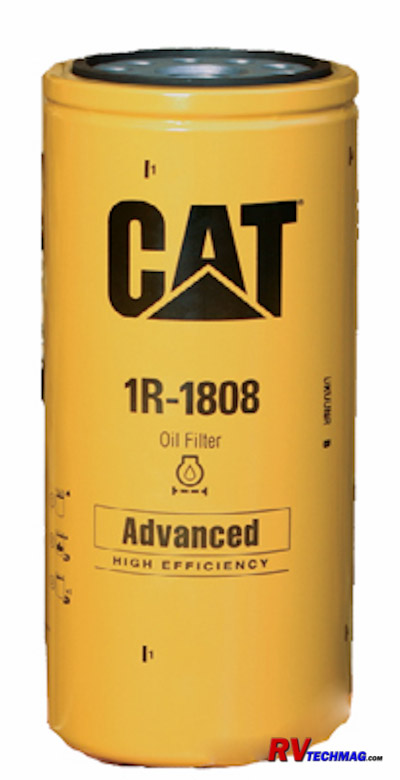
To maintain your engine in operating order you'll need to provide the correct weight and rating of oil and you'll need to service both the oil
and oil filter on a regular basis. In the following paragraphs we'll try to demystify motor oil and provide you with some information so that
you can make an informed decision regarding how to properly care for your motorhome's engine. Note that this tutorial only serves to enlighten
you as to some of the differences between the various lubricants. It does not replace your owner's manual, which will be the ultimate guideline
to the service schedule that pertains to your RV.
Viscosity
Viscosity is just another term for "Thickness". Thick oils flow slowly while thin oils flow fast. As the oil heats up, it
becomes thinner, flows faster, and doesn't provide as much lubrication at higher temperatures. When the oil gets cold it thickens, flows much slower,
and won't provide adequate lubrication if it gets too thick. For this reason, oils are rated by the Society of Automotive Engineers (SAE) according
to a standardized numbering system. basically they heat the oil up to a 210 degree temperature and measure how long it takes for a given amount of
oil to pass through a standardized diameter hole. Thicker oils take longer to drain through the oil so they receive a higher rating number than a
thinner oil that flows through much quicker. Therefore an SAE 40 rated oil will be thicker than an SAE 30 oil. These numbers are rated at the 210
degree temperature and can be useful for determining how that oil will perform in summer use but it doesn't take into account the low temperature
performance of the oil, which is necessary for cold winter startups. A second test is taken at 0 degrees F for winter oils and these ratings are
given the "W" rating. Therefore an SAE 10W oil is thinner than a 20W oil.
Thick engine oils provide good protection in hot engines because the oil doesn't thin out at higher temperatures. But, that
same oil will be fairly stiff when it's cold. In a cold start condition the engine will turn over slowly because of the drag that is placed on the
engine bearings from the cold, stiff oil. Once the engine does start it will take a while for the oil to pass through the oil pump and get to all
the critical wear parts so you'll basically be running without lubrication during those first few seconds. That's why winter oils are created to
allow easier starts and better lubrication during cold temperatures. The problem with this is that eventually the engine will warm up and if you
work it hard the oil will thin out and you won't have very much oil pressure or lubrication going on. This is a problem with single viscosity oils.
Fortunately a solution for this came out in the late 1960s in the form of multi viscosity oils.
Multi viscosity oils are the best of both worlds. They are thin at low temperatures so that their pour point is low enough to
provide adequate lubrication at cold temperatures. Yet, they retain their viscosity at high temperatures and don't thin out like a single viscosity
winter oil does. The SAE has given these a multiple rating and the winter rating will be followed by the summer rating. A 10W-30 oil will have the
low temperature viscosity of a 10W winter oil but will retain it's viscosity up to the same rating as an SAE 30 summer oil.
Modern engines are fitted with extremely tight tolerance compared to engines made 20-30 years ago. It's critical to follow
your owner's manual when choosing your oil viscosity. Not all engines are designed for the same viscosity so be sure to refer to the manual for your
particular application. Keep in mind that operating temperatures play a big part in choosing which oil to use. A 20W-50 oil will probably work quite
well in the middle of a desert but won't work well at all in Alaska where a 5W-30 oil may be a better choice. When choosing an oil for your
application be sure to give careful consideration to what kind of temperatures you'll be operating in.
API Specifications
|
API Classifications for Gasoline Engines
|
|
Category
|
Status
|
Service
|
|
SM
|
Current
|
Introduced November 30, 2004.
For all automotive engines currently in use.
|
|
SL
|
Current
|
For 2004 and older automotive engines.
|
|
SJ
|
Current
|
For 2001 and older automotive engines.
|
|
SH
|
Obsolete
|
For 1996 and older automotive engines.
|
|
SG
|
Obsolete
|
For all 1993 and older automotive engines.
|
|
|
|
API Classifications for Diesel Engines
|
|
Category
|
Status
|
Service
|
|
CJ-4
|
Current
|
Introduced 2007 for the latest engines using a Diesel Particulate Filter (DPF).
Reduced levels of zinc are required to prevent fouling of the DPF. CJ-4 oil is required for
all diesel engines using ULSD fuel and DPF emissions equipment, introduced in 2007.
Can be used in all diesel engines currently in use.
|
|
CI-4
|
Current
|
Introduced September 5, 2002. Designed to meet 2004 emissions standards.
Meets requirements of all LSD (0.5% Sulphur) diesel engines.
|
|
CH-4
|
Current
|
Introduced in 1998 and designed to meet 1998 exhaust emission standards.
|
|
CG-4
|
Current
|
Introduced 1995. Designed for all high Sulphur diesel engines.
|
|
CF-4
|
Current
|
Introduced in 1990.
|
Engine oil isn't just plain old oil. There's a ton of additives that contribute a huge amount to overall performance.
Detergents will aid in cleaning any sludge out of the system, anti-foam agents reduced oil foam, anti-wear additives (such as zinc), will help
prolong the life of engine bearings, anti-corrosion additives reduce the effect that the acids created by normal engine combustion have upon the
internal components, etc, etc. The level of additives helps determine the quality level of the oil. Older engines weren't so picky but over time
engines have gotten more sophisticated as far as emissions are concerned and the quality of the oil has had to increase as well in order to meet
that demand. For this reason you also need to find out which API (American Petroleum Institute) service level you need to meet for your
particular engine. The API service levels determine the quality of the oil. You can always go up a grade to a higher quality oil but you cannot
drop down below the level that your engine requires. So, in addition to oil viscosity rating, it's just as important to watch the API service
category as well. Fortunately, the latest oils have fairly high ratings while the older oils are discontinued so it's not that hard to find the
right oil for your engine. Generally, if an oil is harder to find it's because you've got the very latest engine design and the oil manufacturers
haven't quite caught up yet.
It's important that you use API CJ-4 oils in any diesel engine that meets the new 2007 emissions standards. The 2007 spec
engines began to show up in the 2008 model year RVs. These engines use Diesel Particulate Filters to filter and recycle the engine exhaust gasses.
In addition, only Ultra Low Sulphur Diesel (ULSD) fuel can be used in these engines or else the DPF will foul out and need some very expensive
service or replacement. Oils up through API CI-4 contain zinc and other anti-wear additives which will foul and leave ash content in the DPF so
they cannot be used in the latest engines. API CJ-4 oil was developed with a new additive package that replaced the traditional zinc and other
anti-wear additives with new elements that will not foul the DPF so it's critical that you use API CJ-4 oil in any engine with a DPF.
Synthetic Oil Options
Conventional motor oil is refined from mineral oil that is pumped from the ground. Basically, dead dinosaurs, etc.
Conventional oils contain impurities, like Sulphur, wax, asphalt, etc. because conventional oil is basically "found", rather than "created",
there is a fair amount on inconsistency within it. Synthetic oil, on the other hand, is chemically created in laboratory conditions. This
eliminates any impurities and also provides for molecules that are consistent in size and shape. Basically, synthetic oil is fine tuned.
Because synthetic oil is created from scratch it can have just about any properties the chemist choose to incorporate within it. Synthetics
have the ability to pour at much lower temperatures than conventional oils, which greatly improves cold weather performance. Yet, the high
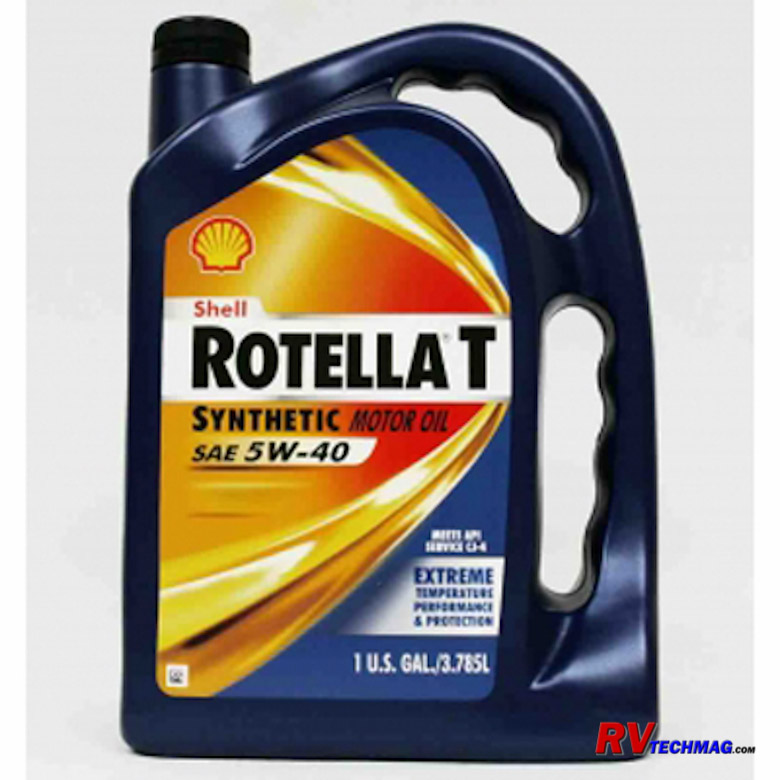
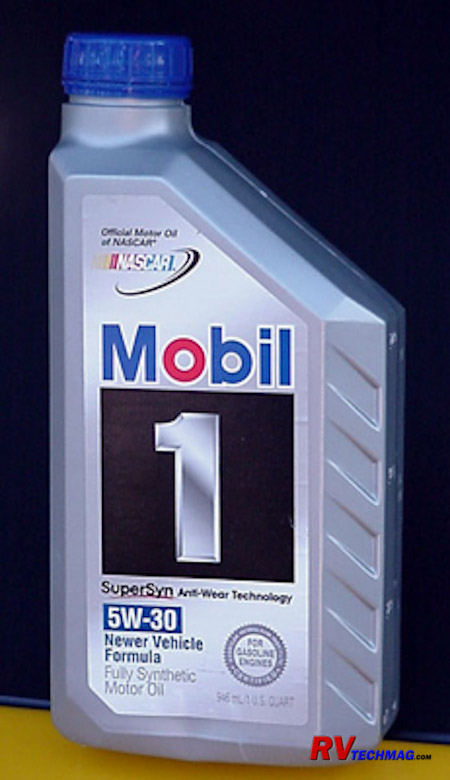
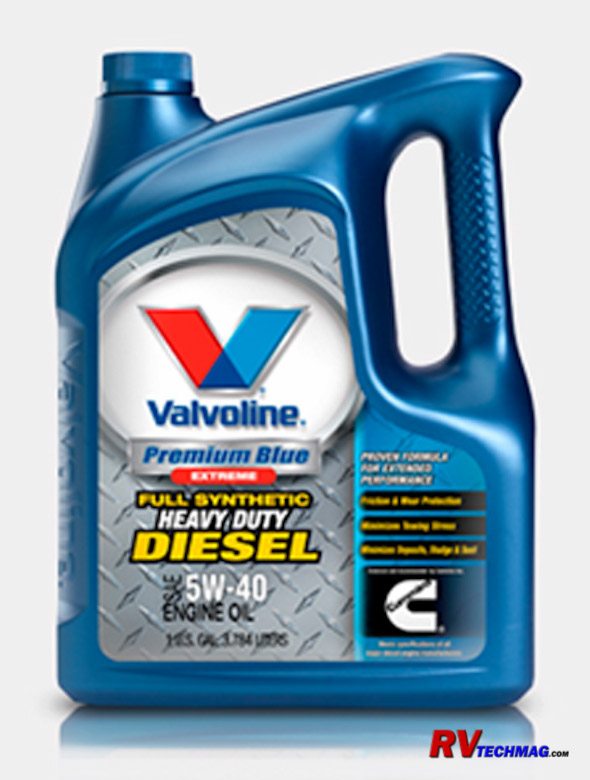
end performance is not diminished. It's common to find a conventional oil rated at 15W-40 while the synthetic version is rated at 5W-40.
All oil will eventually boil. It's just a matter of how hot it needs to get in order to reach it's boiling point. Once that point is reached
the oil vaporizes and forms carbon deposits when it condenses. A typical place for this is piston heads and the piston sides just above the
top piston ring. This is a hot location and as the carbon builds up, it accelerates wear on the engine cylinders and increases oil consumption.
Synthetic oil boils at a much higher temperature than conventional oil so you won't have the carbon buildup that you do with conventional oil
and the oil consumption will be reduced because it remains as a liquid lubricant rather than vapors in the exhaust. Conventional oils tend to
break down once the oil temperature gets to 250 degrees but synthetics are good to 290 degrees and beyond.
Synthetics last longer so the oil manufacturers claim that you can extend service intervals out farther with synthetics.
However, not all vehicle manufacturers state the same so it's possible that extending your service intervals may affect your warranty coverage
should an engine failure occur. In the case of RVs, most RVers change according to time versus mileage anyway because they don't put on that
many miles in a year. So, the extended service interval most likely isn't something that the average RVer will benefit from. But, a synthetic
oil will give better protection for your engine than conventional oils. If you operate in cold weather the benefits of synthetic's low pour
point is a big plus for cold starts. The greater high temperature protection also means that you'll guarantee good lubrication when you are
working the engine hard in extreme conditions. Conventional oil will meet all of the minimum requirements but synthetic just gives you a
greater margin for error. Unfortunately, synthetic oil does cost more than conventional oil. Whether or not you feel that the additional cost
is justified is something that only you can determine.
Service Intervals
Service intervals are always rated by time or mileage. You always perform this service according to whichever happens first.
Oil changes are no different. A typical diesel engine may have a recommended oil and filter change at 12 months or 20,000 miles, whichever happens
first. The majority of RVers will fall under the time rather than mileage criteria. Keep in mind that you are not just replacing worn out oil when
you change it. The oil will flush and accumulate a number of things during it's lifetime that you just don't need in your engine. Engine crankcases
are an extreme environment and many of the byproducts of combustion wind up in the crankcase. These include acids that can eat and pit your critical
wear surfaces, carbon and other grit that can grind away bearing surfaces, etc. Whenever you fire up a cold engine there will be condensation
inside the crankcase. Short runs are bad for this because the condensation never gets a chance to burn away. Running your engine for longer periods
of time and getting it good and hot helps in that regard. There will always be some condensation left though and after a while it will need to be
removed, along with the other contaminants that have accumulated over time. So, it's important that you don't strictly look at mileage as a criteria
for determining when to change your engine oil. Time is just as important and most RVers will change based on time rather than mileage. Always refer
to the service schedule as put forward by your engine manufacturer when determining when to change your oil.
Do Your Own Oil Changes
When you do change, be sure that you have the engine warmed up. Run it long enough to ensure that the oil has had a chance to
loosen up any sludge and carry it, as well as any condensation or foreign particles, out as it flows into the drain pan. Give it plenty of time to
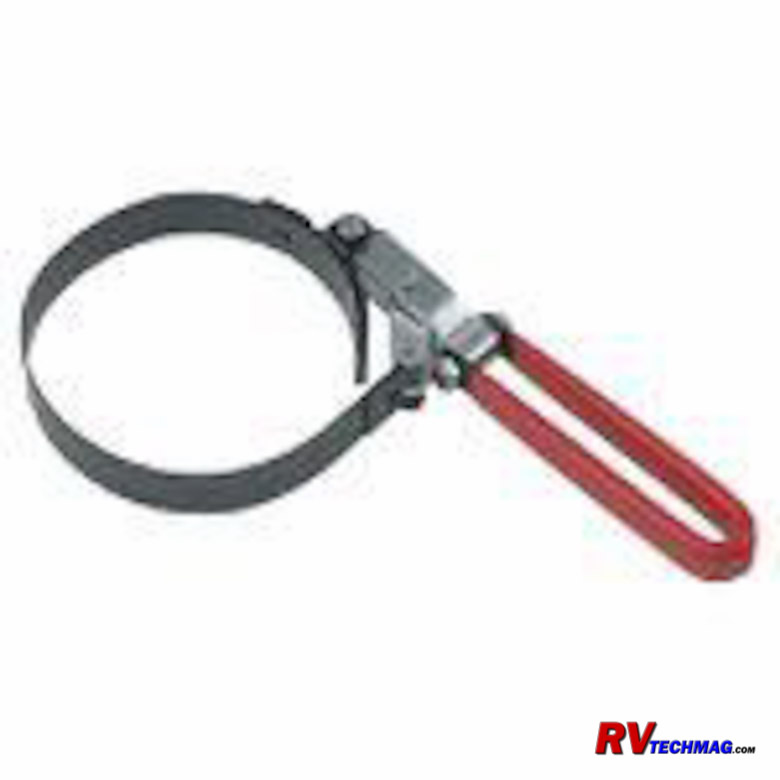
drain - don't rush it. Then reinstall the drain plug and move your drain bucket over to the oil filter and remove the filter. To remove the filter
you'll need an oil filter wrench. Many diesel engine oil filters are of a large diameter than standard automotive filters so you'll probably need an
oil filter wrench that's one size up from the normal size. Conversely, if you plan on changing your own oil on your generator you'll probably need
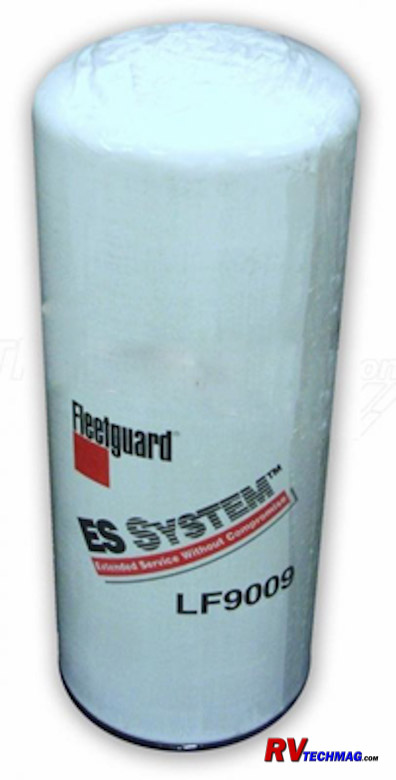
an extra small one so you will probably wind up with three different sized oil filter wrenches in your toolbox. Before installing the new filter be
sure to prefill it with fresh, clean engine oil. If you don't prefill it you'll be starting your engine up without any oil pressure. Given the size
of the filter it will take quite a while before it finally fills up and you'll be running your engine without oil pressure for a dangerously long
time. Always prefill engine oil filters on large diesel engines. Wipe a small film of oil onto the oil filter gasket before installing. If you don't,
the gasket will pinch and bind when you tighten the filter and it'll leak and maybe even loosen up and fall off after a while. An oiled gasket won't
pinch. Be sure to tighten the filter adequately. The larger filters take a fair amount of torque to tighten them so don't be afraid to lean into it
and apply some elbow grease when tightening the filter.
Next it's time to refill the engine with oil. Add the required amount of oil as per your engine's service manual. Be sure to
allow for any oil that you used to prefill the filter with because that oil is part of the total capacity. After you have filled the crankcase with
the correct amount of fresh oil start the engine and observe the oil pressure gauge. As soon as you see the oil pressure gauge move go back to the
engine compartment and check for any leaks, especially by the oil filter. If you find an oil leak, shut the engine off and correct the source of
the leak. Dipsticks can be misleading. The dipstick runs through a very long tube into the crankcase. If this tube is not clamped off at the required
length your dipstick will not read accurately. For this reason it's best to calibrate the dipstick the first time that you perform an oil change on
your coach. Change oil, as detailed above, and run the engine. Once you know that everything is in good shape and that you have added the exact amount
of oil specified to your engine shut the engine off. Let it sit for a few minutes to enable all of the oil to settle into the oil pan. Then remove the
dipstick, wipe it off, and insert it back into the engine. Check it carefully to see what it reads. It's best to take a couple of sample to make sure
that you have an accurate reading. If the oil level is right on the full line you are fine. If not, you can either remember that the "real" full line
is a bit off from there or you can change your dipstick so that it reads correctly. To do this, loosen the clamp that holds the dipstick tube in
place and length or shorten the tube until the dipstick reads accurately. Once it's accurate, tighten the clamps to lock it into place.
Draining a large capacity diesel engine isn't the same as draining your passenger car. Many engines can hold 28 quarts of oil.
That's 7 gallons and that won't all fit into a 5 gallon bucket. You'll need two 5 gallon buckets to hold all of the oil plus the old oil filter. You'll
also want some lids if you need to transport the oil to another location for disposal. One problem with this is that you'll need to switch buckets
mid-stream. There's no way that you can replace the drain plug while the oil is rushing out without spraying oil all over the place and switching
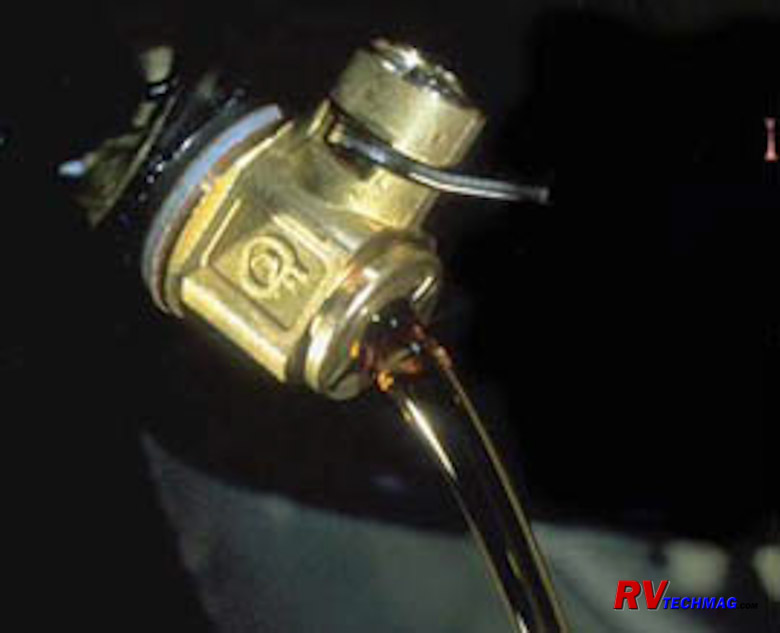
buckets "live" is a tricky operation. I recommend replacing your drain plug with an oil drain valve that can easily be switched off. I use a Fumoto
Oil Drain valve, which is shown in the photo above. This is a high quality, reliable valve that will remove all of the mess from swapping buckets in
the middle of your oil change. For information, or to order this valve, contact them at
www.quickoildrainvalve.com. Two types are available. One has a nipple that can be used to connect a rubber hose to direct the oil to the drain
pan and one is a plain valve. Typically the nippled version works well for front engined chassis where the oil needs to be directed away from tie
rods and axle parts while the plain version works best for rear engined diesel pushers.
Automatic Transmission Fluids
Allison Transmissions are pretty much standard on most motorhomes so this topic will deal exclusively with them. We'll discuss
the various transmission fluids used in them as well as filters and service requirements. Hopefully this information will help you plan a realistic
service schedule for your Allison Transmission so that you can keep it running smoothly and strongly. Note that this tutorial only serves to help
illustrate the differences between the various lubricants and service schedules. It does not replace your owner's manual, which will be the ultimate
guideline to the service schedule that pertains to your RV. For additional information please refer to the Allison website at
www.allisontransmission.com for specific details.
Therefore we can forget about API Service Categories and the various SAE viscosity numbers. We really have only two choices to
make - whether to use conventional lubricants or synthetic. If you choose to use conventional transmission fluids Allison limits the warranty coverage
and requires more frequent service intervals. However, if you use approved synthetic transmission fluids you can extend both your warranty and your
service intervals. Unlike the choice between conventional and synthetic engine oils, this choice is a no-brainer. In fact Allison runs all of their
transmissions with synthetic oil prior to shipping. Most of the oil is drained before shipment so it's up to the chassis manufacturer as to what type
of fluid they will refill the system with. Sometime in the 2004 model year both Freightliner and Spartan began shipping all of their chassis with
synthetic transmission fluid so most all of the conventional fluid has pretty much disappeared from RVs by now.
The biggest question is "Which brands of synthetic ATF can I run in my transmission?". Originally Allison only approved their
own brand of synthetic ATF, which was called Transynd. Transynd was made by Castrol and privately labeled and sold through authorized Allison
service centers. Since that time Allison has published a set of specifications, called TES-295, and has tested various synthetic fluids to see which
ones were compatible. The ones that were approved are listed on the Allison site. As of today's date, the following fluid are approved by Allison.
For any changes to this table please refer to the Allison website at the above link.
TES 295 Approved Fluids
|
TES 295
Approval
Number
|
Approved Marketer
|
Product Brand Name
|
|
AN-011001
|
Castrol Heavy Duty Lubricants
|
TranSynd
|
|
AN-031002
|
BP
|
Autran Syn 295
|
|
AN-031003
|
Cognis Corporation
|
Emgard 2805
|
|
AN-031004
|
International Truck and Engine Co
|
Fleetrite Synthetic ATF
|
|
AN-051005
|
ExonMobil Lubricants
|
Mobil Delvac Synthetic ATF
|
|
AN-071006
|
John Deere
|
HD Syn Tran
|
As the above chart shows, you don't have to buy Transynd any more in order to get the benefits of synthetic oil that is
approved for your Allison transmission. You can use Mobil Delvac, BP's Autran, or any other of the approved fluids as well. Running approved
synthetic fluids will increase the time between fluid changes. For example, an Allison 3000 series transmission running non-synthetic fluids
requires a fluid change at 25,000 miles but when filled with synthetic fluids that increases to 300,000 miles. The smaller Allison 1000 series
goes from 50,000 miles with non-synthetic fluid up to 150,000 miles with synthetics. The filters also get extended treatment with synthetics.
For exact details on these check out Allison's Fluid and Filter Change Recommendations at
This Link.
Transmission Filters
Transmission filters are just as important as the oil that passes through them. And, just like transmission fluid, they too
have a limited service life. Refer to the above service schedule for exact requirements for when they need to be changed. The Allison 3000 and 4000
series transmissions used to require an initial change of the primary filter at 5,000. This was to remove any contaminants or machining residue from
when the transmission was built. however, effective with serial number 6510670912 (3000 series) and 6610205144 (4000 series) some Allison
transmissions were equipped with high capacity filters. This change began around July of 2006. If you have these high capacity filters you do not
need to perform the initial 5,000 mile filter change and you can go right to the normal service schedule. High capacity filters can be identified
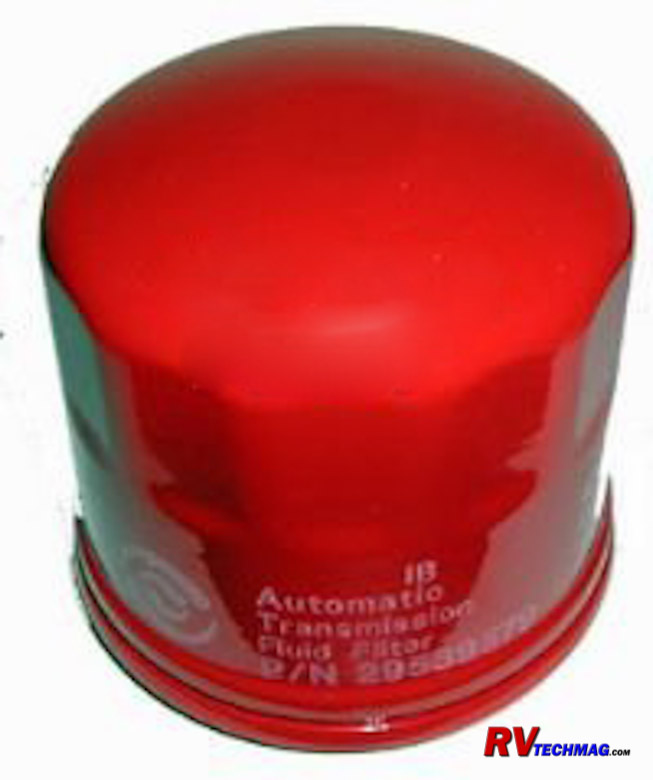
by P/N 29545777 or P/N 29545780 stamped into the end of the filter cap. If you have the standard filters instead of high capacity, those part numbers
will be P/N 29538231 or P/N 29538232. More info on this can be found in the above mentioned link.
Do Your Own Service
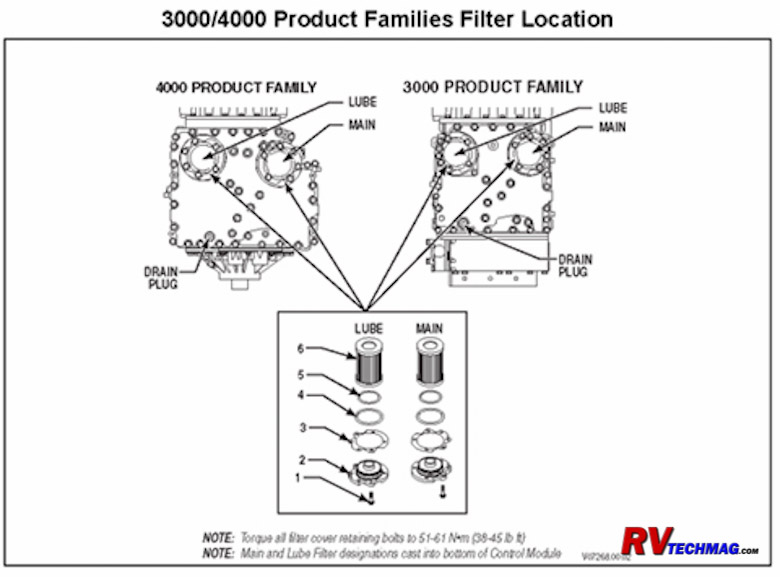
Servicing your own Allison transmission isn't all that hard. Assuming that you are using synthetic fluid you won't have to do
it very often. If you have the Allison 1000 series transmission you'll have a spin-on oil filter and all you'll need is a drain pan and an oil filter
strap wrench. If you have the Allison 3000 or 4000 series it's bit more complex, but not difficult. You'll need a metric socket set to remove the
flanges that retain the filters from the cast aluminum pan on the bottom of the transmission. A small amount of fluid will escape into the drain pan
but it's not the entire contents so you won't need huge buckets to handle this. After removing the old filters, simply wipe everything clean and
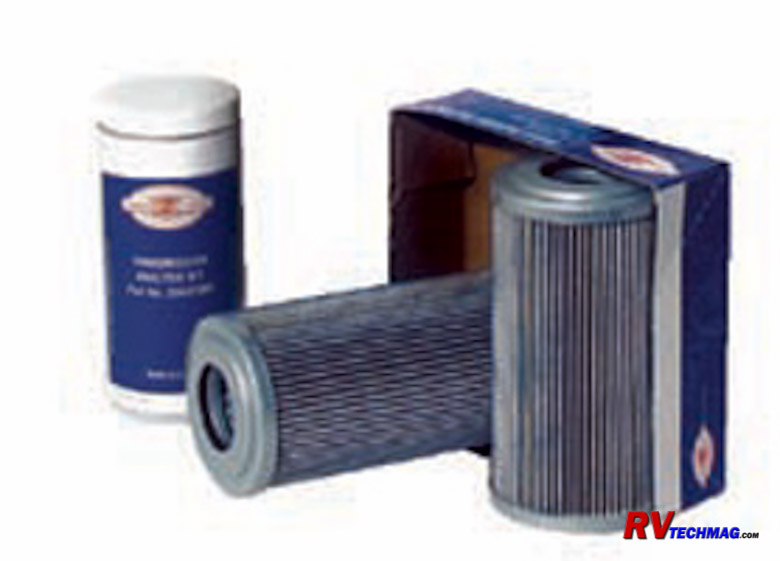
install new o-rings onto the flanges, and insert the new filters. The o-rings are supplied with the filters so you don't need to go searching for
them. Allison offers a handy two filter kit that includes everything you need, including illustrated instructions. Be sure to refer to the Allison
tech document, referenced above, for more detailed information.
If you have non-synthetic fluid in your transmission, this would be a good time to upgrade to the synthetic fluid so that you
can gain the benefits of synthetic. If you drain the transmission and change the filter(s) you won't get all of the old fluid out. There will still be
plenty of the old fluid left in the cooler, lines, and torque converter. If you do this Allison does not recognize this as meeting the extended
service interval requirement of synthetic. You'll have to run this 50/50 mix a bit and then change it once again. After the second change it will be
considered full synthetic and you may use the extended service intervals. This second change can be done the same day if you want to get it over
with, or you can wait for the next scheduled non-synthetic service interval It's your choice. An alternative is to take your coach to an Allison
approved service center and have them flush the entire system, then fill with synthetic. This will meet Allison's requirements for extended service
intervals because it will be full synthetic. The downside is that you have to pay someone to flush the system.
Gear Lubes
In addition to the engine and transmission, other rotating parts also need lubrication. Rear axles and wheel bearings have
their own set of specific needs. Fortunately they don't have to deal with the attributes of a combustion engine nor the power transmission
characteristics of an automatic transmission so these requirements are a bit relaxed and finding good gear lube isn't as difficult as obtaining the
best engine oil or transmission fluid for your RV. But, axles and wheel bearings do have to put up with a fair amount of heat and a tremendous
amount of load. This means that the lubricant will be thicker in viscosity than engine oil in order to handle the load and heat without thinning
out. Typical gear lubes will run in the 90 weight viscosity range. It's also possible to improve lubricant performance by going with a synthetic
gear lube. Again, this tutorial only serves to help illustrate the differences between the various lubricants and tips on servicing those
components. It does not replace your owner's manual, which will be the ultimate guideline to the proper lubricant and service schedule that
pertains to your RV.
Conventional Gear Lubes
Chances are your application that requires gear lube falls into one of two categories - standard duty or extreme duty. The
majority of situations require your basic 80W-90 gear lube. This gear lube serves well to lubricate most bearings, manual gearcases, and rear axle
ring and pinion gear sets. In some automotive applications a limited slip rear axle will be utilized. This adds a bit of complexity to the lubricant
requirement because the limited slip differential utilizes clutch plates to tie both drive wheels together for improved traction, yet still allowing
them to slip when turning corners. An additive may be added to conventional gear lubes or a gear lube that is specifically designed for limited slip
applications may be utilized. Note that a limited slip rated gear lube can also be run in an axle without limited slip without any problems.
Sometimes conditions are more extreme and a greater range of protection is desired. In that case a heavier weight gear lube
will be specified. In years past a 140 weight gear lube was a popular choice. The drawback to a heavier weight lubricant is that it is thicker than
molasses when it's cold and does not provide good lubrication until it warms up. This has been rectified in recent years when multi-grade gear lubes
were formed. However, this necessitated the use of synthetics to achieve that temperature range because traditional gear lubricants just weren't up
to the task.
Synthetic Gear Lubes
Synthetic gear lubricants really do "Kick it up a notch." They provide a wide range of operating temperatures from a single
lubricant. Conventional gear lubes that stay in the 80 to 90 weight range can be replaced by synthetic lubricants in the 75 to 90 range or even the
75 to 140 range. The provide better cold temperature performance and greater high temperature performance and can handle greater loads and stress
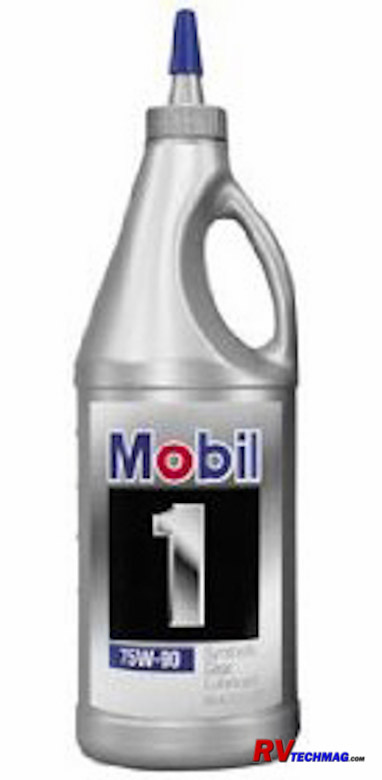
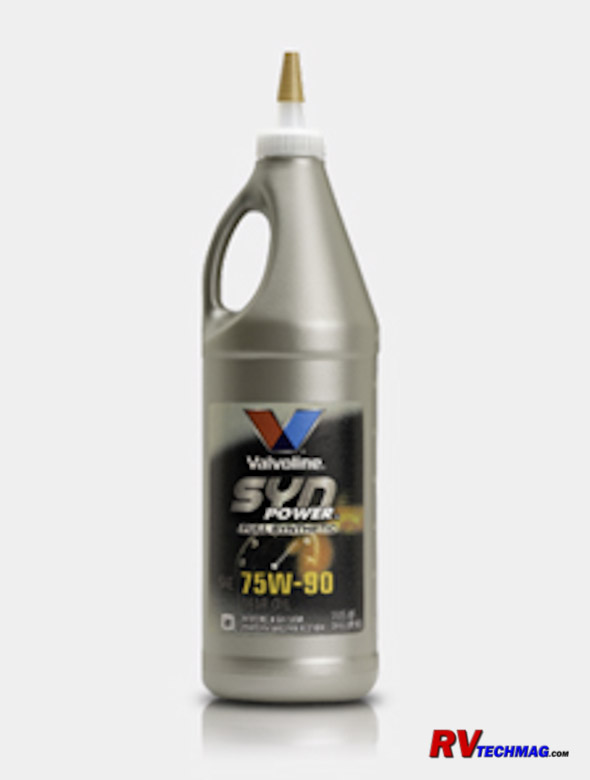
than conventional lubricants. Synthetic lubricants are manufactured by all of the major oil and lubricant makers, such as Mobil One, Shell Oil,
Valvoline, Kendall, Royal Purple, and many others.
Synthetic lubricants are less susceptible to foaming than conventional lubricants, which makes them better suited for wheel
bearings and axle housings. Synthetics offer better low temperature performance with reduced friction and drag in cold temperatures as well as
greater high temperature performance, which will show up when the coach is working hard. The following chart will better illustrate the low
temperature (pour point) and high temperature (flash point) of three typical gear lube viscosities. This particular chart was based upon Mobil Oil
specifications but other brands will have similar performance.
|
Viscosity
Rating
|
Pour Point
Degrees (C)
|
Flash Point
Degrees (C)
|
|
80W-90 Conventional
|
-27
|
98
|
|
75W-90 Synthetic
|
-46
|
175
|
|
75W-140
|
-51
|
221
|
As the above chart shows, synthetics flow much better at low temperatures yet hold up better under extreme high temperatures.
Couple that with reduced friction and foaming and synthetics are a good choice for any gear lube application.
Do Your Own Service
Servicing your gear lube levels isn't hard. Gear lube typically has a long service life because it's not exposed to the extreme
conditions that engines and automatic transmissions are. But, eventually it's time to replace the lubricant. Note that gear lube is contained in a
housing that is designed to lubricate bearings and/or gears. There should not be any consumption of lubricant therefore the level should not drop over
time. If your gear lube level is dropping it's time to check for leaks to see where it's going.
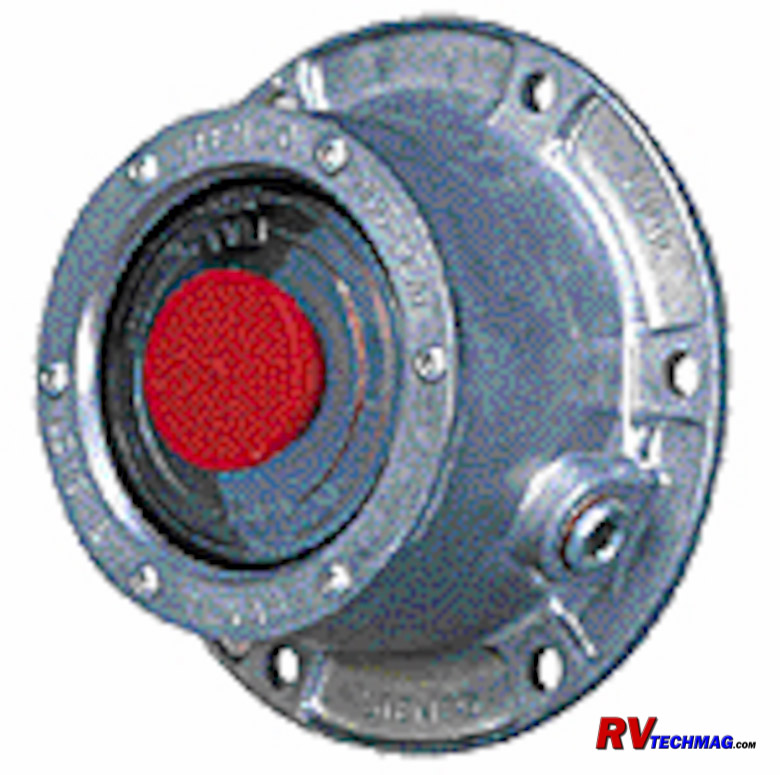
Wheel Bearing Hubs are used on front axles as well as tag axles. Gear lube is used on wheel bearing hubs in heavy duty
applications. You won't find them on your car or pickup truck but you will on a larger class A. Grease filled hubs work but the grease gets slung away
from the wear surfaces over time whereas the more fluid gear lube circulates better and gets to more areas that need lubrication. Your front bearing
hubs will generally have a hub cover, as shown in the above image. These cast aluminum covers have a clear plastic sight glass window and a rubber
plug (typically red or black) that fills the center hole. The clear window will have two rings molded into the plastic. These act as a dipstick of
sorts. The outermost ring is the "low" marking while the inner ring is the "high" marking. Think of them as the "full" and "add oil" markings on your
dipstick. You want to keep the oil level between these two lines.
You do not want to overfill the hub. If you do, it will create excess pressure and blow the wheel seal. If the level is low,
simply pry the rubber plug out with your fingers and add some gear lube through the hole. Again, do not overfill. Keep it between the lines. You may
need to let it settle for a minute to allow the lube to pass through the bearing and into the hub cavity, then check it again. If you need to add gear
lube, check for leaks. The wheel hub can leak in one of two places - either the hub cap, or the wheel seal. If the wheel seal is bad the lube will
sling all over the backside of the tire and make a big mess. If the leak is at the hub cover you'll find the mess on the outside of the wheel and
inside the chrome trim hubcap. Either way, a little leak makes a big mess because the rotation of the wheel slings it all over the place. If your
hub cover is leaking, check for loose bolts where the hub cover bolts to the wheel hub. If they are loose, chances are the gasket is also bad. You'll
need to replace the gasket and apply a good gasket sealant to it during reassembly. My personal preference is Permatex Ultra Black. Also check the
six small Torx had screws that clamp the clear sight glass window to the hub cover. If they are loose, the retaining ring will allow gear lube past
the silicone gasket that holds the clear window in place. I have repaired that with a light coating of clear silicone gasket sealant but replacement
hub covers aren't all that expensive either.
If you want to change your hub gear lube it's going to be hard to get it all out because the well inside the wheel hub is deeper
than the hub cover. Ideally you'd remove the hub, clean everything up, inspect the wheel bearings, and replace the seals. We did that on over-the-road
trucks all the time but they racked up significant mileage. Most RVers simply rotate the hub so that the hex plug in the side of the casting is facing
down, then remove it to drain the hub. You'll get a good chunk of it out that way and if you service it often enough (based on time rather than mileage)
this method should work for you.
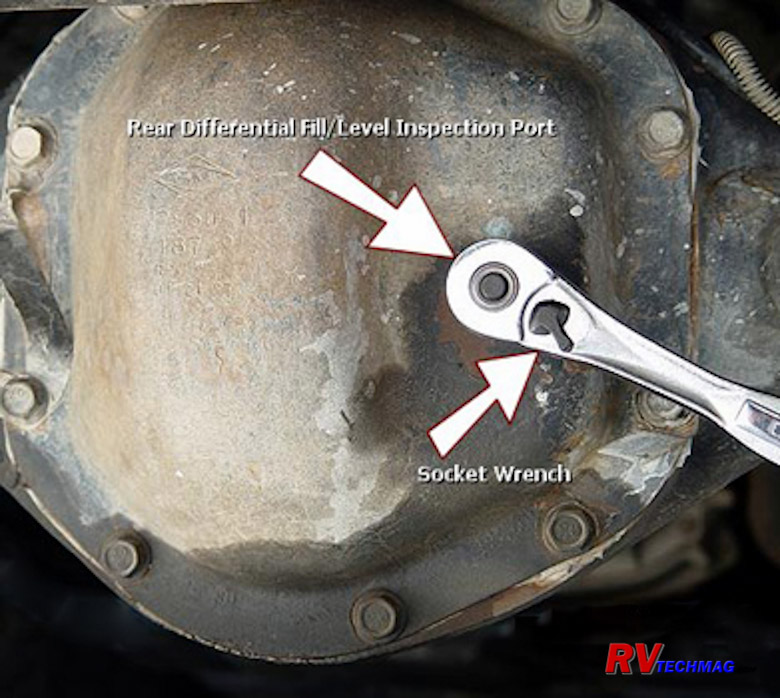
Rear axles have similar needs. However, a typical rear axle as found in a class A motorhome will be rated for
20-22,000 lbs and will probably hold very close to 4 gallons of gear lube. You can buy 16 quart bottles or look into a 5 gallon pail with a hand pump
to simplify it and hold the cost down. To drain the old lube you'll find a drain plug in the bottom of the axle housing and a fill plug in the rear
of the housing. The fill plug also serves as a level checking plug. The lubricant should be just ready to flow out the fill hole when it's at the
proper level. You can check this by sticking your finger in the hole to see how high the lubricant level is. When draining it's best to remove the
fill plug first to allow air to enter the differential cavity while you drain the old lube. Otherwise it'll glug and splatter more as it drains.
Then, remove the drain plug. Most of these plugs have a female square opening in them that you stick your ratchet wrench into. The drain plug will
also have a magnet attached to it to trap and metal filings or chips. Be sure to clean this plug off thoroughly before replacing it. Once it's drained,
reinsert the drain plug ands start adding your gear lube. When you get close to the recommended quantity, stop and check the level with your finger
to see if you are getting close. If you have found the correct specs you should hit it right on the head.
Chassis Grease
Okay, it's grease, right? How technical or glorious can you get? You just shove a tube in a grease gun, find some grease
fittings, and squeeze away. Yet, there really is more to it than that. There's a right way and a wrong way to grease things and there's a wide variety
of greases available. Some of them barely work, while some work very well. Remember, grease is a lubricant, just like engine oil, transmission fluid,
and gear lube. It is needed to prevent wear and tear on parts that require lubrication. If you match the grease to the job, and perform the
lubrication tasks properly, your greaseable components will last for a long time. If not, you're going to have some repair bills looming sooner,
rather than later.
Grease Types and Classifications
Classification of grease is much easier than motor oils. The viscosity of grease is referred to by it's NLGI rating. Your
typical chassis grease is an NLGI 2. An NLGI 1 rating would be a thinner grease that would melt and flow at a lower temperature. This is probably
the stuff you'd want in your equipment if working the Alaska pipeline but NLGI 2 works for 90% of your automotive applications. Conversely, NLGI #3
is a stiff grease and would be used in extreme conditions where the load level is creating additional heat. Most greases are lithium based, although
synthetic greases are available that offer increased protection levels. In most applications, a synthetic grease won't offer enough benefits to
offset it's additional cost. Synthetic grease is better suited for extreme duty conditions.
Not all lithium greases are identical. Just because there's lithium in them doesn't guarantee that. There's more to grease
than lithium. Lithium is the base upon which the grease is formulated. Plain lithium grease works well for wheel bearings and also serves in driveshaft
universal joints and front end components. But, universal joints and front end parts have different needs than wheel bearings. These components don't
use rotating rollers within bearing races. They rely on a thin layer of grease to separate two metal surfaces so that the don't gall and bind. If
enough force is applied to these two surface the grease can squish and run away from between these two surfaces, allowing metal to metal contact.
Additionally, when surfaces pull apart from each other the grease film can fall away rather than stick to the surfaces. Fortunately there are other
greases that improve upon the basic lithium grease. They are still lithium greases but they've been enhanced with additives to improve the
characteristics of the grease. Naturally, they cost a bit more than your entry level lithium grease but are well worth it.
One of these characteristics is to improve the tackiness of the grease. If you place a small wad of your basic lithium grease
between you thumb and index finger and squeeze, much of the grease will ooze out but a small layer will remain. In order to remove that layer you'd
have to smack your thumb with a hammer real hard so we don't want to go there, but when you pull your two fingers apart you'll see that the grease
breaks free and sort of leaves a slight film on your fingertips. Each time you squeeze and release you'll lose more of the lubricant. Better quality
greases were developed that improved on the tackiness of a basic lithium grease. If you were to place some of this between your fingers and do the
same test you'd find that the grease would tend to stick to your fingertips and it would be harder to pull them apart. When you did pull them apart,
if you looked carefully, you'd notice that the grease would stretch like strings between your fingertips. This "tacky" version of the grease will do
a better job by staying in place better than a less expensive lithium grease.
When two surfaces are being forced together, which is typical of a ball joint or tie rod end, the grease tends to squish out
from between the two surfaces. If there was a way to keep these two surfaces from coming into contact with each other it would be a huge benefit to
component longevity. This was accomplished through the development of Moly grease. Moly is short for Molybdenum, which is technically a metal.
But Moly particles are actually lubricants and won't scratch or damage metal surfaces. When Moly is added to grease, it comes in the form of super
small round particles that act as miniature ball bearings. Moly's unique characteristics is that it will not scratch the metal, yet it is very hard
and it won't crush or be destroyed when put under pressure when two surfaces are trying to squeeze the life out of them. The Moly particles are carried
in the grease and they prevent metal to metal contact and allow the grease to filter in and around the small Moly bee bees to cool and lubricate the
components. Moly grease typically has a black color to it and is messy to clean up but it's great grease for front end work and universal joints. The
one area where Moly is not recommended is for wheel bearings. The Moly particles tend to force the rollers away from the races, which tightens
tolerance and increases heat. For wheel bearings it's best to go with a more fibrous general purpose or tacky grease that has no Moly in it.
There are super greases available. Synthetic grease is available by many lubricant suppliers. Synthetics offer a greater
temperature range than conventional greases and are great for extreme conditions but the vast majority of RV owners won't realize the benefits of
them because they don't encounter those extremes. My personal favorite grease is Kendall L-428 Tough Tac Grease. This is a lithium based grease that
has excellent tackiness as well as Moly particles. It resists water penetration, holds up well to heat, stays in place, and resists shock loads.
I've been running this grease for a long time and my universal joint and front end component longevity is remarkable. Most auto parts stores carry
Kendall, which is a division of Conoco-Phillips but don't stock this particular grease. However, there are similar greases available from Shell, such
as Shell's Gadus V460D2 grease.
One other caveat to using a good grease is slack adjusters. Slack adjusters are used on air brakes and are supposed to be
self-adjusting as you use them. In order for them to self-adjust there needs to be some friction in them. If you use a good Moly grease they'll be
too slippery and won't self adjust. So, you'll need a tube of cheap grease to do the slack adjusters. In my case I have two grease guns. One is
loaded with Kendall L-428 while the other has whatever is on sale at the moment. I use that gun strictly for the slack adjuster.
Do Your Own Service
The proper way to grease a chassis begins with getting a good quality grease, as mentioned above. The second item to have is
a good grease gun. Grease guns really run the gamut, from inexpensive imports up to pneumatic and even electric units powered by cordless drill
batteries. Pneumatic grease guns are great for use in a shop but they aren't portable. Cordless battery powered units are portable but do you
really need that kind of power in a grease gun? What happens when the batteries are dead and need recharging? Do you want to wait around for that?
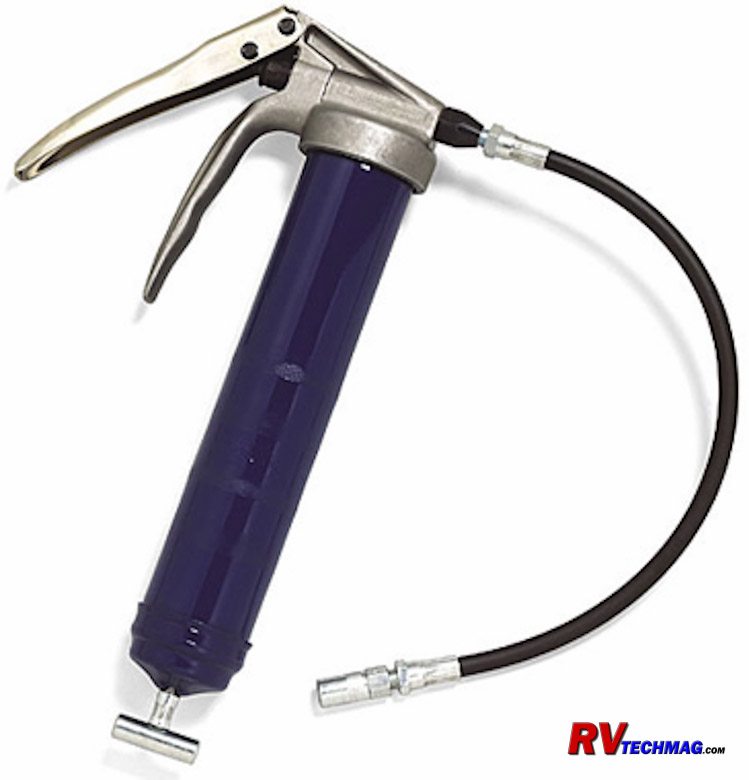
For portable use you just can't beat a well built manual grease gun. They come in different variations so it's important to keep two things in mind
when shopping for them. First of all, you'll need one with a flexible rubber hose. The steel pipe won't get into spots that a hose will. If you find
a good gun with a steel pipe you can always buy a rubber hose kit to convert it over. Secondly, you'll need to operate the gun with one hand every
now and then. You'll need your second hand to hold the hose onto the fitting in an awkward location, such as the backside of a universal joint. This
means that the guns with the pump arm on them won't work in that application. You'll need one with a trigger control, similar to the one shown in
the above image.
Once you have your choice of grease and grease guns all figured out it's time to make a listing of every grease fitting that
is on your coach. Check your owner's or service manual for all of the locations. Take the time to scout them out ahead of time, then make a checklist
with location and number of fittings that you can go through when it's time to lube the chassis. That way you won't miss any of them later. If you
do, you'll find out soon enough when that joint wears out. When it's time to perform the chassis lube have plenty of rags or disposable towels
handy. Use them to wipe any dirt off of the grease fittings prior to attaching the grease gun nozzle. You don't need to shove dirt into the joint,
only fresh grease. When you do grease the joint be sure to move enough grease through to flush any dirt or water that may have accumulated in the
joint. Face it, those rubber dust boots on tie rod ends and ball joints aren't all that tight. Once you see the new grease coming out you'll know
you've flushed all the old stuff out. Use the towels to wipe off the excess so that it doesn't make a mess.
Naturally, there are exceptions to this rule. If you are lubricating a driveshaft slip coupling Do Not over grease it. If
you apply too much grease it'll just fill up the cavity inside the driveshaft. As the coach goes up and down the spline moves back and forth inside
the slip yoke. It'll just force all of the grease out the small vent hole, which will sling all over the place underneath your coach, making it a
miserable place to be next time you have to do any service work down there. Plus, if you were to fill that cavity up good, then hit a good bump,
chances are you would blow the seal and retaining ring off of the slip yoke. This is one area where 3 or 4 pumps of grease is enough,. You only
need a little bit to keep the splines lubricated.
One final area of interest is the kingpins (if a solid front axle) or ball joints (if independent front suspension). These
areas need to be flushed with grease, just like the tie rod ends and other fittings. But, you will not be able to get the grease to everywhere it
needs to be if you do it while the motorhome is sitting on it's front wheels. You need to raise the front end up in order to relieve the pressure
on the kingpin or ball joints. That will allow them to float so that the grease can totally surround the kingpins and ooze out through the thrust
washers as they are greased. The same holds true for ball joints on IFS front ends. Some even prefer to have a second person turn the wheels while
the first one greases them. Normally that is not necessary unless they are having difficulty taking grease. In that case they were left go too
long, the grease isn't of very good quality, or the unit wasn't raised the last time it was greased. If this is the case, it's best to turn the
wheels and grease them to allow the grease to return to where it needs to be. Remember, do not trust your leveling jacks! You can use them to
raise the coach but a pair of heavy duty jack stands should be placed under the chassis to support it in the event the jack system fails while you
are underneath the coach. Chances are it won't, but the stakes are high so don't take the chance. Besides, with the money you save by not having
to pay a service center to lube your chassis you can certainly afford to buy a few tools.
Return to Home Page
If you enjoyed this article be sure to recommend RVtechMag.com to your friends, like us on Facebook or Twitter
or subscribe to our RSS feed.


|


