MCD Innovations: Made in the Shade
Upgrading an RV's Pleated Day-Night Shades and Visors
Article Date: May, 2009
Article and Photography by Mark Quasius
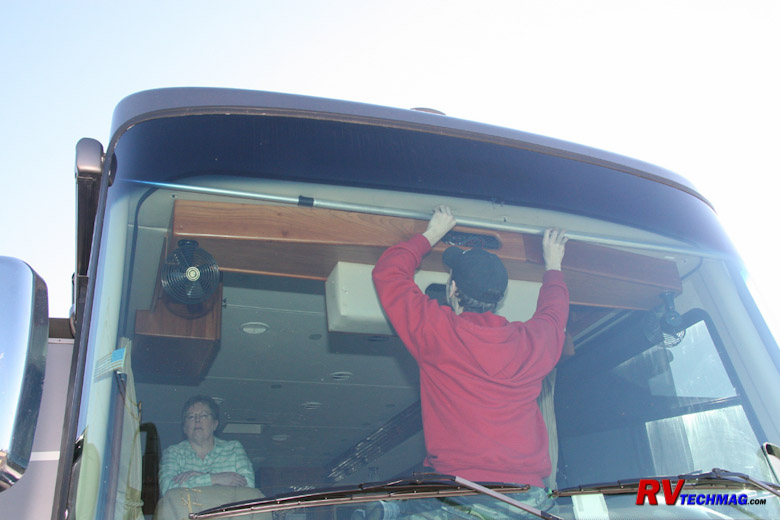
Many RVs come with pleated day-night shades that have been known to plague RV owners. They have two steps of
shade material - a translucent sun filtering day shade followed by an opaque privacy shade for nighttime use. They are held together
with thin strings that frequently break, causing the shades to fall down. These are the shades that came in my 2007 Allegro Bus.
Tiffin Motorhomes began using MCD roller shades in recent years and they have been getting rave reviews by RVers so we looked forward
to upgrading the shades in our coach to MCD shades. After doing my research I was invited to come down to MCD's facilities in McKinney,
Texas for my installation. I felt this was a great opportunity to learn more about the product, the company, and the actual installation
process. MCD opened their doors wide for me and gave me full access to their production line as well as their service techs. I learned
more about their company, their products, and just how to install them. I took plenty of photos so the following links will take you to
a series of webpages that offer tutorials on all of these subjects.
MCD Innovations has long enjoyed a great reputation for making quality products and backing them with great customer
service. In my first chapter I'll detail what I've learned about MCD and detail my experience with them. The next chapter will detail the
various products they have to offer as well as the pros and cons and benefits to RVers. The third entry will document their windshield
shades. In this chapter I'll describe how they work, how they compare to other options, and finally cover their installation in my coach
in detail. The next chapter will detail their manually operated roller shades, as well as the valance requirements, and finish up with
the actual installation tutorial. Following that I'll do the same for the remote powered roller shades as well as cover the various
controller options available. Finally, I'll describe the various generations of manual roller shades as well as detailed procedures on
how to identify which generation you have, and how to adjust them.
During the installation I had the benefit of watching and learning from one of their installation techs who had
done over 600 installations. I learned many installation tips and secrets during this time and have included them in each area's
installation tutorial. By the time you read these tutorials you will know whether or not this is a do-it-yourself project that you may
want to undertake, or if you should have the work done by someone who does this regularly. You will gain the benefit of years of experience
and you might be surprised as to how easy it is to perform this project yourself.
Now that I have my MCD shades installed I have to say that I am very happy with them. You would think that shades
are shades but that's just not true. MCD has some real advantages and benefits that others do not have. Read on and you'll see what I mean.
I've divided this article into pages to allow you direct access to each area if you need to refer back in the future. Following is a
description for each page:
Welcome to MCD
MCD Shades have long enjoyed a great reputation for making quality products and backing them with great customer service.
During my visit I met with Dave Townsley, the CEO of MCD, as well as numerous other members of the company. During this time I was able to
learn more about the company, it's products, and it's commitments to it's customers. Originally MCD stood for Motor Coach Designs. However,
as the value of their products became known many commercial buildings began purchasing their solar protection products so the name settled in
as MCD Innovations, which is a better fit given that they are committed to bringing
out new, innovative products.
I found that MCD has a number of things going for it. First of all, everyone is very friendly and customer service oriented.
It didn't matter who I talked to. Everyone did whatever they could to make my visit and installation as enjoyable as could be. Secondly, they do
not cut corners. They use only the highest quality components and materials in their products and do not cheapen the product just to cut costs.
Thirdly, they are constantly developing new products and improving existing products. They are not just looking for "good enough", they are
striving for perfection and their commitment to engineering and product development clearly reinforces that. Lastly, there's the solar screen
material that they have made for them. You'd think that screen is screen but that's just not true. I did some tests and found that the MCD solar
fabric is vastly different than the "me too" material used by all of their competitors. More on that later when we get to the Products chapter.
MCD takes pride in their product and takes measures to ensure that everything is perfect when the customer receives it. Every shade is mounted on
a test stand and thoroughly tested and adjusted before it leaves the factory. It is then placed in preformed coated cardboard boxes that will
withstand even the roughest handling during shipping to ensure that it arrives intact at the customer's location.
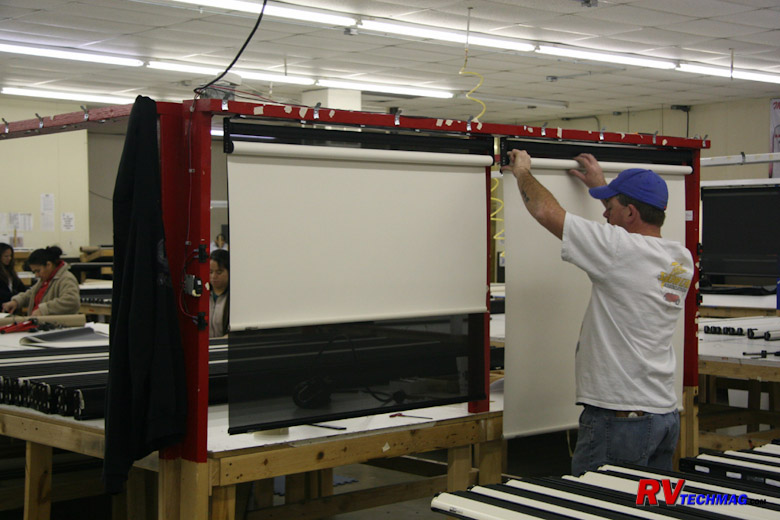
Testing Shades Prior to Shipment
Many OEMs, such as Winnebago, Tiffin, and Newmar, use MCD products in their featured coaches. Naturally, the most popular
products are the American Duo roller shades but MCD makes a complete line of products. Their 26,000 square foot facility uses state of the art
equipment. I found that every order is logged and every product tagged with a build number. Every screen or shade is cut or drilled on a computer
controlled machine. Even the stitch marks are laid down with an invisible UV marker that is only visible to the person who uses the UV equipped
sewing machine to sew the hem. If you ever need a replacement shade all you have to do is tell them the build number and their computer system
can retrieve that information and create a replacement shade to the exact same dimensions with zero tolerance.
MCD has a number of certified installers throughout the country. In addition they offer a shade installation service right
at the plant in McKinney for those who want to take advantage of that opportunity. They provide eight complimentary sites for any RVer who is
there for installation work. Customers may remain in their coaches during installation if desired. They are very pet friendly and the receptionist
insisted on bringing our pet in to meet her. And yes, they will have dog treats. In addition they will provide you with an information packet on
things to see and do in the Dallas/McKinney area and offer to assist you in any way. Naturally, this information pack comes in a handy tote bag
made with durable MCD solar screen material. When you arrive at MCD for your appointment you'll be met by their staff, who will measure your coach
for you and advise you of the many options that are available.
Overall I found MCD to be one of those few companies who has it all together. Great customer service along with an excellent
high quality product, and innovative technology and product development will keep them a moving target that their competitors will never be able to
match. In the next section we'll see what kind of products MCD makes.
|

RV Parking for Customers.
|
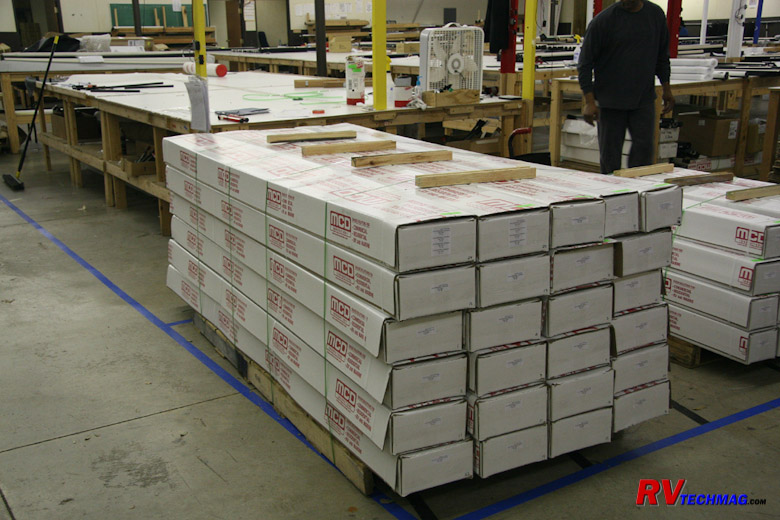
Another Pallet of MCD Shades Ready for Shipment.
|
MCD Products
Every product that MCD produces is built to exacting tolerances and utilize high grade materials in their construction.
Shades are made at MCD's facility in McKinney, Texas and proudly dislay the Made in the USA logo.
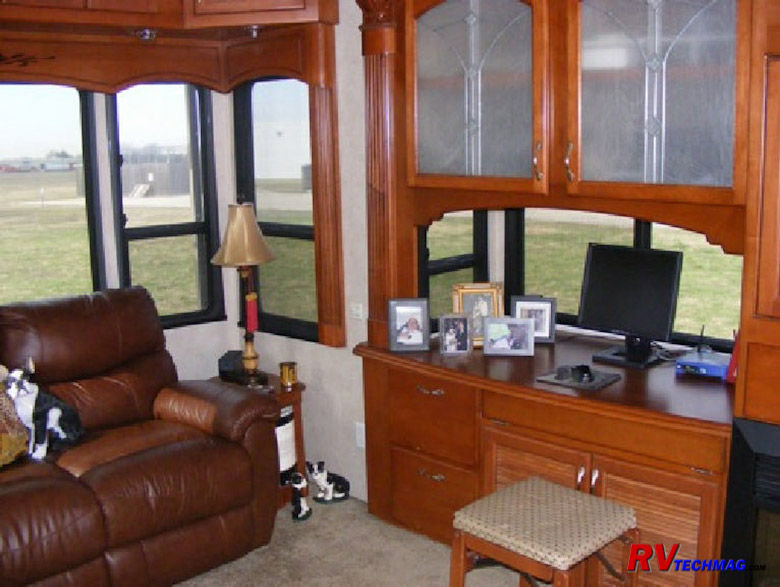
ClearView Sunscreen
Before we get too far into specific products, I'd better take some time out to talk about the proprietary solar screen
material that MCD uses in many of their products. I found that not all screen material is created the same. Many sunscreens are made with a
two-over-two weave, in that two vertical strands are laid together over two horizontal strands and then weaved in such a fashion. This type
of screen varies greatly in effectiveness. It relies more on blocking the light than filtering the heat. When this screen is viewed straight
on, it's much darker than MCD's ClearView screen. When you view this screen on an angle it gets even worse and it's extremely hard to see out
of the coach with this weave. This method gives the screen manufacturer an inexpensive way to make screen that offers some heat reduction. It
also allows them to use inexpensive fiberglass screen threads, pretty much like a bug screen on your windows at home. But this method is not
as effective at reducing heat intrusion and it seriously cuts down on the visibility through it, particularly when trying to view at an angle.
MCD's ClearView screen material is very high tech. When comparing it to competitor's screens think of it as comparing the
aluminum in a Boeing 747 to a soda can. There's that much difference. The MCD screens use a one-over-one weave and don't use inexpensive
fiberglass as the material. This design makes it easy to see out of the coach when the day shades are down. Viewing at an angle has minimal
effect and the view remains nice and clear. With this kind of view my initial impression was that it wasn't going to be doing a very good job
of filtering the heat out of the coach. But this system does a much greater job of filtering heat. I tend to think of it more as a thermal
barrier than a sunscreen. I've viewed competitive screens and the MCD screen under a magnifier and could see the difference in the construction.
The two-over weaves were chunky and rough coated while the MCD screen was crisp and clean. The two-over weave also has a tendency to pull during
the weave process. When holding screen panels up to the light you could see dark streaks where the threads had bunched together and lighter gaps
in between. Not that impressive to look at actually. But when viewing the MCD fabric it was clean and consistent throughout the entire screen panel
and it was easy to see out of while inside the coach. Interestingly enough it's virtually impossible to see into the coach during the daytime from
outside. If it's dark outside and you've lit up the interior of the coach this changes however, which is why the nighttime privacy shades are also
used. During normal daytime activities the daytime shades will act much like a one-way mirror.
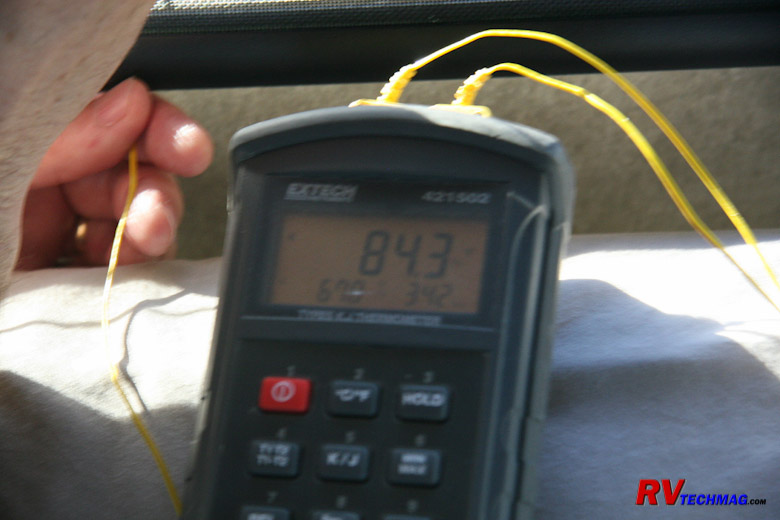
Temperature Readings On A Dual Pane Window
When performing some temperature readings one probe was placed between the screen and windshield while the other probe was
placed inboard of the screen. I was able to observe dual samples at the same time using this method. On a softly lit day with ambient temperatures
around 54 degrees Fahrenheit I observed roughly a 24 degree difference between the inside of the shade and the outside of the shade. This was on
the windshield. When similar tests were performed on a dual pane insulated side window the difference was 17.3 degrees. On a nice 90 degree, sunny
day the temperature readings between the windshield and screen are reported to be up to 50 degrees higher than the temps on the inside of the screen.
Further proof of my "Thermal Barrier" theory was made after the shades were installed and everything cooled down overnight.
The temperatures were down around freezing when we were there so my windshield got plenty cold overnight. When morning came I'd raise the sunscreen
shade and it felt like a freezer was just turned on. The sunscreen held back the cold air, just like it holds back the hot air on a warm, sunny day.
So, it's obvious that this high tech solar material has more going for it than just UV and sunlight filtering. I was very impressed.
Exterior Sunscreens
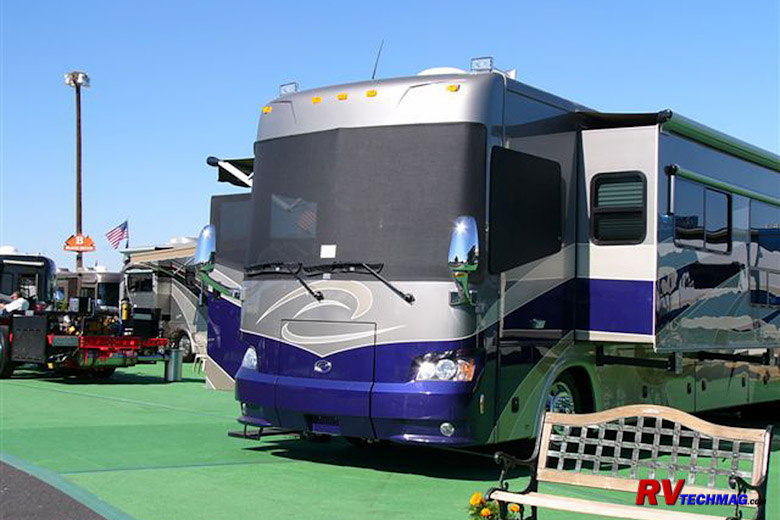
Exterior Sunscreens
This is the product that started it all. MCD Exterior Sunscreens used the same exclusive ClearView technology as the
Interior Sunscreens except they attached to the outside of the coach. With the advent of the American Duo interior roller shades, the demand
for exterior shades has gone down and this product has been discontinued.
It has been argued by some that you need to keep the shades on the outside of the RV to prevent heat from passing through
the glass and building up inside the coach. However, I've performed some tests with a dual probe digital thermometer that prove that the interior
solar shades are just as effective, while being super easy to deploy. Simply press a button to lower them or roll them back up. I can only conclude
that the exterior shades conduct heat to the windshield because they are resting on the surface of the glass while the interior roller screens have
the ability to reflect the heat back through the windshield. Indeed, the interior screen material was not overly hot to the touch so it must be
reflecting rather than absorbing the heat.
American Solo Shades

Nighttime Shade
The Solo shades are single roller shades, similar to window shades that you might find in your home. Except these are totally
different in that they are designed and built to MCD's critical specifications. These roller shades attach to a mounting rail via brackets. The
entire rail and roller assembly simply snaps into place into a series of mounting clips. These shades can be fitted with the ClearView sunscreen and
used as day shades or they can be fitted with 100% light blocking or room darkening privacy shades for nighttime use. A wide selection of shade
material is available so that you can choose the style and color that best matches the interior decor of your particular coach.
In addition, these shades can be manually operated or powered by electric motors. MCD's new Glide-Rise IV technology means
you just give a tug to the bottom of the manually operated shade and it effortlessly retracts onto the roller. There is one adjustment wheel on
the end of the rollers to control the rate of ascent while a second wheel on the opposite end sets the auto-stop position so that it doesn't
roll up too far. This is a real slick design and, if needed, can be easily adjusted, although once it's set it probably won't need any future
adjustments. The powered shades utilize MCD's compact 12 volt DC motor that resides inside the roller. No additional space is needed to locate
the motor. The motor is fed 12 volt power from a nearby location and can be remotely controlled via any number of controllers. You do not have
to run wires from a switch to each shade motor, just a common 12 volt feed. All switching is done remotely via the wireless controller(s).
American Duo Shades
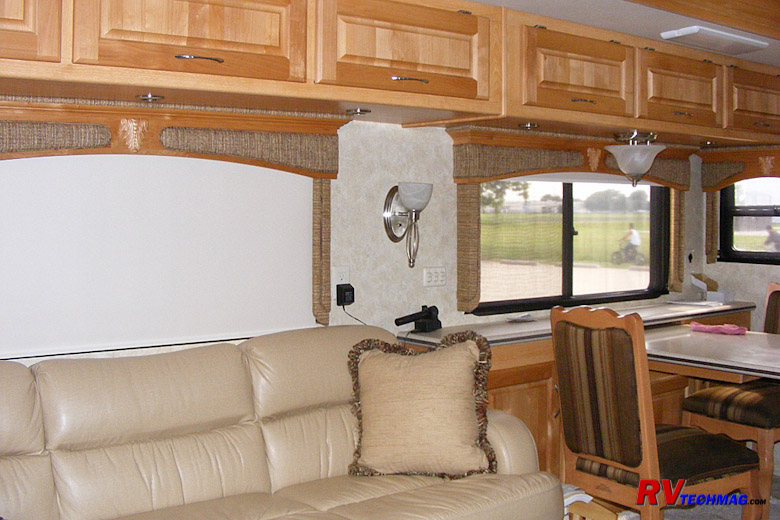
Nighttime Shade on Left - Daytime Shade on Right
The Duo shades are similar except that two rollers are mounted vertically above each other. This allows the use of one
roller with a daytime solar screen shade while the second roller is fitted with a nighttime privacy shade. The rollers can be manually operated
or fitted with 12 volt motors for power operation. A hybrid design can even be used whereby the day shades are manual and the nighttime shades
are powered. This was the system chosen for the main living area in my coach. The Duo design packs both rollers in a compact design so that it
fits into most existing window valances on motorhomes.
Powered Windshield Shades
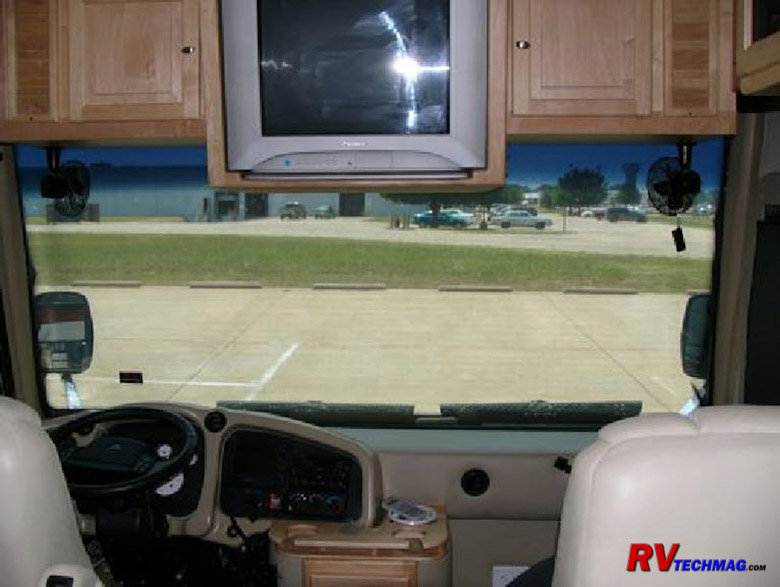
American Duo Windshield Shades
MCD's windshield shades can be either Solo or Duo. The biggest difference between the windshield shades and remote powered
shades is in the way they are controlled. Windshield shades utilize rocker switches rather than wireless remote controls. This is for safety reasons
as well as convenience. Most coaches already have a pair of basic powered sun shades so it makes sense to utilize the existing switches. In addition,
the windshield shades have top and bottom adjustable limit settings that are programmed into the motors. Each shade will have two lower limit settings.
One will be for when the ignition is off and another setting will be for when the ignition is on. This MCD developed safety feature prevents any
accidental lowering of the shades past a user set point. If a rocker switch would fail in the closed position this prevents the shade from blocking
the driver's view when driving. Competitive shades do not have this safety feature and is just another illustration of the kind of commitment that
MCD has towards their customers.
Velcro Attached Shades
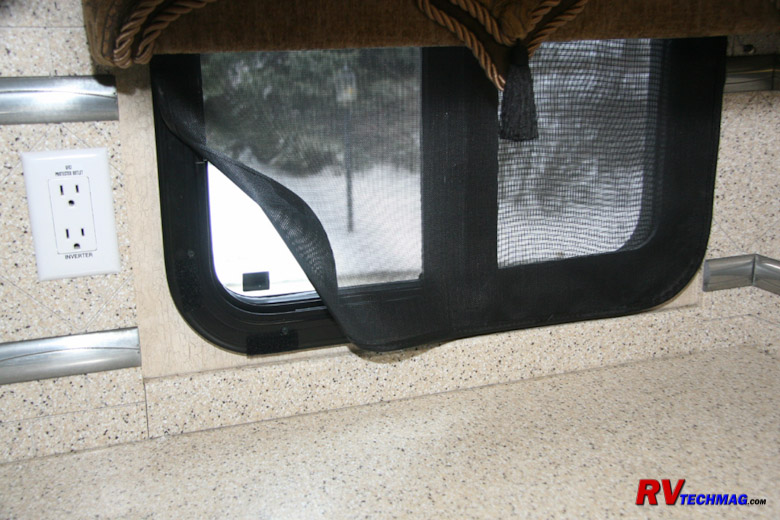
Velcro Attached Sunscreen
Sometimes it's just not practical to utilize a roller shade. Yet, the protection of a good sunscreen is desired. Maybe the
valances are too small to place two rollers into. Or, maybe the shade will be on there 95% of the time and won't need to be removed. In this case a
Velcro attached shade using MCD's ClearView technology is a good choice. I actually have them installed in three locations on my coach. Two were
for the above mentioned reasons while the third one was for the entry door. Having a hanging sunscreen dangling in front of the door means that
I'd have to power it up every time I wanted to use the door. By attaching a Velcro sunscreen to the screen door it opens whenever the door does
while still giving me excellent solar protection.
Sway Shades
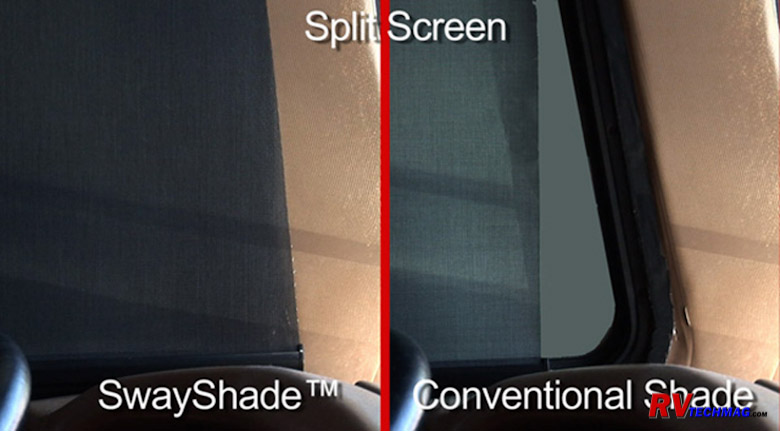
Sway Shade
Some cockpit side windows are not rectangular. They slope towards the front windshield. When a conventional roller shade
is extended a triangular gap remains where the shade does not cover. MCD's SwayShade uses a unique spiral mechanism that solves this by allowing
the shade to slide forward as it is extended. This eliminates light penetration and also provides for uncompromised privacy.
Remote Controllers
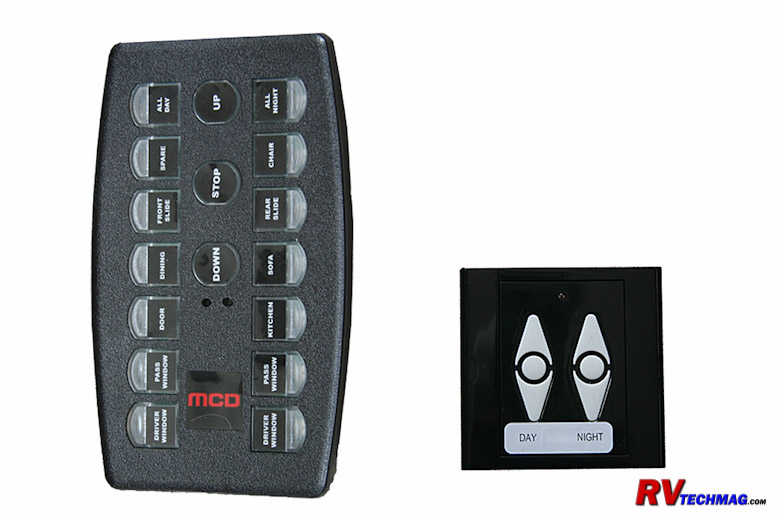
Remote Controllers
With the exception of the windshield shades, all powered MCD shades are operated by wireless remote controllers. Any one
shade can be married to any number of controllers. There are 2-channel controllers as well as 14-channel controllers. A 2-channel unit typically
controls one window with dual powered rollers. An example of this would be a cockpit side window. The 14-channel controller controls many shades.
Each button will be custom labeled for your coach. A single shade can be controlled from multiple controllers. For instance, a cockpit side
window can be controlled via a 2-channel remote mounted near the driver's seat. It can also be controlled via a 14-channel controller. In addition
it is possible to program any button on any controller to handle multiple shades. This means that that same cockpit window shade can be controlled
by an "all night shades" button or whatever else you can come up with. The remote controllers are wireless so they do not require any 12 volt
wiring. The 2-channel controllers use a CR-2032 watch style battery and the 14-channel controllers use a pair of AAA batteries. You can mount any
of the controllers on the wall or you can use them as hand held if you desire.
In the next section we'll follow the installation process of a set of MCD windshield shades.
Windshield Shade Installation
Without a doubt windshield shades are an important part of a motorhome. The huge glass area allows lots of sunlight in.
When driving this can become a safety hazard so most RV manufacturers install some form of sun visors. On entry level RVs this may be a small
flip-down visor that is hard to reach from a driver's sitting position and provides very little area for blocking the sun. Larger coaches may
come with a pair of powered sun visors that are controlled by rocker switches within reach of the driver's and copilot's seats. They utilize a
black vinyl material and a scissors type mechanism to extend and retract them. This is better than nothing but there are large gaps between the
two visors as well as around the corners of them and, for some odd reason, that's always where the rising or setting sun happens to be.
When parked the powered visors can be lowered to help keep some of the sunlight from penetrating the coach and heating
the interior up. This is somewhat of a help but the heat trapped by these visors works its way around the sides so they are not 100% effective.
Also, you cannot see through them so visibility out of the coach is affected. For nighttime privacy a set of pull drapes is employed to curtain
off the windshield and cockpit side windows. The cockpit side windows on my coach came with sun screen shades that pulled down manually, then
retracted with a snap when the lanyard was pulled. The awkwardness of these shades, plus the minimal sun filtering that they provided left much
to be desired.
After seeing the MCD cockpit shades on newer Tiffin models Leann and I decided that we would like to replace our power
visors, cockpit side shades, and drapes with MCD products. We arranged to have this done at MCD's facilities in McKinney, Texas as well as
replace the pleated shades in the living area with MCD shades. The end result is phenomenal. The MCD shades provide excellent temperature control
in the coach. They filter out the sunlight but also do an excellent job at creating a thermal barrier, regardless of whether the sun is out or
not. They work equally well at keeping the interior nice and warm during cool weather as they do at keeping the interior cool during warm, sunny
weather. They are very easy to operate and when the nighttime shades are down the cockpit is much darker and has less light infiltration at night.
Overall we are very impressed with the MCD shades and find them a cut above anything else.
In the following paragraphes I'll detail the actual process used to install MCD's American Duo windshield shades in my 2007
Allegro Bus. We also installed cockpit side window shades but I will leave that for the chapter that covers powered shades because the windshield
shades have some unique features that require different installation procedures than side shades.
Product Overview
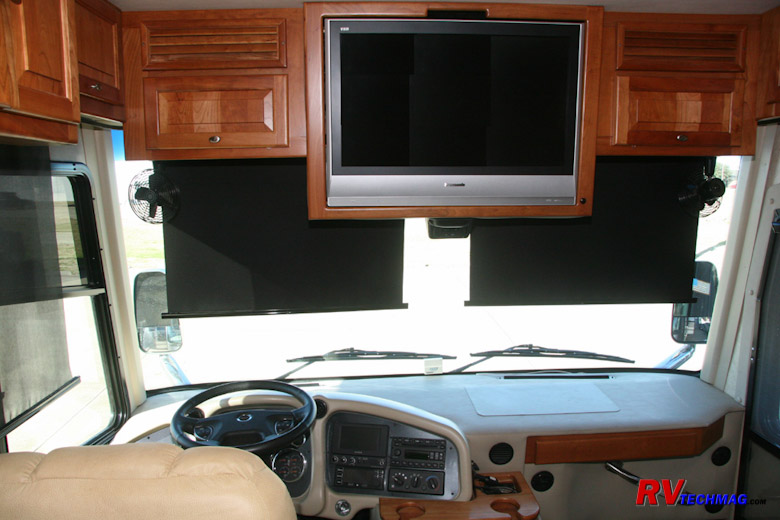
Original Visors and Side Shades
Our 2007 Allegro Bus came with the two powered Carefree sun visors as well as manual side shades. As the above photo illustrates,
there are large gaps on either end of the visors and the side shade does not cover the entire window. You have to be tall to reach the side shade in
order to pull it down when driving. In order to retract it you need to fish around in the drapery to find the pull cord. Again, long arms are needed.
Once you finally get the cord and give it a pull, the shade snaps up at the speed of light. There is no stopping it midway nor can you control its rate
of ascent - which is very fast. Also, the purported "sunscreen" material is basically fiberglass bug screen and has little to no R-value. The power
windshield visors were controlled via rocker switches. The driver's left side console had a pair of switches - one for each shade. The copilot had a
single rocker switch at her side to control her visor so the right side could be controlled from either seat. We decided to replace the power sun visors
with the American Duo full width sunscreen and privacy shades. This dual roller system could easily be powered via the existing rocker switches. I chose
the standard method, which is to operate the nighttime privacy shade from the single rocker switch on the driver's side while allowing either seat to
control the daytime sunscreen shade. That made wiring these shades a simple task.
Measuring and Planning
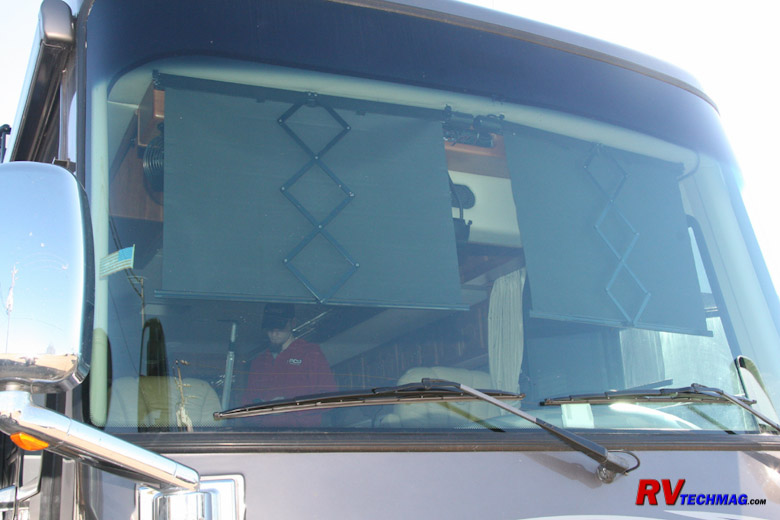
Original Visors to be Removed
Before we start mounting things it's important to thoroughly analyze just what you have and come up with a plan on how to install
the shades. Coaches vary greatly from model to model and year to year so not every coach installation will be approached the same way. The first step was
to remove the existing shades and drapery to get them out of the way and give us a clear area for the installation.

Measuring the Width
In order to properly measure the width of the windshield shades it's best not to use a tape measure. MCD installers use a
telescopic pole that has a pair of shade brackets installed on each end. This allows them to move the pole up and down within the range of motion that
the shade will operate in. The pole can be adjusted to prevent binding in any tight spots, which are generally near the top. A tape measure just isn't
capable of providing accurate measurements in this situation. If performing a do-it-yourself installation I'd recommend modifying some sort of extendable
closet pole or whatever to perform this task. The shade should have a minimum of 1/4" clearance from the windshield on either side at the narrowest spot
to prevent binding.
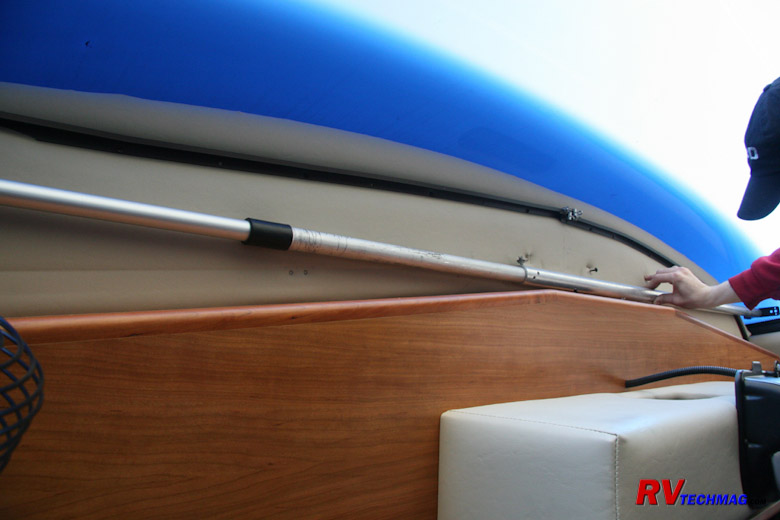
Checking For Single or Split Shade Usage
Ideally, the shades will be installed as a single shade covering the full width of the windshield. Sometimes this is not
possible, depending on the overhead cabinetry design. Some overhead cabinets have large CRT TVs in them. The extra depth of these TVs requires
deeper cabinets. In my case, I had a flat screen LCD TV but Tiffin never bothered to change the backside of the cabinet because it wasn't necessary.
They began using MCD shades the following year so at that time the bulge on the backside of the cabinet was removed. As the above photo shows, this
bulge forces the measuring pole (which represents the position of the shade) farther forward into the curved sides of the windshield. If this makes
the shade too narrow a split shade system will be required. A split shade will have a small overlap of maybe 1" where the two pieces of fabric overlap.
This will leave a small darker stripe in the middle although no additional switches will be required to operate the shades. The other alternative is
to remove the upper cabinet and modify it by trimming off the back end. Fortunately, in my case the shade roller would only be slightly forward and
we could live with that.
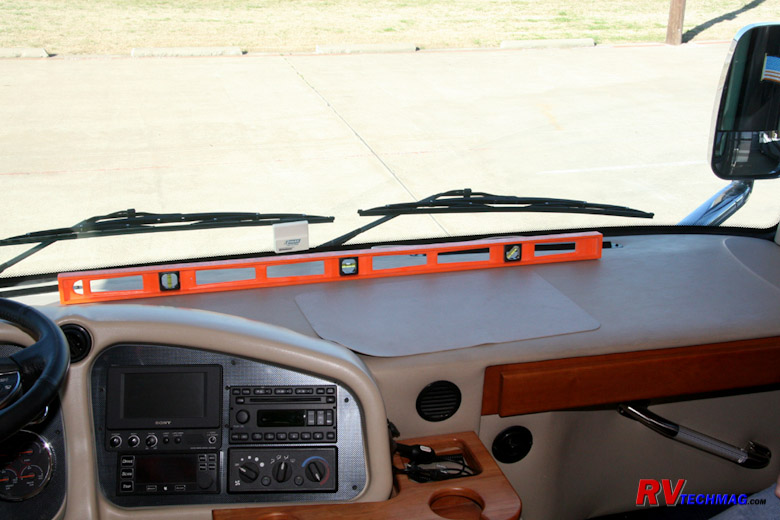
Checking For a Flat Dash
Dashes vary from coach to coach. For privacy reasons you want your shade to meet the dash, with no gaps. Some dashes are not
flat and have a fairly large hump to them. Some dashes are slightly cocked and not perfectly parallel with the ceiling. Getting a straight shade to
match a humped or slanted dash just doesn't work. Normally a shade will have a flat hem rail that does not flex. For those situations where a humped
or slightly sloped dash is involved, MCD can make a windshield shades to compensate for this. Rather than use a rigid aluminum hem rail, MCD installs
a rigid micro aluminum extruded tube inside the shade, which can be between 2" and 6" from the bottom, depending on just how much that particular
coach needs. The very bottom flap of the shade is filled with a large number of ball bearings. This allows the shade to hang nice and flat but the
base will conform to the dash when fully extended. This is not a sloppy bean bag appearance. It's a nice professional look and you wouldn't even
know it's created that way. To see if your coach needs this style simply place a large level or straight edge across the dash and check for gaps.
Also be sure to grab a tape measure and check the distance between the dash and the overhead ceiling to see if the dash is parallel to the ceiling
or has a slope to it. In my case the dash was both flat and parallel to the ceiling so this procedure was not necessary.
Modifying the Windshield Pillar Trim
|
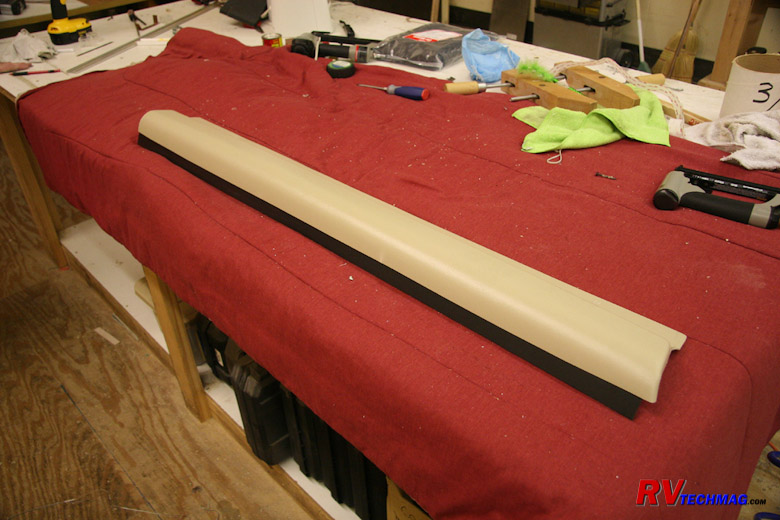
Adding A PVC Strip to the A Pillar Trim.
|
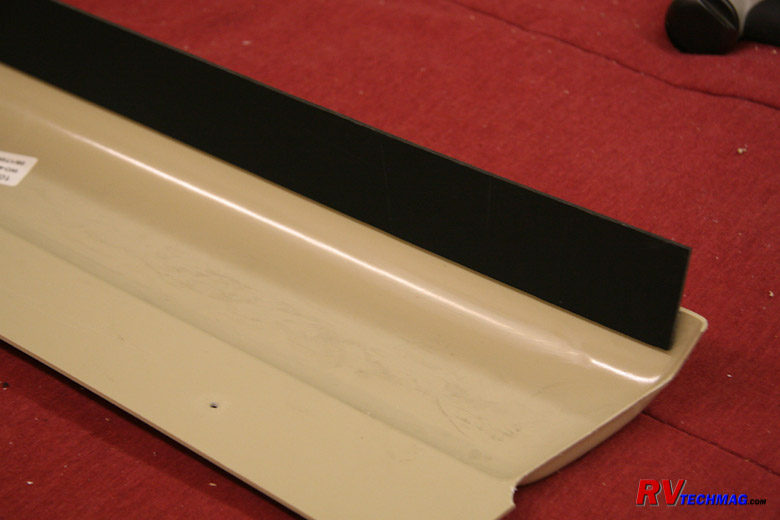
Modified A Pillar Trim.
|
Ideally the shade would drop down and rest on the front side of the windshield A pillar trim as it lowers. If the A pillar trim
is fairly curved or small, this may not be possible. In this case it may be necessary to install a track for the shade to ride in. In my case the
windshield trim was fairly flat on the front so a track would not be required. However, the trim was slightly on the narrow side and the shade would
have fallen inside the track on the copilot's side. To correct this a small PVC strip was attached to the passenger side A pillar trim to space it out
from the wall farther. A piece of strong 3M double sided VHV fastening tape was used to eliminate the waiting around for PVC cement to dry. It's
impossible to see from the coach interior and when viewed from the exterior through the windshield it looks just like its weatherstripping and supposed
to be there. This was an excellent workaround to correct a narrow trim situation. You could split the difference and add a piece of trim to both the
driver's side and copilot's side A pillars but 1/2" isn't that noticeable so it really wasn't necessary. Also, fattening up the driver's side pillar
trim would also mask a bit more of the driver's line of sight to the left side mirror so it was decided to simply modify the copilot's side.
Note that this was a 2007 Allegro Bus. Beginning in 2008 Tiffin offered MCD shades in the Allegro Bus so future years had
fatter A pillar trim and did not have to deal with the bulge on the backside of the overhead cabinet. However, if you are retrofitting an older coach
these are some of the considerations you may have to deal with. That's why it's important to take the time to analyze just what you have and plan and
measure accordingly to prevent running into any brick walls later on.
Mounting The Shade
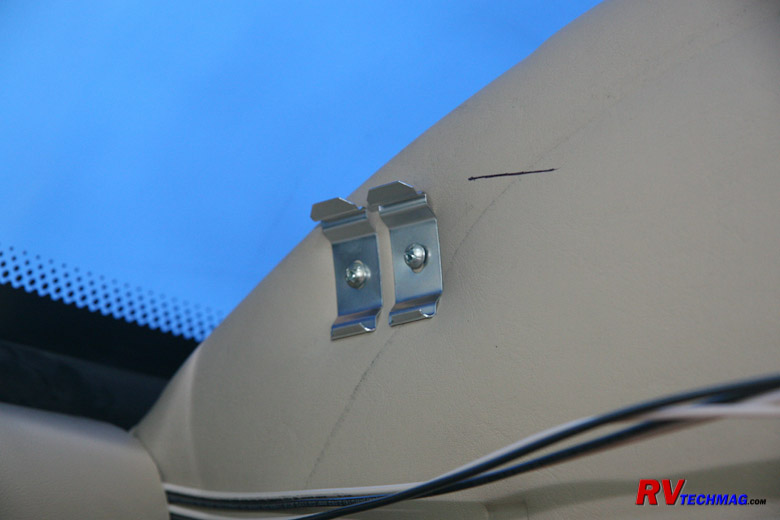
Track Mounting Clips
MCD shades come mounted via either a single roller or dual roller bracket to a mounting track. This track snaps into place on
the ceiling into a number of mounting clips. The number of clips depends on the width of the shade. Windshield shades are the most critical so they
will generally have 6 mounting clips. It's important to use double clips at each end of the windshield shades. The remaining clips get evenly spaced
out. Using double clips helps hold the larger track assembly in place and also guarantees that if a clip should ever pull out, your shade won't come
down when driving. In the above photo you'll also see a temporary mark made on the ceiling to align these clips. It's best to hold an empty mounting
track in place to mark the location of the clips. It's easier to do this than when the shades are providing additional weight for you to hold up. A
second pair of hands is helpful at this point.
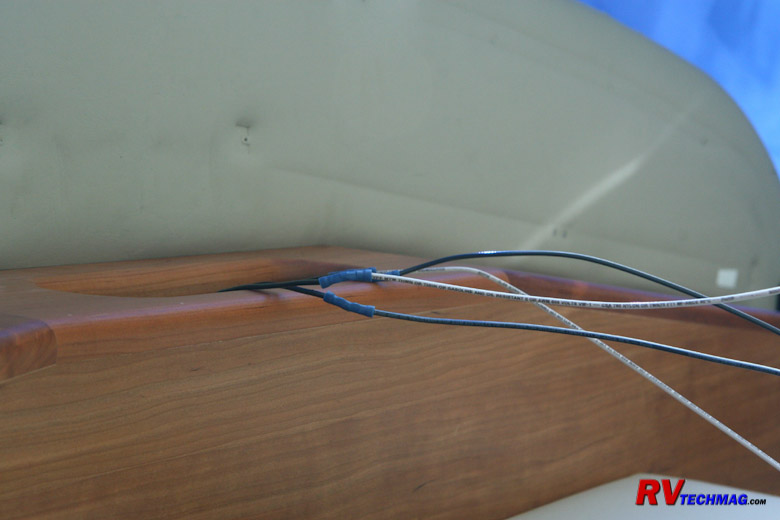
Extending the Wiring
The original powered visors were fed by short wire leads coming from the center of the overhead cabinet. The MCD shades are
full width so the motors will be on the far end of the shade rollers. It may be necessary to extend the existing shade wires in order to reach that
location if there is not enough slack in the existing wires. Once installed the wires can be tucked behind the shade mounting track to keep them
supported and hidden. You will also need to access a power source that is switched hot whenever the ignition key is on. There are a number of
locations behind the dash that offer this switched power. In my case the mirror heat switch was powered via a circuit that was switched by the
ignition key. This "ignition sense" wire is necessary to operate MCD's exclusive dual range safety feature on their windshield shades.
Product Overview
Once the shade is installed and programmed it's ready for use.
In the next section we'll follow the installation process of a set of manually operated MCD shades.
Manually Operated Shades Installation
Previously we installed MCD's dual range powered windshield shades on our 2007 Allegro Bus. MCD also makes manually operated
shades and powered remote controlled shades for all the other windows in the coach. Some times powered shades are desired but for those times when
a powered shade is not desired manually operated shades are also available. Sometimes cost is a factor and sometimes the issue of supplying 12 volt
power to the shades just makes a manual shade a better choice. MCD's latest manual shades are the GlideRise IV shades, which use the latest
generation of shade mechanisms. To extend a GlideRise IV shade, simply pull the shade down to the desired latched position and let go. To raise the
shade just tug on the bottom of the shade and it will rise under its own power automatically. The rate of ascent is adjustable via a knob on one
side of the shade roller. An adjustable auto-stop feature ensures that the shade won't wrap itself around the roller and you can decide just how
much material you want to be exposed by adjusting a knob on the opposite side of the roller. These GlideRise IV shades really are the ideal solution
in a manually operated shade. Manual shades can be fitted with MCD's exclusive ClearView solar sunscreen or your choice of privacy shade materials.
Appearance-wise they look identical to the powered shades and will give a nice consistent look throughout the coach. Many coach manufacturers choose
a white shade material for their nighttime shades which, to some people, can look kind of plain and sterile. For aftermarket installations you can
choose from a large selection of materials that MCD offers, all the way up to a weaved pattern with a silver reflective background if you would so
choose. We chose the ever popular B33 pattern which was a great match with the headlining and other interior trim and also replaced the plainness
with a bit more classy look.
The GlideRise IV shades use the same basic hardware as the remote powered shades. Therefore it is possible to install both a
manual shade and powered shade on the same American Duo bracket. This hybrid design is becoming very popular with RVers and is what we chose for
our installation. The nighttime privacy in the main living area shades are remote powered and I have the ability to lower or raise every shade,
including the cockpit side window shades, via the "All Shades" button on the 14-channel remote controller if I wish. The daytime shades in the
living area are all manually operated as are both the daytime and nighttime shades in the bedroom area. The nice thing about having manual operation
of the daytime shades is that you can sit in a chair or on the couch and when the sun comes in you just reach up and pull the shade rather than
going to the remote controller panel. In the bedroom it saved us from having to run 12 volt wire to power the shades, which would have been a
greater task. It's also a small area and it's just as easy to go pull the shade manually. The cockpit side windows were fitted with two channel
remote switches by each seat. That made it easy to control them when driving without having to reach for them. So there are places for both power
and manual shades, depending on what you want. Regardless of whether you choose manual or remote powered shades, it will be a huge improvement over
other types of shades.
In the following paragraphs I'll detail the actual process used to install MCD's manually operated shades in our 2007 Allegro Bus.
Product Overview
|
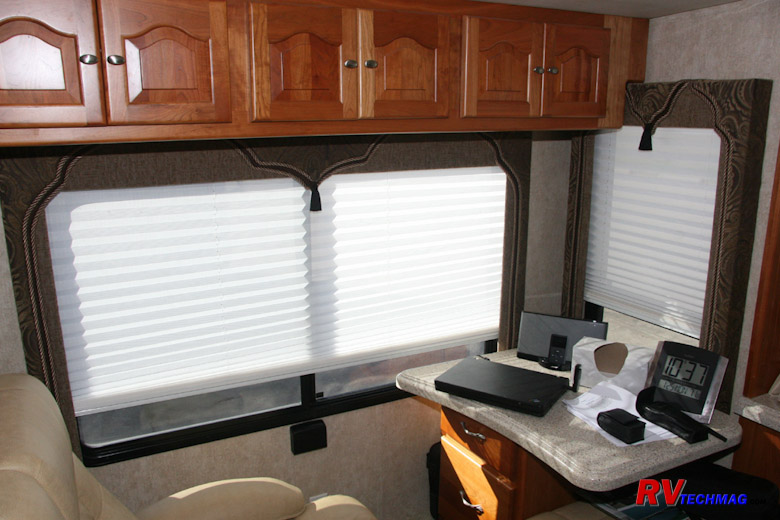
Original Pleated Shades - Interior View.
|
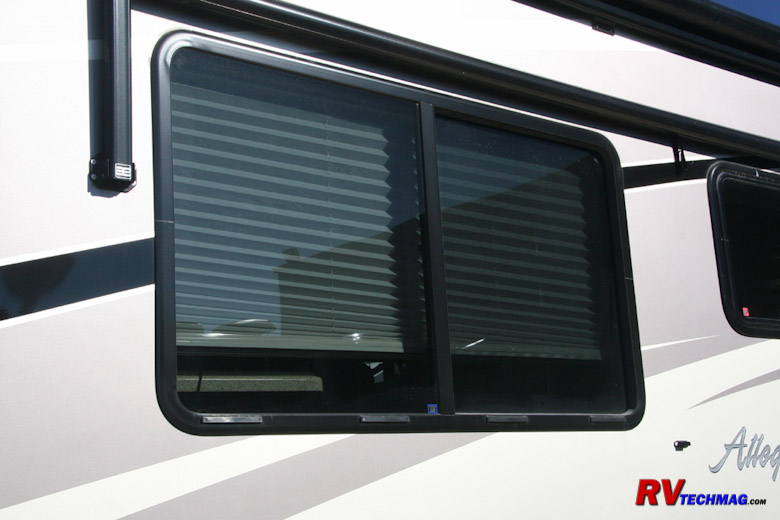
Original Pleated Shades - Exterior View.
|
Our coach originally came with those famous pleated day-night shades. They don't totally block off the light in the evening
and they are held together with strings that are known for breaking. As a matter of fact I now have a spool of the proper 1.4 mm thread and
restringing needle that I thankfully will never need to use again. The series of pinholes in the shades also allows light to penetrate the coach
during the night and whenever the day shades are down to minimize sunlight you can't see out. They also offer a less attractive appearance when
viewed from outside the coach compared to the MCD shades, which give the appearance of a nice reflective look.
Another recent shade being used by Tiffin is being referred to as the RollEase shade. In actuality, there is no such thing as
a RollEase shade. RollEase makes the pull-chain mechanisms and supplies them to shade builders but does not actually make the shades themselves. The
quality of the fabric used on these shades will not equal the quality of MCD's ClearView sunscreen material.
Measuring and Planning
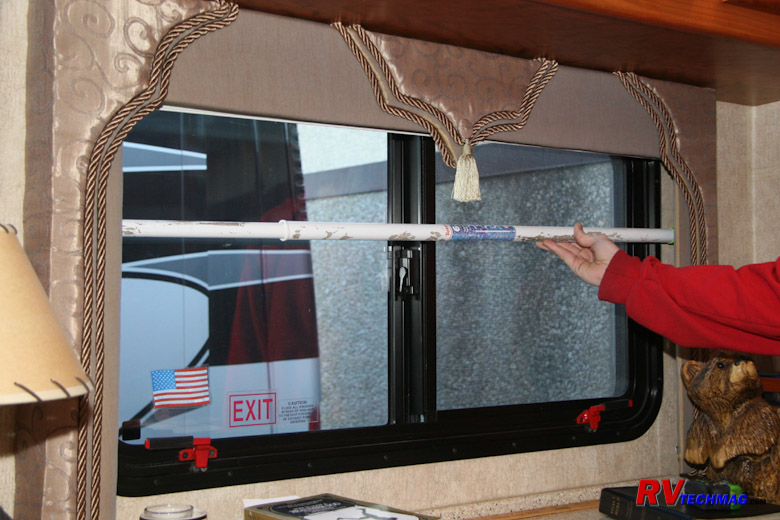
Measuring the Valance
The best way to obtain an accurate measurement of the inside width of the valance is to use an extendable pole. Extend the
pole until it touches the inside of the valance. Then move it up and down inside the valance to check for any tapering. If the valance is slightly
tapered be sure to take the smallest measurement to prevent binding. If you don't have a pole then you could jury rig two yardsticks and clamp them
together with vise grip pliers. Either way, it'll be easier and more accurate to measure your pole or whatever later. Next measure the height of
the valance with a tape measure. Be sure to measure according to the detailed instructions found at
This Link. MCD will automatically add additional shade material to your measurements to facilitate wrapping around the shade roller. They will
also allow for clearance within the valance so just measure the valance and let MCD deal with the actual shade size.
Removing the Old Shades
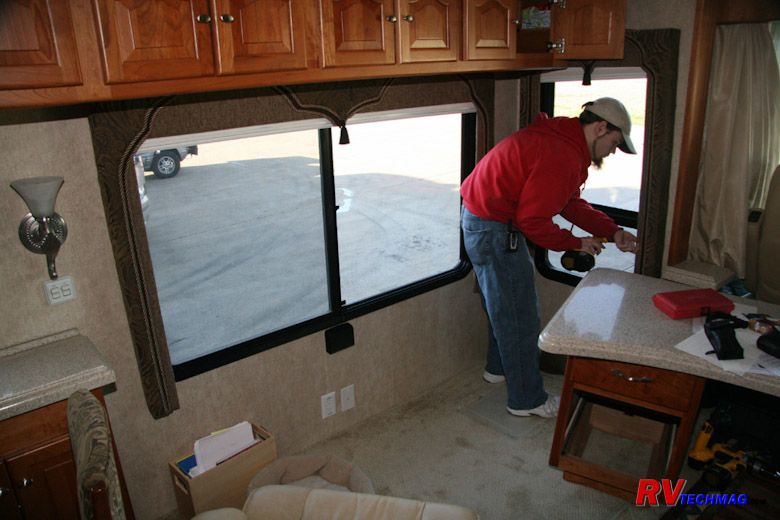
Removing the Valances
The pleated shades snap into some retaining brackets mounted into the top of the valance. But they tend to pop free and the
shade can fall so Tiffin added an extra screw to help pin the shade into the valance brackets. However, they install this screw on an angle and then
mount the entire valance and shade as an assembly which means that you cannot get to this screw when the valance is mounted to the wall. Therefore,
it's easiest to remove the entire valance to gain access to the shade.
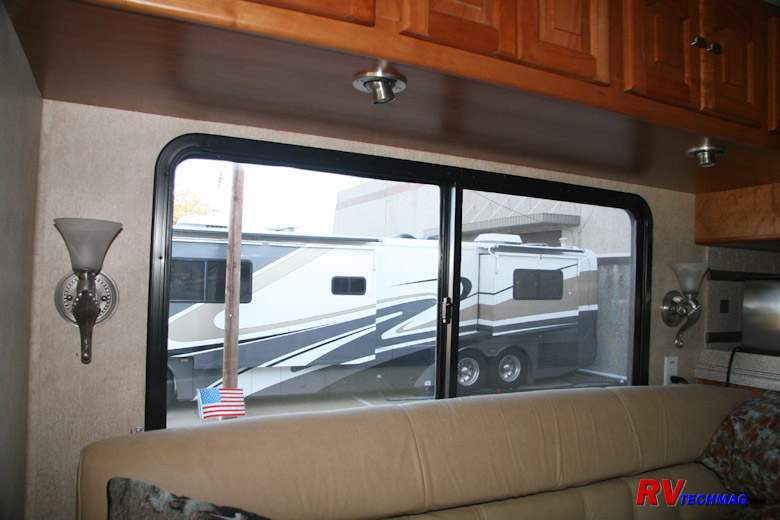
Bare Window Frame
Once the valances have been removed the bare window frame will be exposed. The pleated shades can now be easily removed from
the valance. In addition to height and width you also need to check the depth of the valance. The shade and roller needs a minimum of 2" depth in
order to fit and operate properly. Some valances were not that deep because they were designed for the slightly narrower pleated shades.
Modifying the Valances
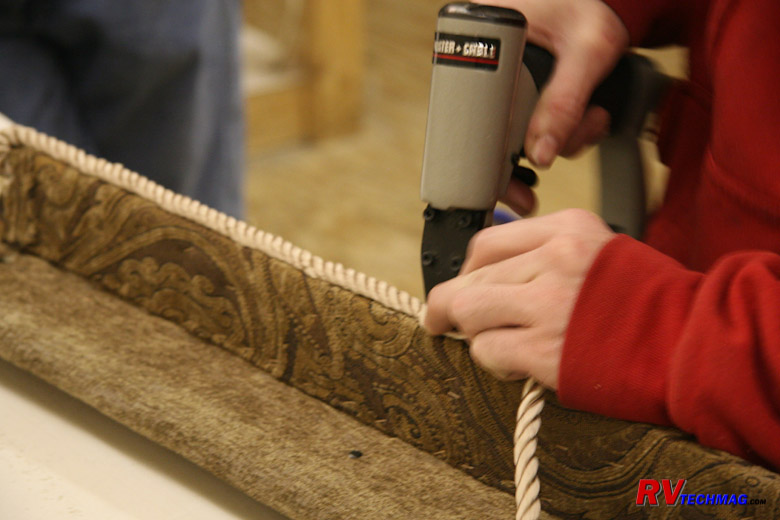
Attaching Drapery Cording to the Valances
Our 2007 Allegro Bus was one of the coaches that had the narrower valances. I did barely have the 2" of depth to the wall
but the window frames stick inboard a bit. While the shade rollers did fit, the window frames interfered with the hem rails and tended to stick and
bind. In recent years the valances were made deeper to accommodate MCD roller shades but my coach was one year too early to benefit from that. Rather
than go through the expense and time of making new valances it was much easier just to space me existing valances out from the wall a bit. I didn't
need much more room but it still needed to look attractive as well. What is generally done in those cases is utilize drapery cording, commonly used
to create tie backs for drapes. This stuff is popular, comes in many colors, has a nice satin sheen, and is 1/2" in diameter, which is perfect for
what we need. We used a color that went well with my existing valances and stapled the cording to the backside of the valances - effectively spacing
them out from the wall enough to ensure smooth operation of the shades. The end result was that it looked like it came from the factory that way and
was part of the valance.
Mounting the Shade
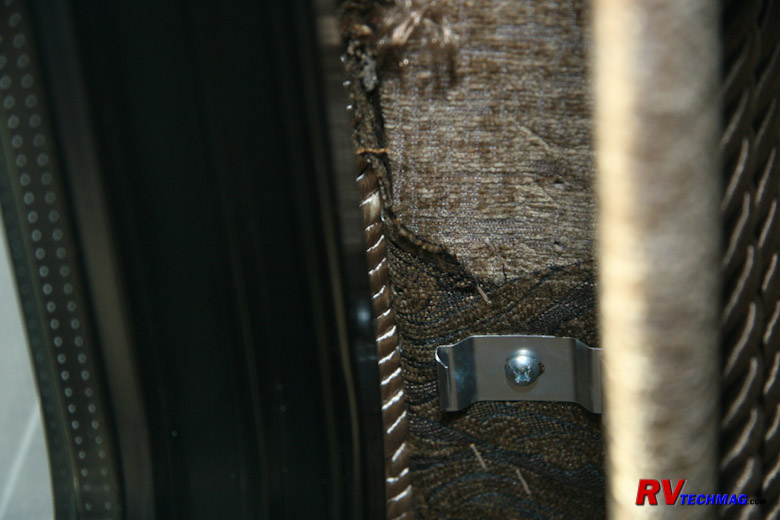
Track Mounting Clip
MCD shades come mounted via either a single roller or dual roller bracket to a mounting track. This track snaps into place on
the ceiling into a number of mounting clips. The number of clips depends on the width of the shade. If the shade is 29" or smaller two clips will be
fine. For shades that are between 30" and 60" in width three clips will be required. If your shade is larger than 60" in width four clips will be
required. Place one clip near each end and evenly space any remaining clips over the width of the shade. Be sure to properly locate the shade in the
valance. Properly center the shade from left to right within the valance but do not center it depth-wise or else the shade may catch on the window
frame, which intrudes into the valance. In order to allow for the width of the window frame, plus the screw heads you'll probably need to allow 1/2"
of clearance on the back side. After allowing for this clearance you can then center the shade brackets within the remaining area. If you place the
shade too close to the outer edge of the valance it will rub on the inside of the valance and bind. Conversely, if it's too close to the window frame
it'll catch on the screw heads and bind. The mounting clips do have slotted mounting holes so be sure to locate your screw in the very center of the
slot so that you can adjust the shade in either direction if necessary. Also, before mounting the valance check the condition of the screw heads on
the window frames. If the screws have any sharp burrs on them from when they were installed it would be a good idea to file them off so that they can't
cut the shade when it glides past them. Once the brackets are installed into the valance you can either mount the valance to the wall, then simply
snap your GlideRise IV shade into the brackets or snap your shade into the valance and then mount the entire assembly to the wall, depending on which
way is easiest.
Adjusting the Shade

Testing the Shade
Once the shade is installed in the valance all you might have to do is adjust the retract speed and auto-stop positions.
Virtually every single shade that MCD makes is tested and properly adjusted before it leaves the factory. The shades are hung on a test stand and the
retract speed and auto-stop limits are preset. In most cases your shade won't require any adjustments at all. If you've unwrapped a loop or two of
fabric when you handled the shade you may need to readjust the retract speed. If your valance is deeper than what was expected you may need to
adjust the auto-stop position. This is an easy task with GlideRise IV shades. You simply adjust the appropriate knob on the shade roller. For
details on how to adjust your manual shades refer to the Manual Shade Adjustments tutorial page.
Once your shades are installed and any needed adjustments made, you are ready to enjoy your MCD shades. Simply pull the shade
down to the desired position and the internal locking mechanism will hold it in place. To raise the shade, just give the bottom of the shade a tug and
let it go. The GlideRise IV technology will automatically retract the shade at a controlled speed and the auto-stop feature will ensure it stops right
where you want it to. On my particular coach I chose to install American Duo dual roller shades throughout the coach. Both the day and night shades on
the cockpit side windows were powered. In the main living area we chose a hybrid design where all of the night shades were powered but all of the day
shades were manually operated. In the bedroom area we chose to go with American Duo manually operated shades on both the day and night shades. In two
cases we had extremely tight clearances in the valances. The small window of the galley sink had a very small overhead valance tucked under the overhead
cabinet that would never be able to conceal a two shade roller. If we replaced the valance with a large unit the window area would be greatly reduced.
In this case it just would not be practical to use a dual roller design so we opted for a single roller powered night shade. For a daytime shade we went
with MCD's excellent ClearView sunscreen material and utilized a Velcro mount to the window frame. Generally this screen will stay on that window 24/7
because it's easy to see through. Whenever the window needs to be opened or closed we simply pull one corner of the Velcro'd screen loose and slide the
window. We also used this system in the bathroom, which had a similar compact valance.
In the next section we'll follow the installation process of a set of remote powered MCD shades.
Remote Powered Shades Installation
In previous chapters we covered the installation of MCD's dual range powered windshield shades on our 2007 Allegro Bus as well
as some manually operated shades in the living area. We also installed some remote powered shades in the cockpit side windows and in the main living area.
This topic will cover MCD's remote powered shades - how they work and how they were installed. For all practical purposes we will not be referring to
MCD's dual range powered windshield shades because they use a different control method as well as the dual range safety feature that operates when the
ignition is on. For information on windshield shade installations please refer to the Windshield Shades Installation tutorial.
MCD's powered remote controlled shades are a unique, compact design. A 12 volt motor is inserted into the shade roller and does not
take up any additional room in the valance. Powered shades can be located anywhere that a GlideRise IV manually operated shade can be located. The powered
shades can be used in MCD's American Solo single roller systems or can be part of the American Duo dual roller systems. Dual roller configurations allow
for dual manual shades, dual powered shades, or a hybrid design using one manual and one powered shade.
The motors are powered by 12 volt battery power. Each motor is fed a pair of wires, a hot feed and a ground. The feeds are
constantly hot, not switched, so you can tie into any available nearby 12 volt source. Each motor draws 800 milliamps under load (.8 amps) so the
current draw is very small. Each motor contains a radio receiver and some electronic memory to hold the various parameters and settings. Wireless
remote controllers communicate with each motor to operate them as well as to program the various settings. It's a fairly simple task to modify any
shade's parameters or relocate to a different switch. Unlike the GlideRise IV manually operated shades, the remote powered shades use digital memory
to set the auto-stop positions so there are no adjustment knobs on the shade itself. Everything is done from the remote controller.
In the following paragraphs I'll detail the actual process used to install MCD's remote powered shades in our 2007 Allegro Bus
and explain in more detail how the various controllers function.
Product Overview
|
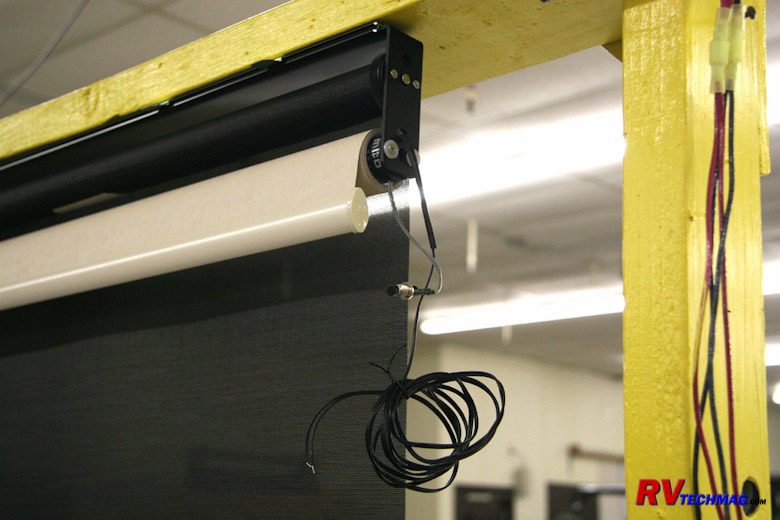
Powered Shade Assembly.
|
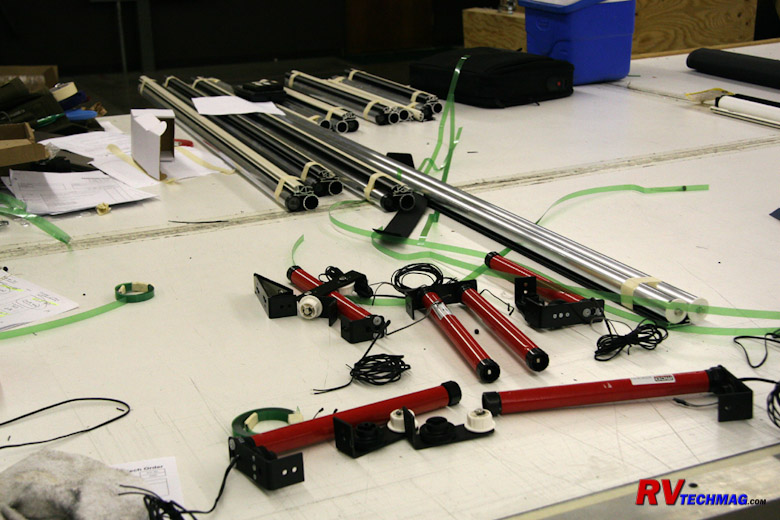
Powered Shade Components.
|
In the upper photo a remote powered shade is hung from a test stand at MCD. Every unit is tested prior to shipment. This image
shows two sets of wires. One pair is the 12 volt hot and ground that powers the shade. The other pair connects to a small pushbutton which is used to
short those two wires out in order to initiate the programming mode on remote controlled shades or to set the stop limits on a dual range powered
windshield shade. Once the shade is programmed the button is no longer needed. It can be left in place and tucked above the mounting track or it can
be removed if desired. The lower photo shows the various components that were used to assemble my shades. Some of the roller tubes are visible on the
assembly table as are the various brackets. The motors are the red tubular items that also contain the electronic components required to communicate
with the remote controllers. As you can see, they are a nice compact package and provide a quality, trouble free product.
Measuring and Planning

Measuring the Valance
The best way to obtain an accurate measurement of the inside width of the valance is to use an extendable pole. Extend the
pole until it touches the inside of the valance. Then move it up and down inside the valance to check for any tapering. If the valance is slightly
tapered be sure to take the smallest measurement to prevent binding. If you don't have a pole then you could jury rig two yardsticks and clamp them
together with vise grip pliers. Either way, it'll be easier and more accurate to measure your pole or whatever later. Next measure the height of the
valance with a tape measure. Be sure to measure according to the detailed instructions found at This Link. MCD will automatically add additional
shade material to your measurements to facilitate wrapping around the shade roller. They will also allow for clearance within the valance so just
measure the valance and let MCD deal with the actual shade size.
|

Removing the Valances
|

Bare Window Frame.
|
The pleated shades snap into some retaining brackets mounted into the top of the valance. But they tend to pop free and the
shade can fall so Tiffin added an extra screw to help pin the shade into the valance brackets. However, they install this screw on an angle and then
mount the entire valance and shade as an assembly which means that you cannot get to this screw when the valance is mounted to the wall. Therefore,
it's easiest to remove the entire valance to gain access to the shade.
Once the valances have been removed the bare window frame will be exposed. The pleated shades can now be easily removed from
the valance. In addition to height and width you also need to check the depth of the valance. The shade and roller needs a minimum of 2" depth in
order to fit and operate properly. Some valances were not that deep because they were designed for the slightly narrower pleated shades.
Modifying the Valances

Attaching Drapery Cording to the Valances
Our 2007 Allegro Bus was one of the coaches that had the narrower valances. I did barely have the 2" of depth to the wall
but the window frames stick inboard a bit. While the shade rollers did fit, the window frames interfered with the hem rails and tended to stick and
bind. In recent years the valances were made deeper to accommodate MCD roller shades but my coach was one year too early to benefit from that. Rather
than go through the expense and time of making new valances it was much easier just to space me existing valances out from the wall a bit. I didn't
need much more room but it still needed to look attractive as well. What is generally done in those cases is utilize drapery cording, commonly used
to create tie backs for drapes. This stuff is popular, comes in many colors, has a nice satin sheen, and is 1/2" in diameter, which is perfect for
what we need. We used a color that went well with my existing valances and stapled the cording to the backside of the valances - effectively spacing
them out from the wall enough to ensure smooth operation of the shades. The end result was that it looked like it came from the factory that way and
was part of the valance.
Wiring the Shades in the Living Area
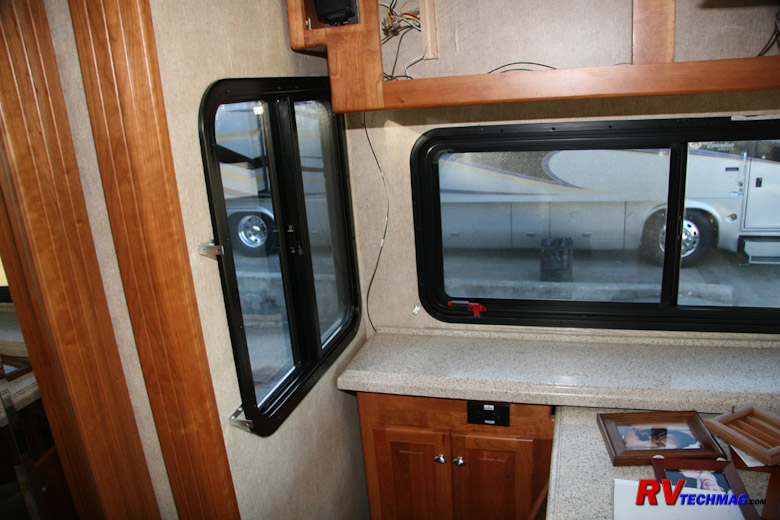
Connecting to the Dinette
Without a doubt, the most time consuming task with installing powered shades is getting power to them. Initially I thought this
was going to be a huge undertaking and had visions of my ceiling all torn out with wiring hanging down all over. Fortunately, it wasn't that bad. When
you stop to think about it, there's 12 volt power all over the coach. Because the shade motors draw such little power it's not necessary to provide a
dedicated fused circuit for them. All you have to do is tap into a nearby circuit. The shades do require power to operate so you'll need to find a hot
source, rather than tap into a light or other device that is controlled by a switch. Otherwise your shades won't work unless you turn the light on.
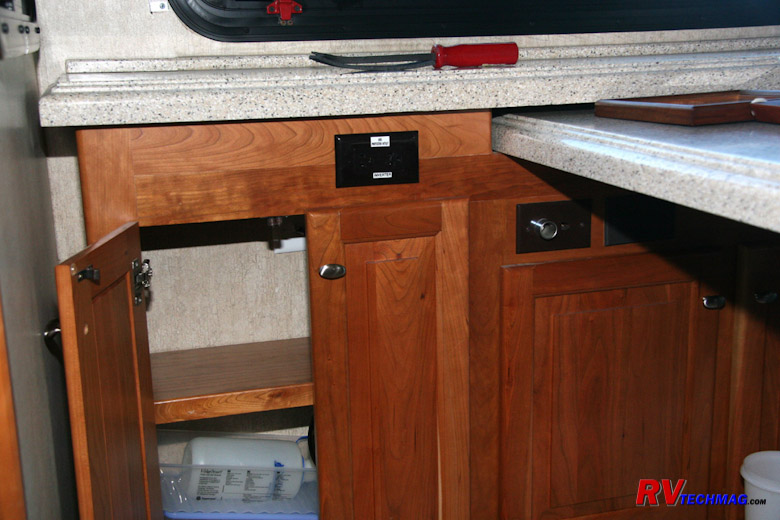
12 Volt Outlet in the Dinette
On the dinette side of the coach it was easy. Most dinettes come with a 12 volt power socket to run a laptop computer or other
12 volt devices. All you have to do is run that power up to the overhead cabinets and then over to the shades on that wall. After the valances were
removed a wire was run from the 12 volt receptacle in the dinette counter and up the corner of the slideout wall. Once the valance was reinstalled that
wire was tucked behind it and hidden so that it was no longer visible.
|

Removing the Cabinet Doors
|
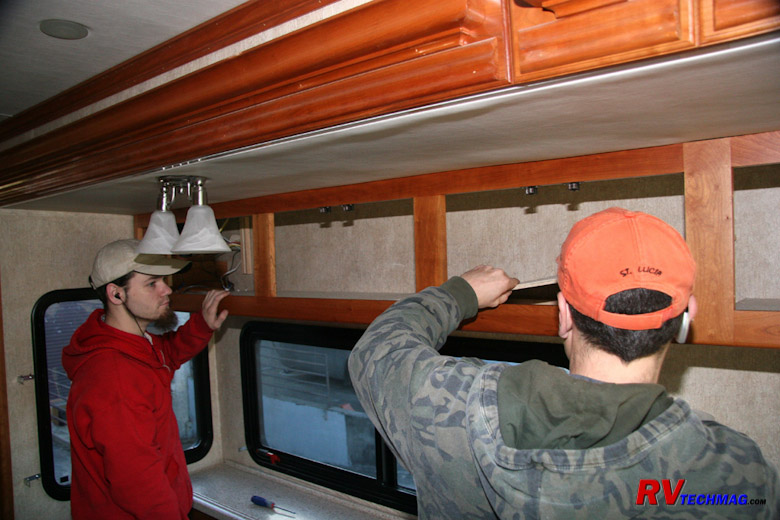
Removing the Cabinet Floor.
|
The four shade valances on this wall butted up underneath the overhead cabinet that ran the full length of the slideout.
Therefore we could hide the wires in the overhead cabinet so that they would not be seen. The cabinet is of sturdy hardwood construction and a 1/4"
plywood floor is placed inside the cabinet and covered with a non-slip material that's a cross between felt and very thin carpeting. This floor is
then stapled down to the crossmembers in the base of the cabinet. This was the perfect spot to run our shade wiring. Using a series of pry bars we
carefully pried up the floor of the cabinet. However, the adjustable hinges for the cabinet doors intruded into the cabinet so we could not lift the
flooring up high enough to gain access. The solution was to remove the cabinet doors, making sure to number them so that we wouldn't have to realign
all the hinges when reinstalling them. The cabinet flooring then lifted right up and we tucked it into the top portion of the cabinet to keep it out
of the way.
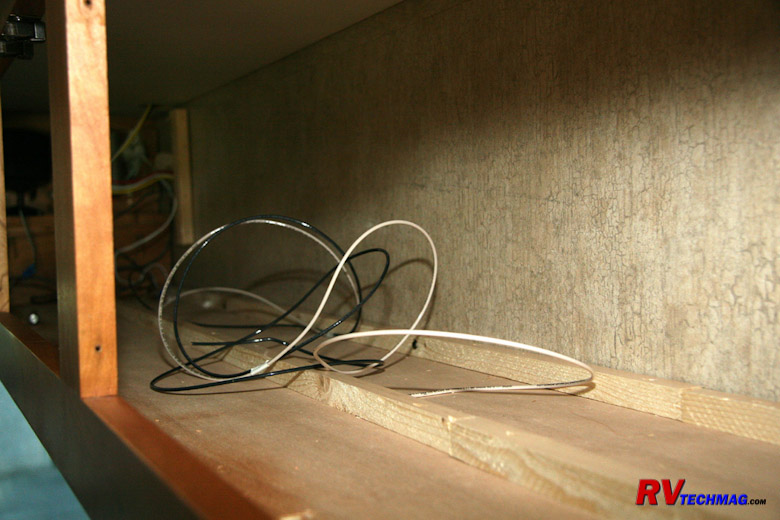
Running the Wires in the Cabinet
The wires were then run to the far end of the cabinet and splices were made to provide four drops, one to each of the shades.
If you are installing both daytime and nighttime shades you'll need to double the number of wiring drops. It would be best to make those splices inside
the cabinet rather than in the valance because there is less room in the valance to do this. The wires will need to exit the cabinets near to where the
shade motors will be. The motors themselves are bidirectional so they can be located on either end of the shade roller. The choice is made upon which
end is easiest to connect to and is made prior to building the shades. Once the wires have been run through the bottom of the cabinets a fair amount of
slack should be allowed. Eventually spade type quick disconnects will be crimped to their ends to facilitate ease of installation and removal. But it's
much neater to drill very small holes into the top of the valances and cabinet bottoms to pass the wires through rather than large holes to pass the
wiring terminals through. The wire terminal connectors can be added to the wires after the valances have been reinstalled so just leave those wires
hang for now. The excess wire can easily be pushed back into the cabinet cavity later on.
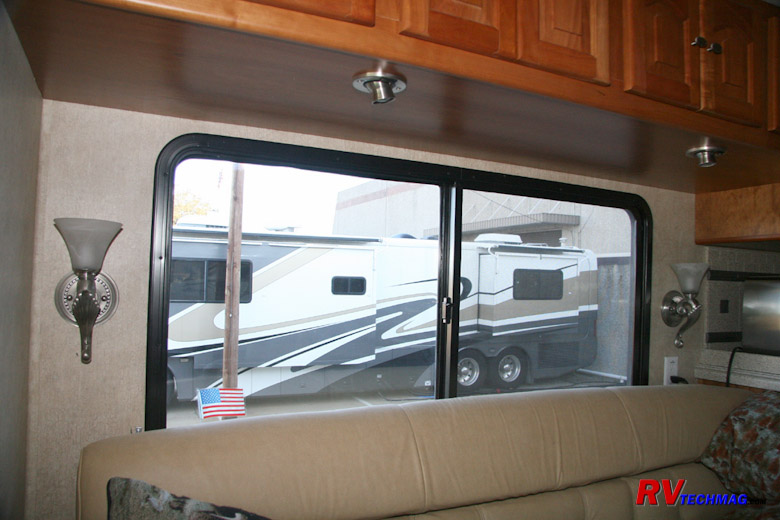
Passenger Side Turret Lamps
The passenger's side was a bit easier. We did need to remove the doors and pry the cabinet flooring up, just as we did on the
driver's side slideout. However, the overhead cabinet in the passenger side slideout had turret style reading lamps that were controlled by integral
switches, which meant that 12 volt hot power was fed to those lights. All we had to do was tie into those wires to supply power to the shade over
the couch.
The small shade over the kitchen windows was done in similar fashion. After removing the cabinet flooring we were able to
connect to the wiring that fed the fluorescent under-cabinet light fixture in that cabinet.
Wiring the Side Shades in the Cockpit Area
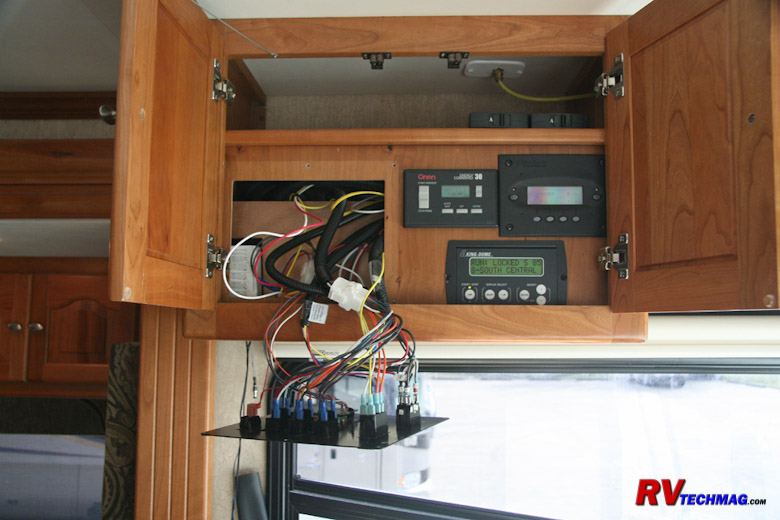
Powering the Driver's Side Shade
The driver's side shade also required 12 volt power. Normally the procedure is to remove the left side A pillar trim and run
a wire up from the dash area, through the A pillar trim, and back through the overhead cabinet to the driver's side shade. You can connect to any 12
volt constantly hot power source found within the dash. Because the shades only draw 0.8 amps it's not necessary to provide a separate fused circuit
for them. In my case, I already had 12 volt power in the cabinet directly above the driver's seat. A 12 volt battery feed was supplied to my Onan
EC30 Automatic Generator Start module so I simply tapped into that wire. Depending on how your coach is outfitted, you may or may not be able to
locate a 12 volt source in that cabinet. If you cannot find one, you'll have to go through the A pillar trim to access the dash area.
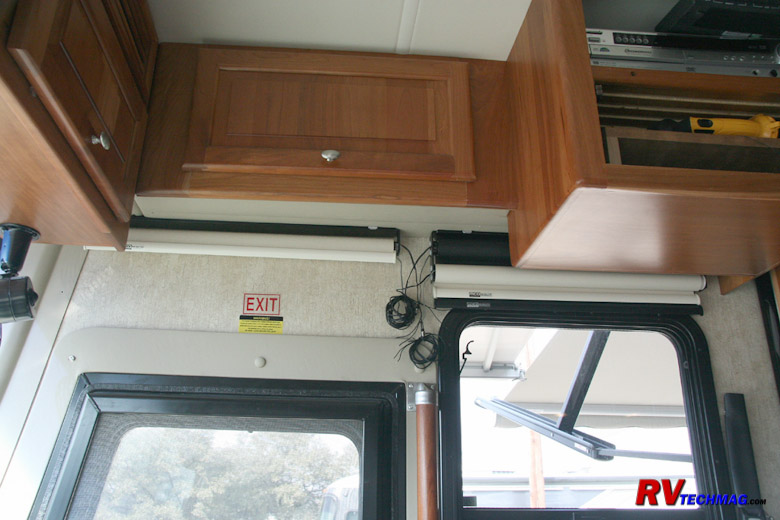
Accessing the Antenna Booster Cabinet
Power was provided to the shades that cover the entry door and copilot's side window power once again by dropping wires down
through the overhead cabinet. Many coaches use a Winegard video selector switch that selects between cable TV, satellite receiver, antenna, DVD, etc.
The units generally have a button to push that lights up a red pilot lamp and powers an antenna booster for use with the standard batwing TV antenna.
This amplifier requires 12 volt power so this is an easy to access power source. If you do not have this kind of video selector you may be able to
find 12 volts at a map light or any other light as long as the power is constantly hot, and not switched. If you do not have any power in that cabinet
you may be able to find something in the front cap, behind the TV. Chances are that if you don't have the coaxial cable selector switch you will have
an antenna booster switch someplace in the front overhead cabinets. If none of these conditions exist you may have to run your wires down through the
passenger side A pillar trim and tap into a source behind the dash. In my case I did have the antenna booster so it was an easy task to tap into those
wires and supply those shades.
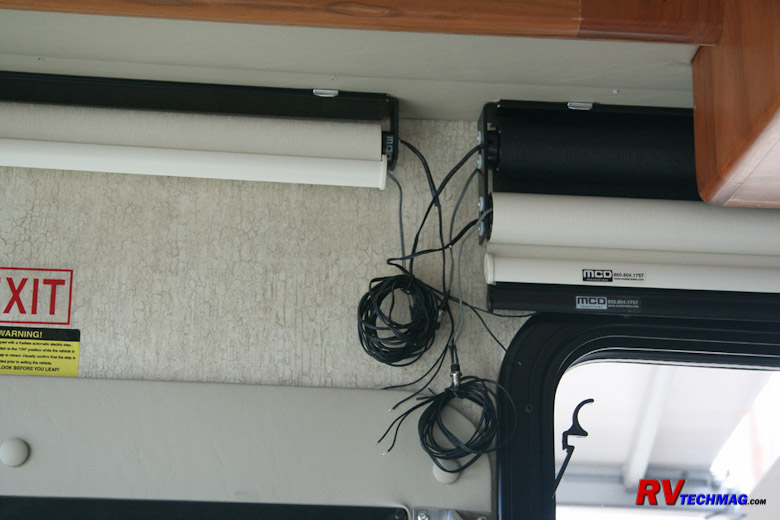
Powering the Copilot's Shades
When planning your installation it's important to plan both the direction the shade will roll off the shade roller as well as
where the wiring will be connected. Normally you want the shade material to roll off the backside of the shade roller so that the shade is closest to
the wall in order to minimize light penetration by keeping the gap between the shade and window frame as tight as possible. Sometimes it's not feasible
to do this because the window frame is too fat. This was the case with our entry door. The screen door jutted into the coach so that particular shade
was configured to roll off the front side of the shade in order to give it more clearance. However, the shade still laid flat against the screen frame
when extended. Once this rotation direction has been decided, it's easy to plan on which end to locate the shade motor. As you can see in the above
photo, the shades are arranged so that all of the wires are bunched in one common location. This makes it much easier to run wiring to the shades and
provides a nice clean look to the installation. By drilling one hole up into the base of the overhead cabinet it was easy to fish the wires forward to
the antenna booster's 12 volt power source.
Mounting the Shades

Track Mounting Clip
Sometimes it's easier to mount the valances first and then snap the shades into place and sometimes it's easier to clip the
shade into the valance and then mount the entire assembly. If that is the method you choose it would be easiest to hold the baser valance up in place
to mark where the wires will need to pass through the valance. Once you have carefully marked exactly where the wires will enter the top of the
valance drill a small hole to allow the wires to pass through the valance. If you choose to install the shades after the valance is up be sure to
first install the mounting clips that will hold the shade to the valance.
MCD shades come mounted via either a single roller or dual roller bracket to a mounting track. This track snaps into place on
the ceiling into a number of mounting clips. The number of clips depends on the width of the shade. If the shade is 29" or smaller two clips will be
fine. For shades that are between 30" and 60" in width three clips will be required. If your shade is larger than 60" in width four clips will be
required. Place one clip near each end and evenly space any remaining clips over the width of the shade. Be sure to properly locate the shade in the
valance. Properly center the shade from left to right within the valance but do not center it depth-wise or else the shade may catch on the window
frame, which intrudes into the valance. In order to allow for the width of the window frame, plus the screw heads you'll probably need to allow 1/2"
of clearance on the back side. After allowing for this clearance you can then center the shade brackets within the remaining area. If you place the
shade too close to the outer edge of the valance it will rub on the inside of the valance and bind. Conversely, if it's too close to the window frame
it'll catch on the screw heads and bind. The mounting clips do have slotted mounting holes so be sure to locate your screw in the very center of the
slot so that you can adjust the shade in either direction if necessary. Also, before mounting the valance check the condition of the screw heads on
the window frames. If the screws have any sharp burrs on them from when they were installed it would be a good idea to file them off so that they can't
cut the shade when it glides past them. Once the brackets are installed into the valance you can either mount the valance to the wall, then simply
snap your GlideRise IV shade into the brackets or snap your shade into the valance and then mount the entire assembly to the wall, depending on which
way is easiest.
When you are ready to install the valance hold the valance up to the wall and slide your wiring tails through the hole in the
valance. Then fasten the valance to the wall and overhead cabinets. Once the valance is fastened down crimp a pair of wire terminal spade disconnects
to the ends of the wires. Allow enough slack to make it easy to access. Don't cut them too short because you can always shove the excess back inside
the cabinet cavity. Crimp another set of spade disconnects to the wires on the shade itself. Try to put a male and female disconnect on each shade and
on each wiring drop. MCD shades are polarity sensitive so it is important that the 12 volt positive wire is connected to the black wire with the white
stripe on the MCD shade motor. By installing a male connector on one motor wire and a female on the other you'll be assured that the wiring will not
get crossed if you ever remove and reinstall the shade for whatever reason. Once the wiring has been completed, simply snap your MCD remote powered
shade into the mounting brackets in the valance.
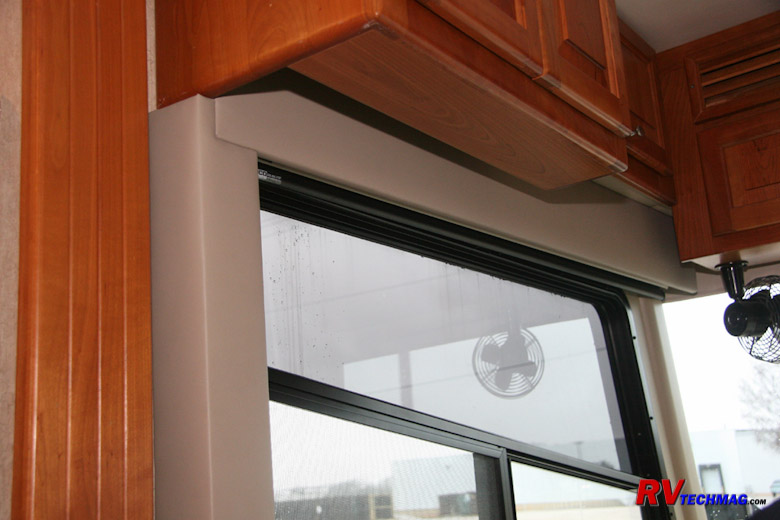
New Valance Trim for Cockpit Side Shades
In the main living area we had existing fabric covered valances that just needed to be spaced out a bit. However, the cockpit
side shades did not have any valances. There were no privacy shades because they relied on drapery to provide privacy at night. The only sunscreen
shades were the bug screen shades on rollers that just hung in plain view from the overhead side cabinets. Now that we were upgrading to MCD's American
Duo dual roller shades it was desired to trim that area up a bit to conceal them from view. To accomplish this MCD fabricated some new panels to create
valances that would do a nice job of concealing the shade rollers. They did an excellent job on these and upholstered these plywood panels with foam
padding and a vinyl covering that was an excellent match for the coach interior. It actually looks better (and more original) than the wood boards that
Tiffin uses in the latest coaches. The valances eliminate any gaps around the edges of the shades, there is no light penetration at night, and there is
total privacy because it is impossible to see in from outside the coach.
Programming the Shades

Remote Control Keypads
MCD Remote Powered Shades are controlled wirelessly by remote controls. Each shade can be programmed to respond to any number of
controllers and each controller button can be programmed to control multiple shades if desired. This allows a very flexible method to control your MCD
powered shades. Controllers come in two sizes - a 14-channel and a two channel controller, as illustrated in the above photos. Two channel controllers
are typically used to control a single shade location, such as a cockpit side shade, while 14-channel controllers handle a large number of shade
positions and typically are used for the main living area. These controllers are wireless and use batteries to operate. Because the controllers require
no external wiring connections they can be used as portable hand-held remotes if desired, surface mounted to a wall surface with hidden screw locations,
or recessed and mounted within the wall, as is popular with the 14-channel remote controller. In our particular situation we chose to mount the two
channel controllers for the side cockpit windows but to leave the large 14-channel remote loose so that we wouldn't have to run back to a wall location
to operate the shades. We can always mount it later if we change our minds.
Programming the Shades
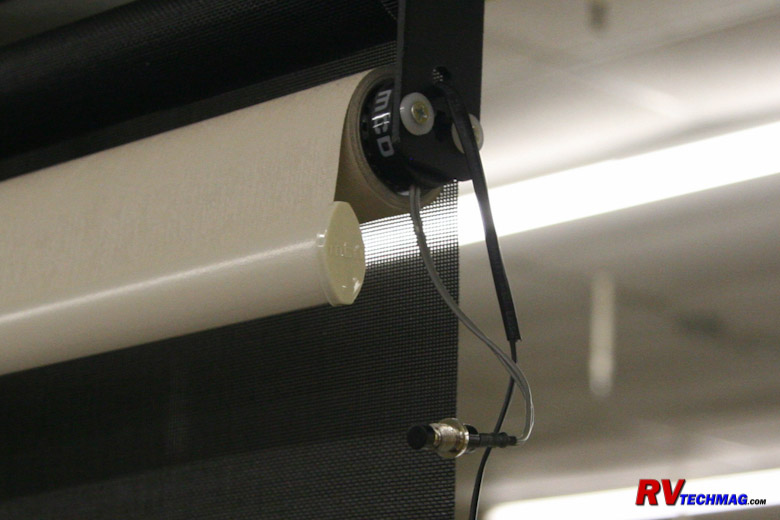
Programming Button
Each powered shade is provided with two short wires that attach to a small pushbutton. This button is pressed to enter the shade
into its programming mode on remote controlled shades or to set the stop limits on dual range powered windshield shades. The buttons do not need to be
present during normal operation but it won't hurt to leave them in place either. If you find that there's not much space in the valance you can unplug
them and keep them in a desk drawer and retrieve them if you ever need to reprogram the shade. While it's true that shades can be assigned to any number
of controller buttons, each shade does need to be married to a specific controller. This defines that controller as the master controller for that
particular shade. The master controller will be used to set upper and lower auto-stop positions and to define the proper motor rotation direction for
the correct up and down motion of the shade. Once this is set, the shade can easily be added to any other controllers or buttons. The best practice is
to use the two channel remote controllers as master controllers for the cockpit side shades, then assign the 14-channel remote as the master controller
for all of the shades in the living area. Note that the dual range windshield shades are not wireless and those limits will be set by the rocker switches
that control those shades. For exact programming instructions please refer to the MCD Owner's Manual.
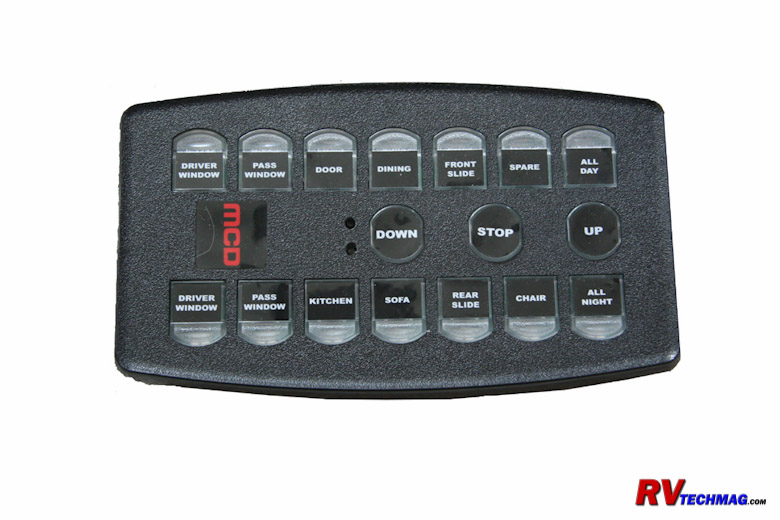
14 Channel Remote
The 14-channel remote can be configured in many ways. MCD will label the various buttons to match the configuration of your
particular coach. If you are installing both powered daytime and nighttime shades each row will generally feature the same labels with the daytime shades
on the left row and the nighttime shades on the right row. In my case we were using MCD's GlideRise IV manually operated shades for the daytime sunscreens
and only powering the nighttime privacy shades in the living area. So, we had plenty of extra buttons available. We included both the daytime and nighttime
powered shades from the cockpit side windows on the available unused buttons. At the top of each row we added "All Day" and "All Night" buttons. Pressing
the "All Night" button operates every remote powered nighttime shade in the coach, including the cockpit side shades. The windshield shade is controlled
by the rocker switches in the cockpit and will not be controlled by the remote controllers. Pressing the "All Day" button operates both of the cockpit side
window day shades. Overkill? Maybe, but the buttons were there so why not use them. Actually this gives three way control over the cockpit side shades.
They can be operated by the two channel remotes at each window, by one of the specific shade buttons on the 14-channel remote, or by the "All Night" or
"All Day" buttons on the 14-channel remote. This system is very flexible and you are unlimited as to how many remotes you want to use and where you
would like to locate them.
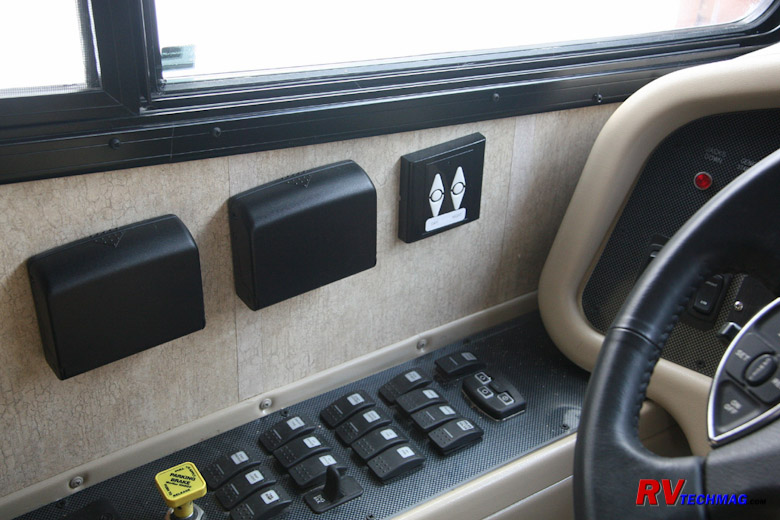
2 Channel Remote by Driver's Side
This hybrid system has really been a great way to go. The daytime sunscreen shades with GlideRise IV technology are easy to
operate. When sitting at the desk or on the couch, you simply reach up and pull the shade down if it gets too sunny. If the sun goes away you can just
give it a tug to have it retract, although with MCD's ClearView technology it's so easy to see out of the coach that you probably won't be retracting
them al that often. The power privacy shades in the living area are generally only operated in the evening to lower for privacy, or in the morning to
raise them back up. The powered cockpit side shades are a real treat. The daytime sunscreen really knocks out the sun's heat and glare when driving
and the privacy shade can also be partially lowered as a sun visor on either the side windows or the windshield. Plus it's quite impressive to others
when you press one button and all the shades operate at the same time. The MCD system really is top of the line.
In the next section we'll discuss how to adjust your MCD manually operated shades.
Generation I Shades
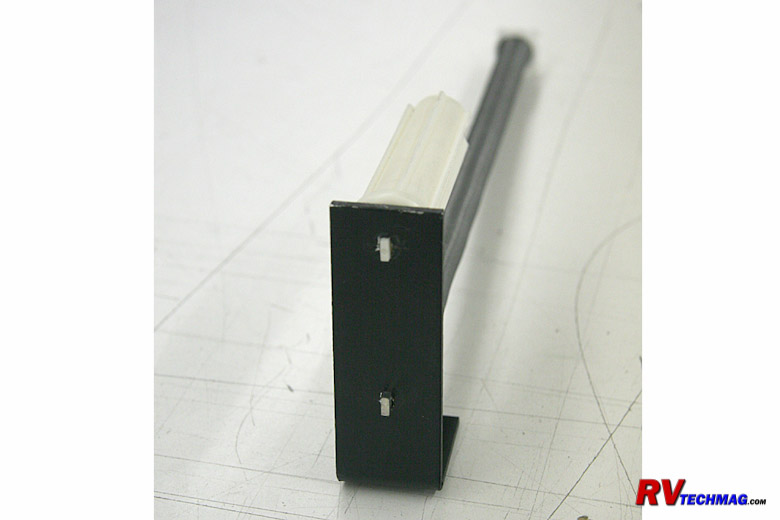
Generation I Shade Mechanism
Identified by Two Spade Ends
The very first generation of MCD interior roller shades began production in April 2007 and continued through October
2007. This generation can best be identified by looking at the end brackets. All Generation I shades have 2 flat spade mounts in the end of the
shades, in similar fashion to your basic residential shades found at home. These shades do not have an auto-stop feature so it was necessary to
give them a tug when you got to where you wanted to park them. These shades were properly tensioned at the factory but many times they were
allowed to unroll when being installed by the coach builder, which meant many of these shades did not retract properly after they were installed.
Many coach builders installed a bump stop to the valance to prevent the shade from rolling up on the roller, which was the proper way to limit
their travel.
Every generation of MCD manually operated shades does contain a speed reducer to control the ascent speed of the shade. If
for some reason the shade is not properly tensioned it may not raise all the way up. To increase the tension on these shades pull the shade down a
bit to expose a foot or so of material then allow it to lock in place. Then pop off one of the plastic end caps on the hem rail at the bottom of the
shade. The end caps just press into the rail so carefully pry them out. Then slide the hem rail off of the shade material. Without turning the shade
roller, simply tuck the shade material around the roller an extra turn or two. This will increase the spring tension on that roller and make it
retract better. If it's too tight, do the reverse and unwrap a loop or two from the roller. Then reinstall the hem rail and test its operation. If
it performs satisfactorily replace the plastic end caps in the hem rail and you're all done. Some of the early valances were quite tight and it may
be difficult to wrap the shade material around the roller. If that's the case, simply unclip the shade from the mounting brackets and work on it on
a smooth, flat surface, such as a table or workbench. Make sure to pull some material off and lock the roller when you first start your adjustment
procedure. If you do not lock the roller the spring will probably unwind once you remove the hem rail and you'll have to give it quite a few turns
in order to restore spring tension.
It should be noted that every single generation of MCD manually operated shades did incorporate a speed reducer to control
the retract speed.
Generation II Shades
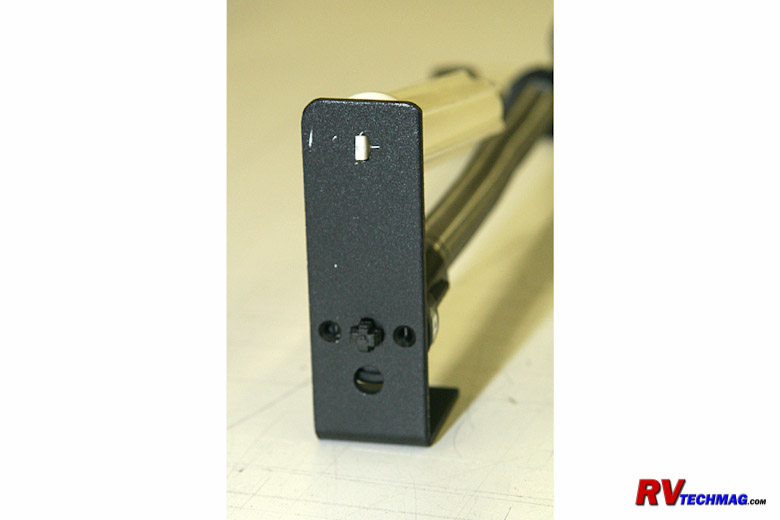
Generation II Shade Mechanism
Identified by One Spade End and One Cross End
The second generation was a temporary improvement in the spring mechanism to allow for better latching and smoother operation.
It was short-lived and ran from November 2007 through December 2007. This generation can also be identified by looking at the end brackets. Generation
II shades have 1 flat spade mount in one end and a cross mount in the other end of the shades. These shades are very similar to the Generation I
shades in that they too do not have an auto-stop feature. The improvement was in the spring mechanism so for all practical purposes you can treat
them the same as Generation I shades, using the same adjustment procedures.
Generation III Shades
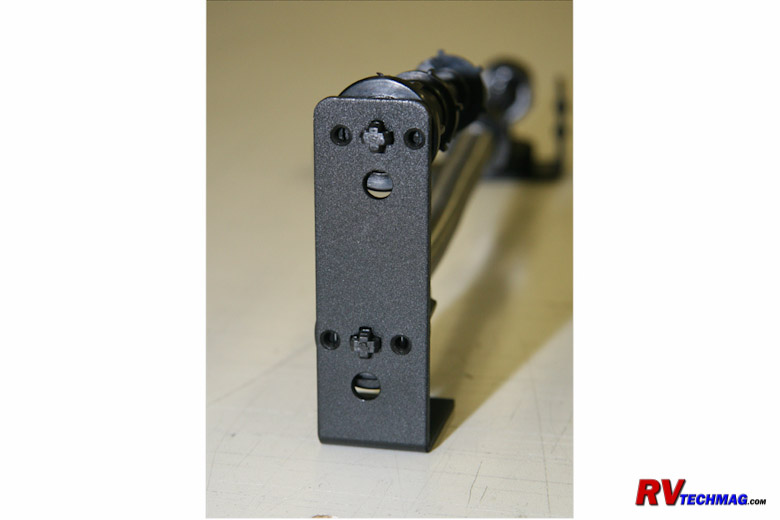
Generation III Shade Mechanism
Identified by Two Cross Ends
Generation III was a nice improvement. A new, improved speed reducer was used and an auto-stop feature was added to the shades.
This meant that shade tension and auto-stop locations were independently adjustable and bump stops were no longer required. No longer was it necessary
to remove the hem rail and wrap the shade material around the roller tube. In fact this is definitely not the way to do it because, while it will
increase spring tension, it will mess up your auto-stop settings. Generation III shades began production in January 2008 and continued through May
2009. This generation is pretty much foolproof and won't require any future adjustments as long as they are not unwound during installation by the
coach manufacturer. These shades can also be identified by looking at the end brackets. All Generation II shades have 2 cross mounts in the end of
the shades.
To increase the spring tension on these shades unclip the shade assembly from its mounting brackets and remove it from the
valance. Set it on a smooth work surface, such as a clean workbench or table. Pull the shade out a bit to allow the shade's lock mechanism to engage.
This will prevent the spring mechanism from unwinding. If it does unwind you'll need to wind it up quite a bit to restore the proper spring tension.
Once the shade assembly is laying on your bench take a careful look at it. If the shade material rolls off the back off the roller, in other words
away from you, the tension spring will be on the left side as you look at the shade while the auto-stop feature will be on the right side. Conversely,
if the material rolls off towards you, the auto-stop will be on the left and the spring tension adjustment will be on the right. Another way to
identify which side is which is that the black roller end on the spring mechanism side is slightly wider and has the letters "MCD" stamped on it.
To adjust the shade remove the end bracket from the side you want to adjust. Then flip it around so that the mounting tab
faces away from the shade roller, rather than towards it. That way you can use the bracket as a wrench. You can use anything to grab the cross and
turn it but you run the risk of damaging the plastic cross on the end if you use a pliers so using the bracket is the safest and easiest way to do
it. Just give it however many turns you think it needs, then reassemble the bracket. If you have an assistant you can probably have them hold the
shade up by the bracket and you can test its operation. If not, you may want to clip it back into the valance to see if any further adjustments
are required. If the spring tension has been totally lost from being allowed to snap free, it may take as many as 10 to 20 turns to restore proper
tension.
Generation IV Shades
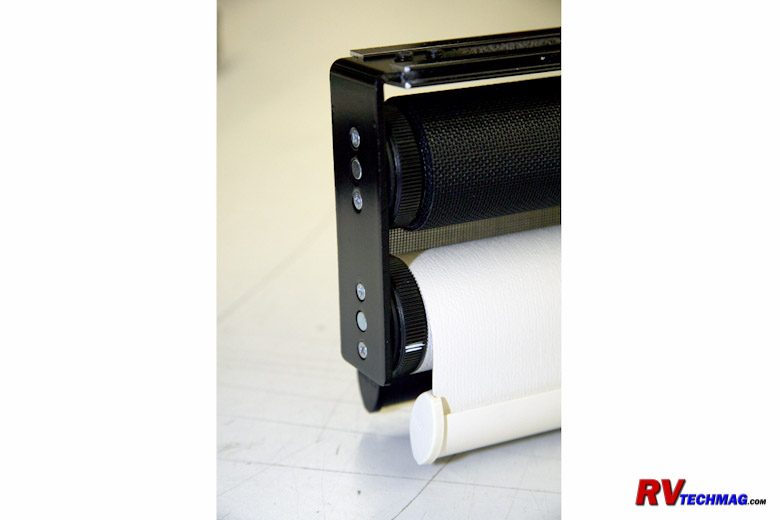
Generation IV Shade Mechanism
Identified by Knurled Adjustment Knobs on Each End
Generation IV is the latest and it doesn't get any better than this. To adjust these shades you do not need any tools nor do
you ever need to remove them from the valance. This design uses easy to access knurled knobs on the ends of the shades to handle both the retraction
rate as well as the auto-stop position. To raise these shades just give them a tug at the hem rail and let them go. The shade will automatically rise
at a controlled speed, which you can easily adjust via one of the knobs. The shade will rise until the auto-stop mechanism stops it at the set
position, which you also determine via the knob on the opposite end. The Generation IV shades are being known by the trademark GlideRise IV. All
manually operated shades produced by MCD beginning in June 2009 are GlideRise IV shades. As perfect as these are, there's just nothing left to improve.
All adjustments to these shades can be done without tools. There are two knurled adjusting knobs - one on each end of the
shade roller. One side adjusts the spring tension, which controls the retract speed, while the other side adjusts the auto-stop position for when
the shade is fully retracted. Normally the auto-stop knob will have a small white line on it, as you can see in the above photo. However, it may
be difficult to see this line if the knob is turned the wrong way or the valance is fairly close to the shade. The best way to determine which knob
is which is to look at the way the shade material falls off the roller. If the material falls off the backside, in other words the side farthest
away from you, then the auto-stop adjustment is on the right side as you are looking at the shade. If the shade material falls off the roller on
the front side, in other words towards you, then the auto-stop adjustment is on the left side of the roller as you are facing the shade. The spring
tension adjustment is always on the opposite side of the auto-stop adjustment.
To adjust the retract speed simply pull the shade down to the bottom of its travel and it will lock in position. Give it a
tug on the hem rail and let go. The shade will automatically retract. If it's not happening fast enough or smooth enough, reach up and tighten the
spring tension adjustment knob, then retest it. If it snaps up too fast reach up and loosen the spring tension adjustment knob. If the shade is
reasonably close, 1/4 turn increments should be sufficient to make a noticeable difference. Note that you can adjust the spring so that it is too
tight. If you give it too much spring tension the shade will raise with too much authority and it will jam against the lock nut in the auto-stop
mechanism. If this happens it'll take a fairly hefty tug on the shade to unstick it when you want to pull it down. If your shade is that tight,
try backing off the spring tension one or two turns and your shade will operate much easier. Remember that you really aren't trying to control
the speed of the ascent. All you really want to do is give it enough spring tension to allow the shade to raise all the way, without stopping short.
To adjust the upper stop position allow the shade to fully retract. To raise or lower the shade's upper stop limit simply
reach up and turn the auto-stop knob. The shade will raise or drop as you rotate the knob. Once you get it set where you want it, leave it alone
and it'll stay there. You want to adjust the shade so that it's easy to reach the hem rail when pulling down, but not hanging down beneath the
valance where it's visible more than what might be necessary.
The next section includes a selection of MCD Technical documents.
Technical Documents
Following is a listing of technical documents that I have placed on my website. For any further documentation please check
out the MCD website at www.mcdinnovations.com. Pricing information as well as a current
product listing, photo gallery, and listing of dealers can be viewed there. For any questions just give them a phone call at 1 (800) 804-1757 and
their helpful staff will answer any questions you may have.
Source
MCD Innovations
(800) 804-1757
www.mcdinnovations.com
Return to Home Page
If you enjoyed this article be sure to recommend RVtechMag.com to your friends, like us on Facebook or Twitter
or subscribe to our RSS feed.


|


