MCD Innovations: Made in the Shade
Upgrading an RV's Pleated Day-Night Shades and Visors
Article Date: May, 2009
Article and Photography by Mark Quasius
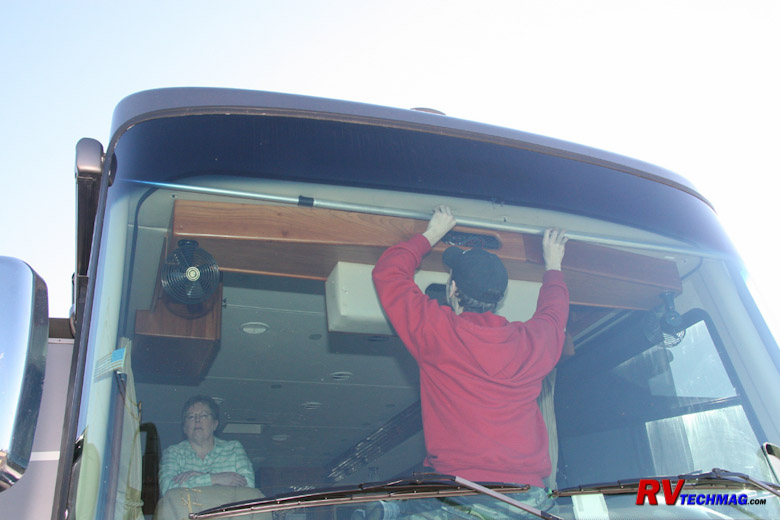
Manually Operated Shades Installation
Previously we installed MCD's dual range powered windshield shades on our 2007 Allegro Bus. MCD also makes manually operated
shades and powered remote controlled shades for all the other windows in the coach. Some times powered shades are desired but for those times when
a powered shade is not desired manually operated shades are also available. Sometimes cost is a factor and sometimes the issue of supplying 12 volt
power to the shades just makes a manual shade a better choice. MCD's latest manual shades are the GlideRise IV shades, which use the latest
generation of shade mechanisms. To extend a GlideRise IV shade, simply pull the shade down to the desired latched position and let go. To raise the
shade just tug on the bottom of the shade and it will rise under its own power automatically. The rate of ascent is adjustable via a knob on one
side of the shade roller. An adjustable auto-stop feature ensures that the shade won't wrap itself around the roller and you can decide just how
much material you want to be exposed by adjusting a knob on the opposite side of the roller. These GlideRise IV shades really are the ideal solution
in a manually operated shade. Manual shades can be fitted with MCD's exclusive ClearView solar sunscreen or your choice of privacy shade materials.
Appearance-wise they look identical to the powered shades and will give a nice consistent look throughout the coach. Many coach manufacturers choose
a white shade material for their nighttime shades which, to some people, can look kind of plain and sterile. For aftermarket installations you can
choose from a large selection of materials that MCD offers, all the way up to a weaved pattern with a silver reflective background if you would so
choose. We chose the ever popular B33 pattern which was a great match with the headlining and other interior trim and also replaced the plainness
with a bit more classy look.
The GlideRise IV shades use the same basic hardware as the remote powered shades. Therefore it is possible to install both a
manual shade and powered shade on the same American Duo bracket. This hybrid design is becoming very popular with RVers and is what we chose for
our installation. The nighttime privacy in the main living area shades are remote powered and I have the ability to lower or raise every shade,
including the cockpit side window shades, via the "All Shades" button on the 14-channel remote controller if I wish. The daytime shades in the
living area are all manually operated as are both the daytime and nighttime shades in the bedroom area. The nice thing about having manual operation
of the daytime shades is that you can sit in a chair or on the couch and when the sun comes in you just reach up and pull the shade rather than
going to the remote controller panel. In the bedroom it saved us from having to run 12 volt wire to power the shades, which would have been a
greater task. It's also a small area and it's just as easy to go pull the shade manually. The cockpit side windows were fitted with two channel
remote switches by each seat. That made it easy to control them when driving without having to reach for them. So there are places for both power
and manual shades, depending on what you want. Regardless of whether you choose manual or remote powered shades, it will be a huge improvement over
other types of shades.
In the following paragraphs I'll detail the actual process used to install MCD's manually operated shades in our 2007 Allegro Bus.
Product Overview
|
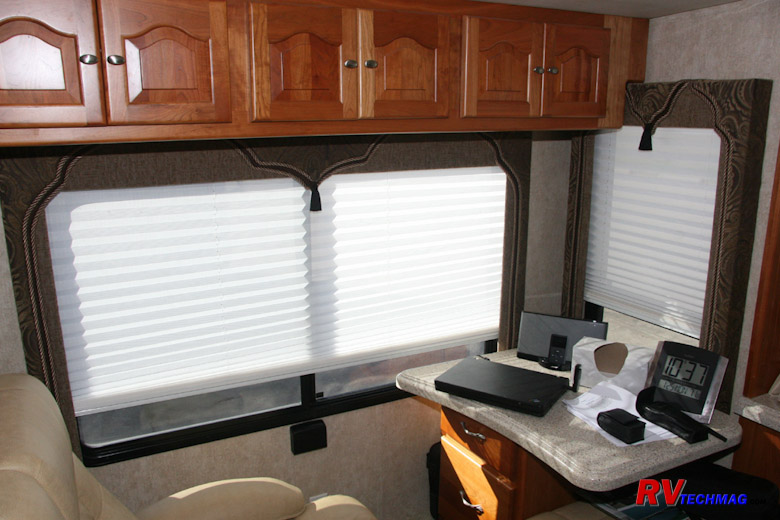
Original Pleated Shades - Interior View.
|
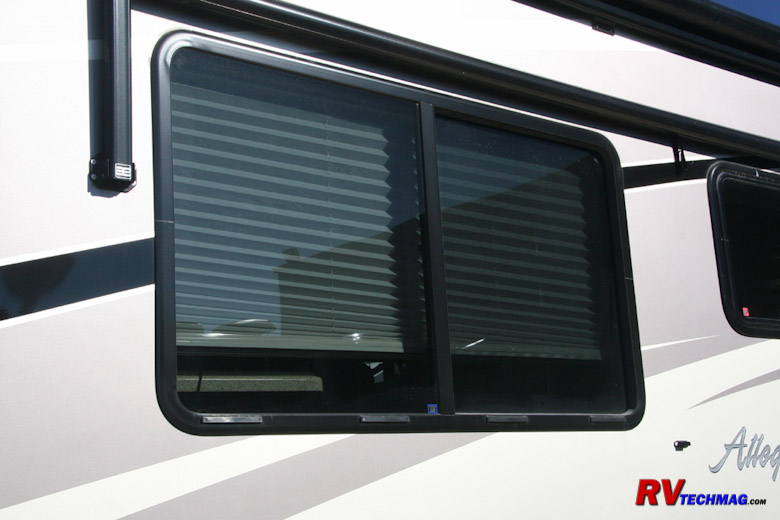
Original Pleated Shades - Exterior View.
|
Our coach originally came with those famous pleated day-night shades. They don't totally block off the light in the evening
and they are held together with strings that are known for breaking. As a matter of fact I now have a spool of the proper 1.4 mm thread and
restringing needle that I thankfully will never need to use again. The series of pinholes in the shades also allows light to penetrate the coach
during the night and whenever the day shades are down to minimize sunlight you can't see out. They also offer a less attractive appearance when
viewed from outside the coach compared to the MCD shades, which give the appearance of a nice reflective look.
Another recent shade being used by Tiffin is being referred to as the RollEase shade. In actuality, there is no such thing as
a RollEase shade. RollEase makes the pull-chain mechanisms and supplies them to shade builders but does not actually make the shades themselves. The
quality of the fabric used on these shades will not equal the quality of MCD's ClearView sunscreen material.
Measuring and Planning
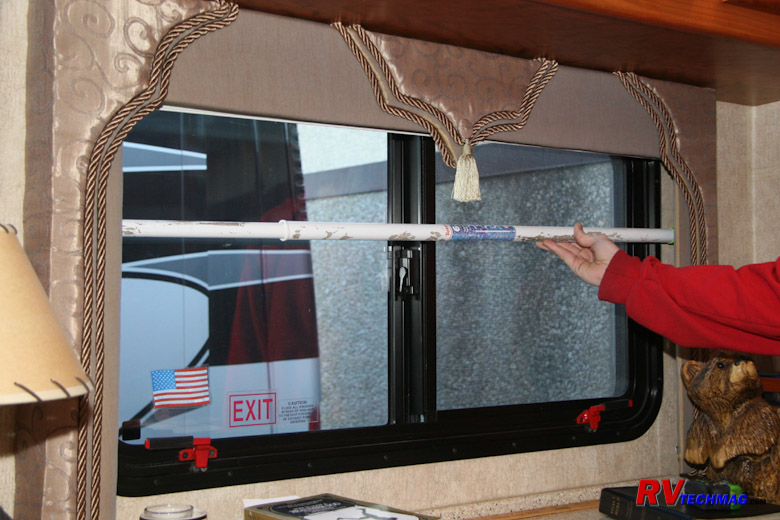
Measuring the Valance
The best way to obtain an accurate measurement of the inside width of the valance is to use an extendable pole. Extend the
pole until it touches the inside of the valance. Then move it up and down inside the valance to check for any tapering. If the valance is slightly
tapered be sure to take the smallest measurement to prevent binding. If you don't have a pole then you could jury rig two yardsticks and clamp them
together with vise grip pliers. Either way, it'll be easier and more accurate to measure your pole or whatever later. Next measure the height of
the valance with a tape measure. Be sure to measure according to the detailed instructions found at
This Link. MCD will automatically add additional shade material to your measurements to facilitate wrapping around the shade roller. They will
also allow for clearance within the valance so just measure the valance and let MCD deal with the actual shade size.
Removing the Old Shades
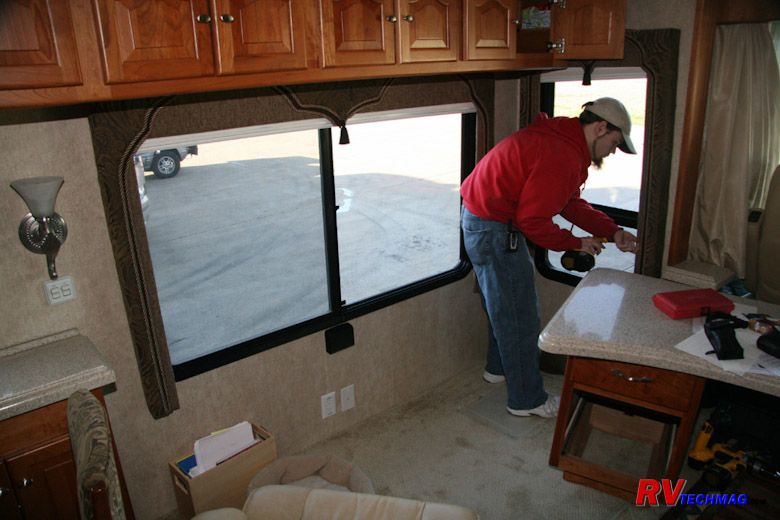
Removing the Valances
The pleated shades snap into some retaining brackets mounted into the top of the valance. But they tend to pop free and the
shade can fall so Tiffin added an extra screw to help pin the shade into the valance brackets. However, they install this screw on an angle and then
mount the entire valance and shade as an assembly which means that you cannot get to this screw when the valance is mounted to the wall. Therefore,
it's easiest to remove the entire valance to gain access to the shade.
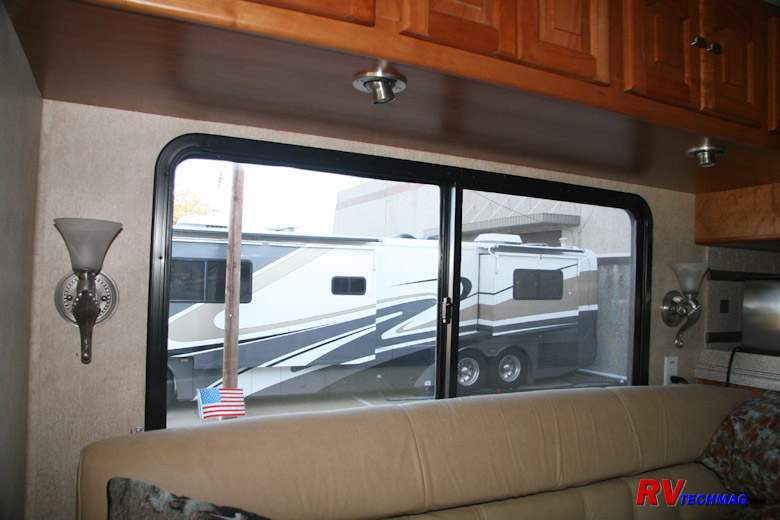
Bare Window Frame
Once the valances have been removed the bare window frame will be exposed. The pleated shades can now be easily removed from
the valance. In addition to height and width you also need to check the depth of the valance. The shade and roller needs a minimum of 2" depth in
order to fit and operate properly. Some valances were not that deep because they were designed for the slightly narrower pleated shades.
Modifying the Valances
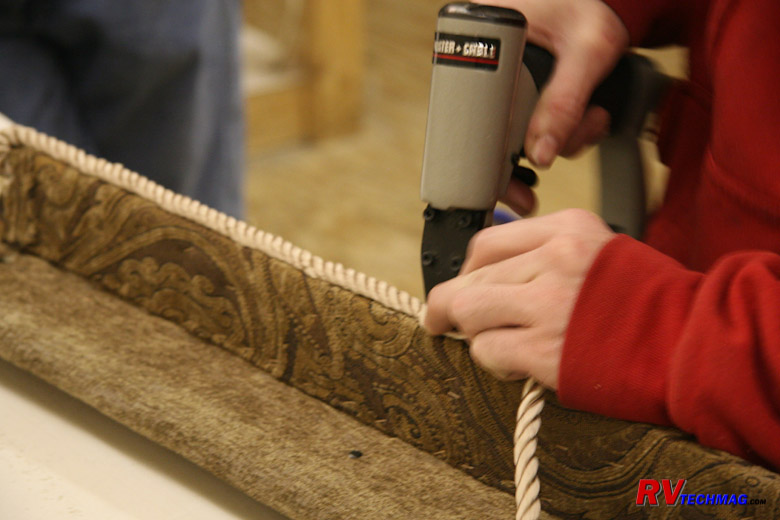
Attaching Drapery Cording to the Valances
Our 2007 Allegro Bus was one of the coaches that had the narrower valances. I did barely have the 2" of depth to the wall
but the window frames stick inboard a bit. While the shade rollers did fit, the window frames interfered with the hem rails and tended to stick and
bind. In recent years the valances were made deeper to accommodate MCD roller shades but my coach was one year too early to benefit from that. Rather
than go through the expense and time of making new valances it was much easier just to space me existing valances out from the wall a bit. I didn't
need much more room but it still needed to look attractive as well. What is generally done in those cases is utilize drapery cording, commonly used
to create tie backs for drapes. This stuff is popular, comes in many colors, has a nice satin sheen, and is 1/2" in diameter, which is perfect for
what we need. We used a color that went well with my existing valances and stapled the cording to the backside of the valances - effectively spacing
them out from the wall enough to ensure smooth operation of the shades. The end result was that it looked like it came from the factory that way and
was part of the valance.
Mounting the Shade
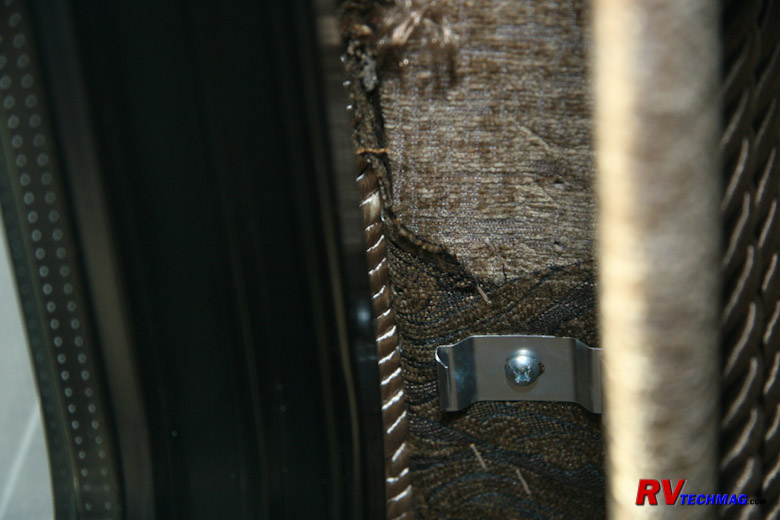
Track Mounting Clip
MCD shades come mounted via either a single roller or dual roller bracket to a mounting track. This track snaps into place on
the ceiling into a number of mounting clips. The number of clips depends on the width of the shade. If the shade is 29" or smaller two clips will be
fine. For shades that are between 30" and 60" in width three clips will be required. If your shade is larger than 60" in width four clips will be
required. Place one clip near each end and evenly space any remaining clips over the width of the shade. Be sure to properly locate the shade in the
valance. Properly center the shade from left to right within the valance but do not center it depth-wise or else the shade may catch on the window
frame, which intrudes into the valance. In order to allow for the width of the window frame, plus the screw heads you'll probably need to allow 1/2"
of clearance on the back side. After allowing for this clearance you can then center the shade brackets within the remaining area. If you place the
shade too close to the outer edge of the valance it will rub on the inside of the valance and bind. Conversely, if it's too close to the window frame
it'll catch on the screw heads and bind. The mounting clips do have slotted mounting holes so be sure to locate your screw in the very center of the
slot so that you can adjust the shade in either direction if necessary. Also, before mounting the valance check the condition of the screw heads on
the window frames. If the screws have any sharp burrs on them from when they were installed it would be a good idea to file them off so that they can't
cut the shade when it glides past them. Once the brackets are installed into the valance you can either mount the valance to the wall, then simply
snap your GlideRise IV shade into the brackets or snap your shade into the valance and then mount the entire assembly to the wall, depending on which
way is easiest.
Adjusting the Shade
Testing the Shade
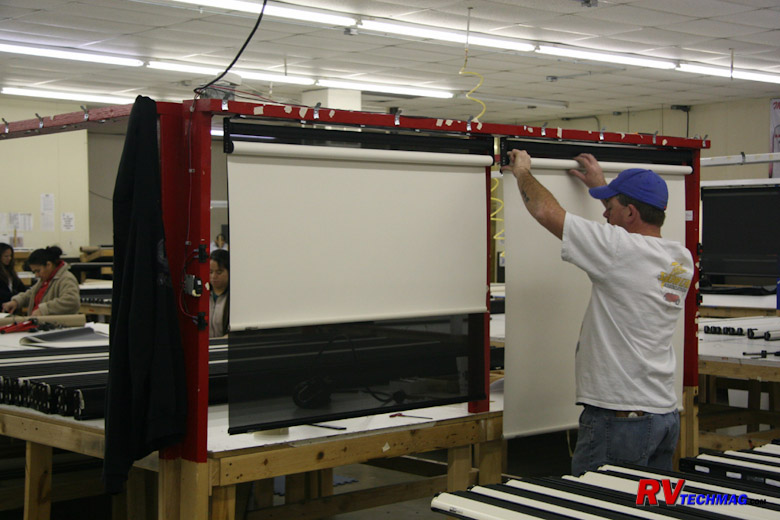
Once the shade is installed in the valance all you might have to do is adjust the retract speed and auto-stop positions.
Virtually every single shade that MCD makes is tested and properly adjusted before it leaves the factory. The shades are hung on a test stand and the
retract speed and auto-stop limits are preset. In most cases your shade won't require any adjustments at all. If you've unwrapped a loop or two of
fabric when you handled the shade you may need to readjust the retract speed. If your valance is deeper than what was expected you may need to
adjust the auto-stop position. This is an easy task with GlideRise IV shades. You simply adjust the appropriate knob on the shade roller. For
details on how to adjust your manual shades refer to the Manual Shade Adjustments tutorial page.
Once your shades are installed and any needed adjustments made, you are ready to enjoy your MCD shades. Simply pull the shade
down to the desired position and the internal locking mechanism will hold it in place. To raise the shade, just give the bottom of the shade a tug and
let it go. The GlideRise IV technology will automatically retract the shade at a controlled speed and the auto-stop feature will ensure it stops right
where you want it to. On my particular coach I chose to install American Duo dual roller shades throughout the coach. Both the day and night shades on
the cockpit side windows were powered. In the main living area we chose a hybrid design where all of the night shades were powered but all of the day
shades were manually operated. In the bedroom area we chose to go with American Duo manually operated shades on both the day and night shades. In two
cases we had extremely tight clearances in the valances. The small window of the galley sink had a very small overhead valance tucked under the overhead
cabinet that would never be able to conceal a two shade roller. If we replaced the valance with a large unit the window area would be greatly reduced.
In this case it just would not be practical to use a dual roller design so we opted for a single roller powered night shade. For a daytime shade we went
with MCD's excellent ClearView sunscreen material and utilized a Velcro mount to the window frame. Generally this screen will stay on that window 24/7
because it's easy to see through. Whenever the window needs to be opened or closed we simply pull one corner of the Velcro'd screen loose and slide the
window. We also used this system in the bathroom, which had a similar compact valance.
In the next section we'll follow the installation process of a set of remote powered MCD shades.
Return to Home Page
If you enjoyed this article be sure to recommend RVtechMag.com to your friends, like us on Facebook or Twitter
or subscribe to our RSS feed.


|


